Create a Job Opening
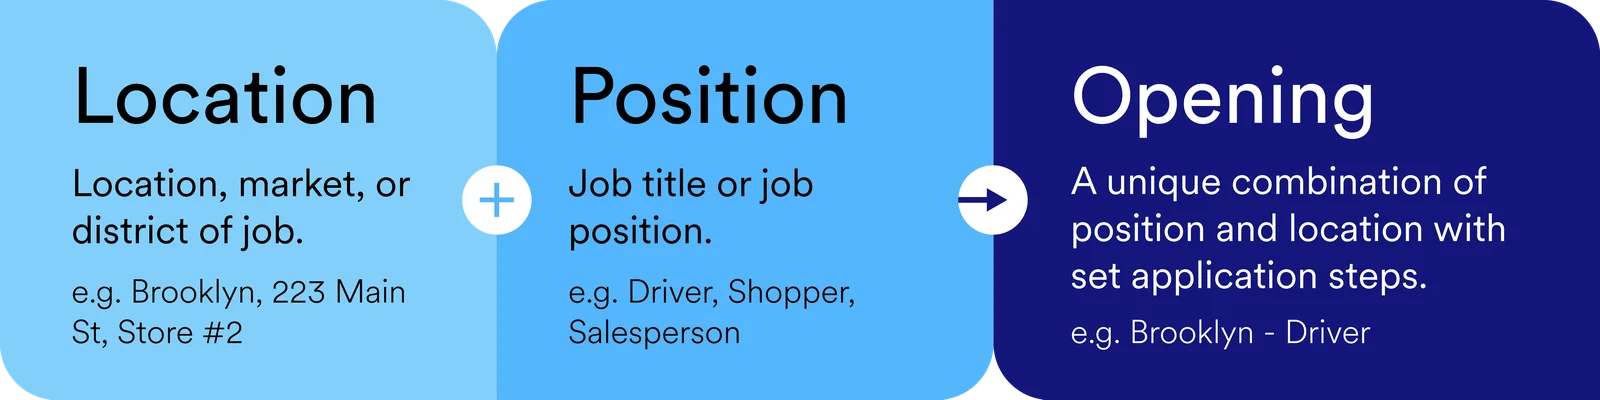
An Opening is made up of a Position and Location. Think of itas a job opening that you are hiring for. For example, you’re hiring for a driver (Position) in San Francisco (Location). Your Opening would be “San Francisco - Driver”.
Each Opening has its own details and Hiring Workflow that you can customize by adding different stages.
Watch the following video for an overview of Fountain Openings:
How an Opening is Structured
Section titled “How an Opening is Structured”Each job you’re recruiting for should be set up as an Opening in Fountain. Having one Opening for each unique Position and Location combination allows you to have different workflows for each, where the hiring requirements/steps may differ. For example, if you’re hiring for a driver (Position) in San Francisco (Location) and a driver in New York, two separate Openings allow the flexibility to list different pay rates, ask different questions, run different background checks, etc.
Add Opening
Section titled “Add Opening”To add an Opening, follow the steps below:
-
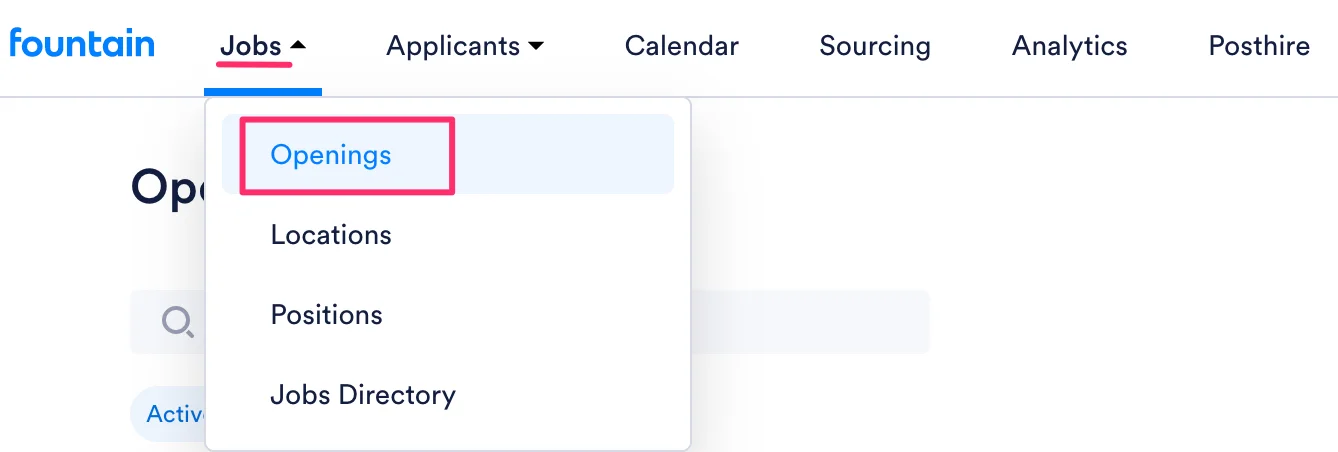
Hover over Jobs in the top navigation bar, and select Openings.
-
Click the blue Add Opening button.
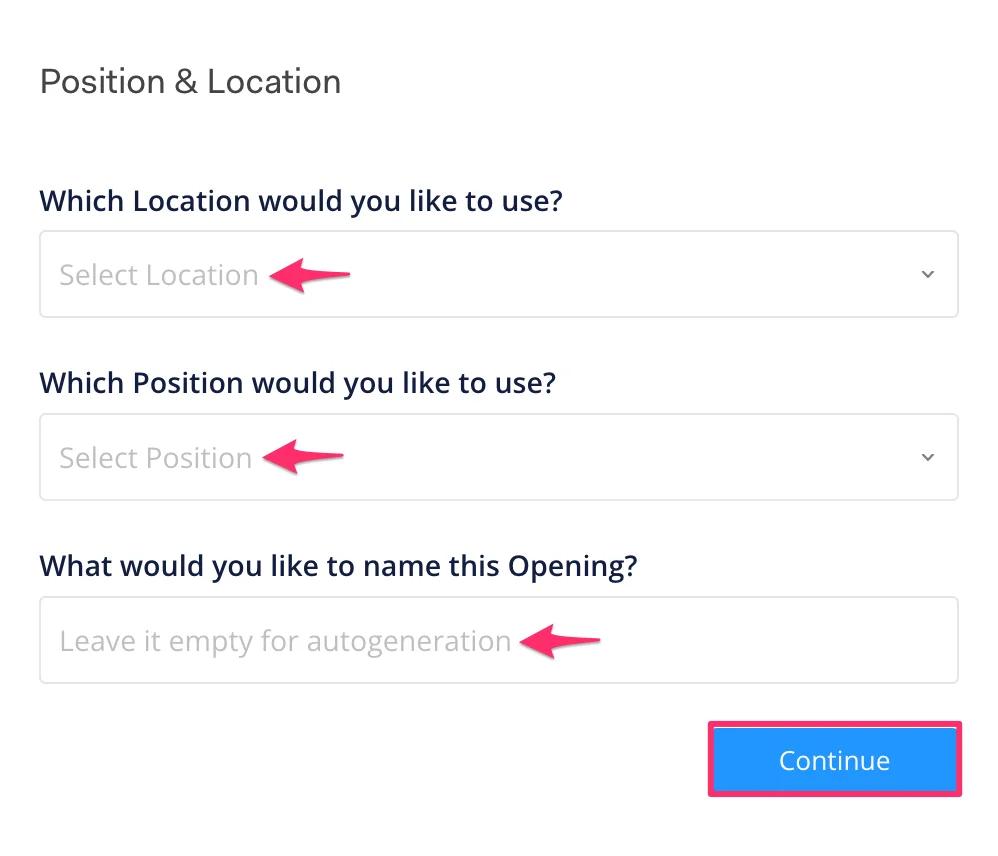
- Select the Position and Location for your Opening. If needed, you can add a new Location/Position by clicking on Add Location or Add Position.
-
Click Continue.
-
Enter the Opening Details. These details can later be used as Merge Keys for your emails and documents. Review the section below for descriptions of these fields.
-
Click Continue.
-
Choose Create new workflow if you want to start from scratch, Link existing workflow if you want to create an exact copy of a workflow without modifying its steps prior to creation or Clone existing workflow if you want to clone your workflow from another existing opening and then modify prior to creation.
| Link existing workflow | If you choose to link an existing workflow, all the stages, rules, and settings will be cloned over to this new opening without the option to modify prior to creation. If you choose to link a workflow, you will need to choose which Opening’s workflow you wish to link from. You will have the option to edit the workflow once it has been created. |
|---|---|
| Clone existing workflow | If you choose to clone the workflow, all the stages, rules, and settings will be clone over to this new opening. If you choose to clone a workflow, you will need to choose which Opening’s workflow you wish to clone from. Please note: cloned stage messages will revert back to sending from the Opening Owner. |
Opening Details Field Descriptions
Section titled “Opening Details Field Descriptions”General Details:
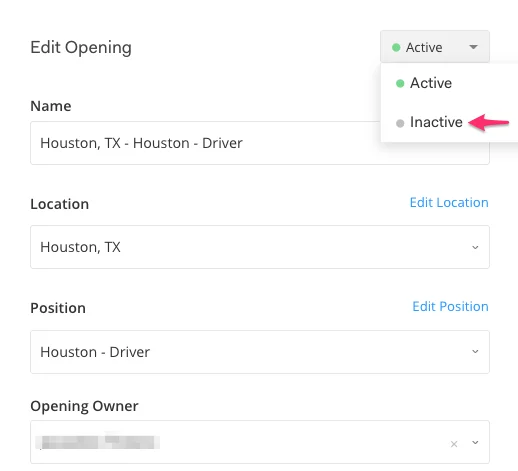
Section titled “General Details:”Opening Status | If you're not ready to publish your opening on your Job Directory that's hosted on Fountain, click on the dropdown on the top right and click, 'Inactive'. 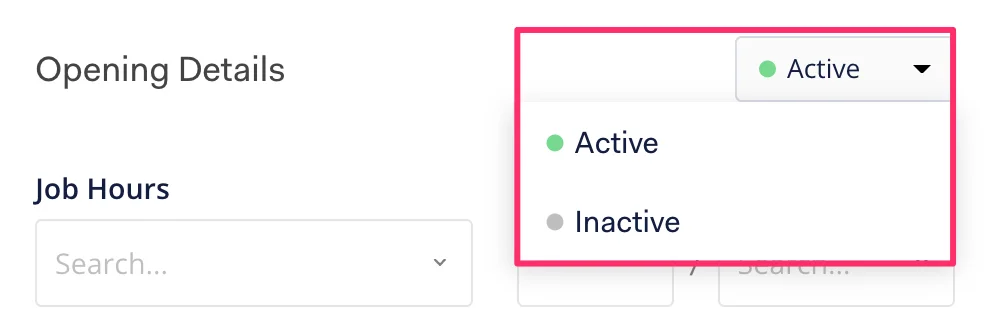 |
|---|---|
Job Hours | Full-time / Part-Time |
Pay Rate | $x per hour / day / month / year |
Job Type | Permanent / Contract / Temporary |
Industry | Pick one industry that your Opening is in. |
Opening Owner | Opening Owner is intended to give a single user more ownership and oversight of the opening. Automated stage emails by default, are sent from the Opening Owner's email unless changed in each message for that stage. If stages notifications are available, emails are sent to the Opening Owner. This user will also receive any email communications from applicants. |
External Application Form | You can use Fountain's Application Form or if you prefer to create your own form on your own website or use another method click 'Yes'. If you clicked 'No' to using an external application form, you will see the application form associated with the 'Position' you selected in step 3. You can edit the questions on the application form by clicking on Unlock, but remember that any changes made will affect the application form for all Openings with this position. If you clicked 'Yes' to using an external application form, you will be directed to Applicant Sorting which sets the criteria to sort applicants into the opening. |
Advanced Settings:
Section titled “Advanced Settings:”| Additional Info | An open field where you can add additional information about the job. |
|---|---|
| Launch Application Portal | Checking this box will automatically move applicants from the initial landing page to the first stage in the hiring workflow. |
| Limit Access | Checking this box will make the Opening private. Users will not be able to see this Opening unless you give them access via user permissions page. |
| Designate as Sourcing Opening | If this box is checked, the Opening will be listed on external job boards including Indeed. Uncheck this box to exclude the Opening from job boards.Checking the box does not automatically post the Opening on job boards. You must make the Opening active in Fountain first. |
| Designate as Hiring Opening | If this box is checked the Opening will be used to hire candidates or contractors. Uncheck this box if you plan to use this Opening to only route applicants to other Openings where they will complete the full application. Hiring Openings will be included in Job Selector or Job Switcher stages. |
| List on Candidate AI Agent | If your company is using CAI, checking this box will include the Opening if it is active as an option to applicants in the CAI widget. |
Customer Example for Sourcing vs. Hiring Openings
Section titled “Customer Example for Sourcing vs. Hiring Openings”You have a Warehouse Worker role you want people to apply to, but downstream you need to split them into shift-specific Openings where they actually get hired. When one shift is filled, you want to be able to mark it as inactive, and you don’t want to list 5 shifts for every Warehouse Worker role on job boards. Now you can mark the top of funnel “Warehouse Worker” Opening as a “Sourcing” only Opening, and mark the downstream shift-specific Opening as “Hiring” only. These downstream shift Openings can be used in Fountain’s Job Selector stage to allow applicants to choose their preferred shift!
If you also have Delivery Driver roles that don’t need to be split downstream, these Openings would have both “Sourcing” and “Hiring” toggled on, and will be visible on both job boards and Selector stages.
Learn more about Fountain’s Job Selector stage by reviewing this article.
Edit and Delete Existing Openings
Section titled “Edit and Delete Existing Openings”After creating an Opening, you can edit its details or delete it entirely. The Edit Opening window provides access to all Opening settings and configuration options.
-
Navigate to the Openings page by clicking on the Fountain Logo on the top left corner.
-
Next to the Opening, click the three dots and select Edit Job Details.
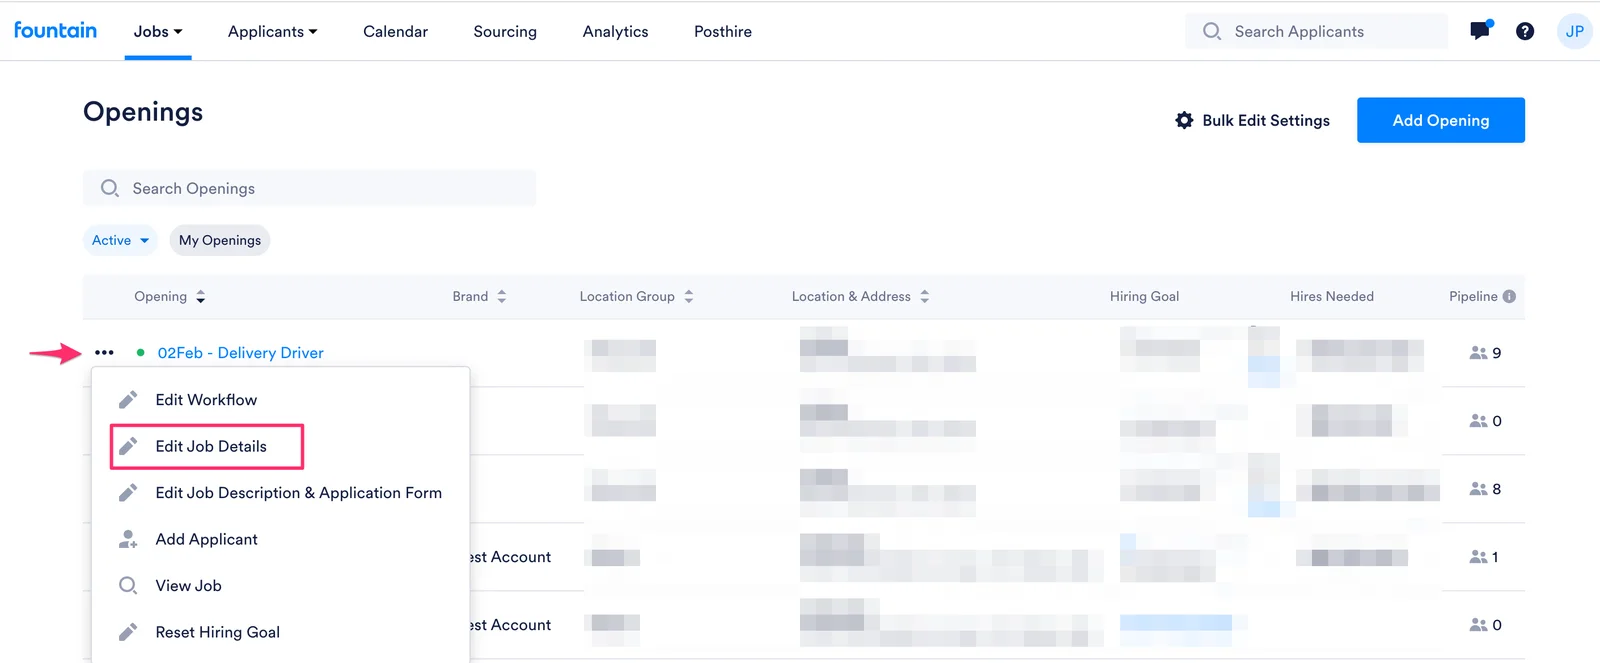
-
Make your changes in the Edit Opening window.
-
Click Save at the bottom to apply your changes.
To delete an Opening, click the three dots next to the Opening and select Delete Opening.
External Opening Title
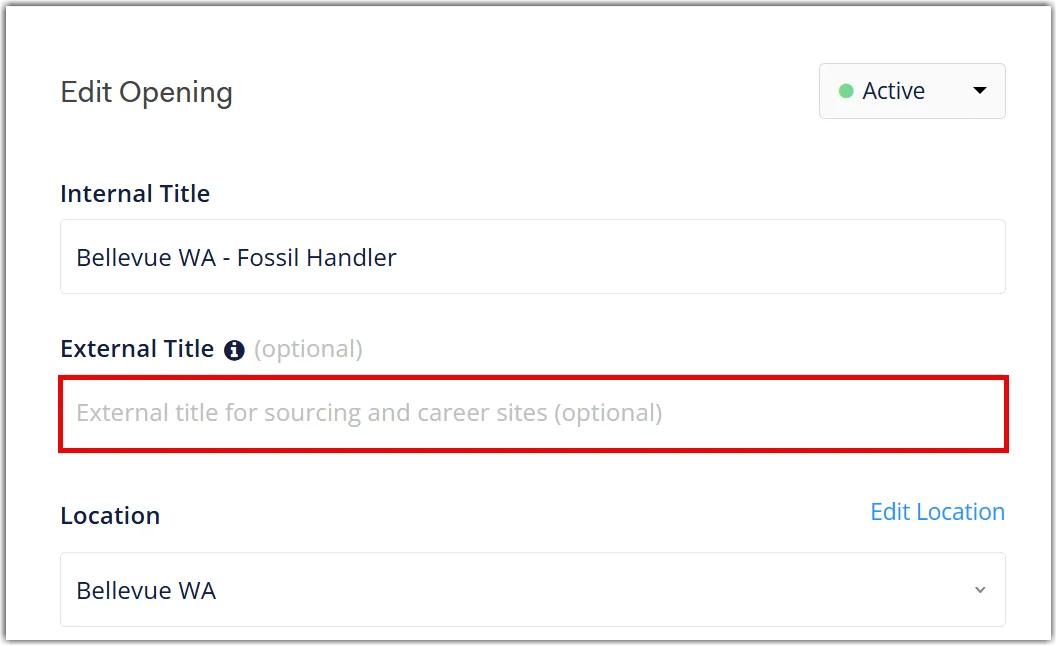
Section titled “External Opening Title”When editing the job details, you have the option to add an External Title. The External Opening Title is displayed anywhere the applicant would see the job title, such as career sites, the jobs directory, the application form, and sourcing pages.
This allows you to use different titles internally versus externally. For example:
- Internal Title (Position): “Delivery Driver - Full Time”
- External Opening Title: “Delivery Driver - Downtown Seattle Location”
Edit Opening-Level Job Description
Section titled “Edit Opening-Level Job Description”You can customize the Job Description specifically for this Opening by clicking Edit Job Description in the Edit Opening window.
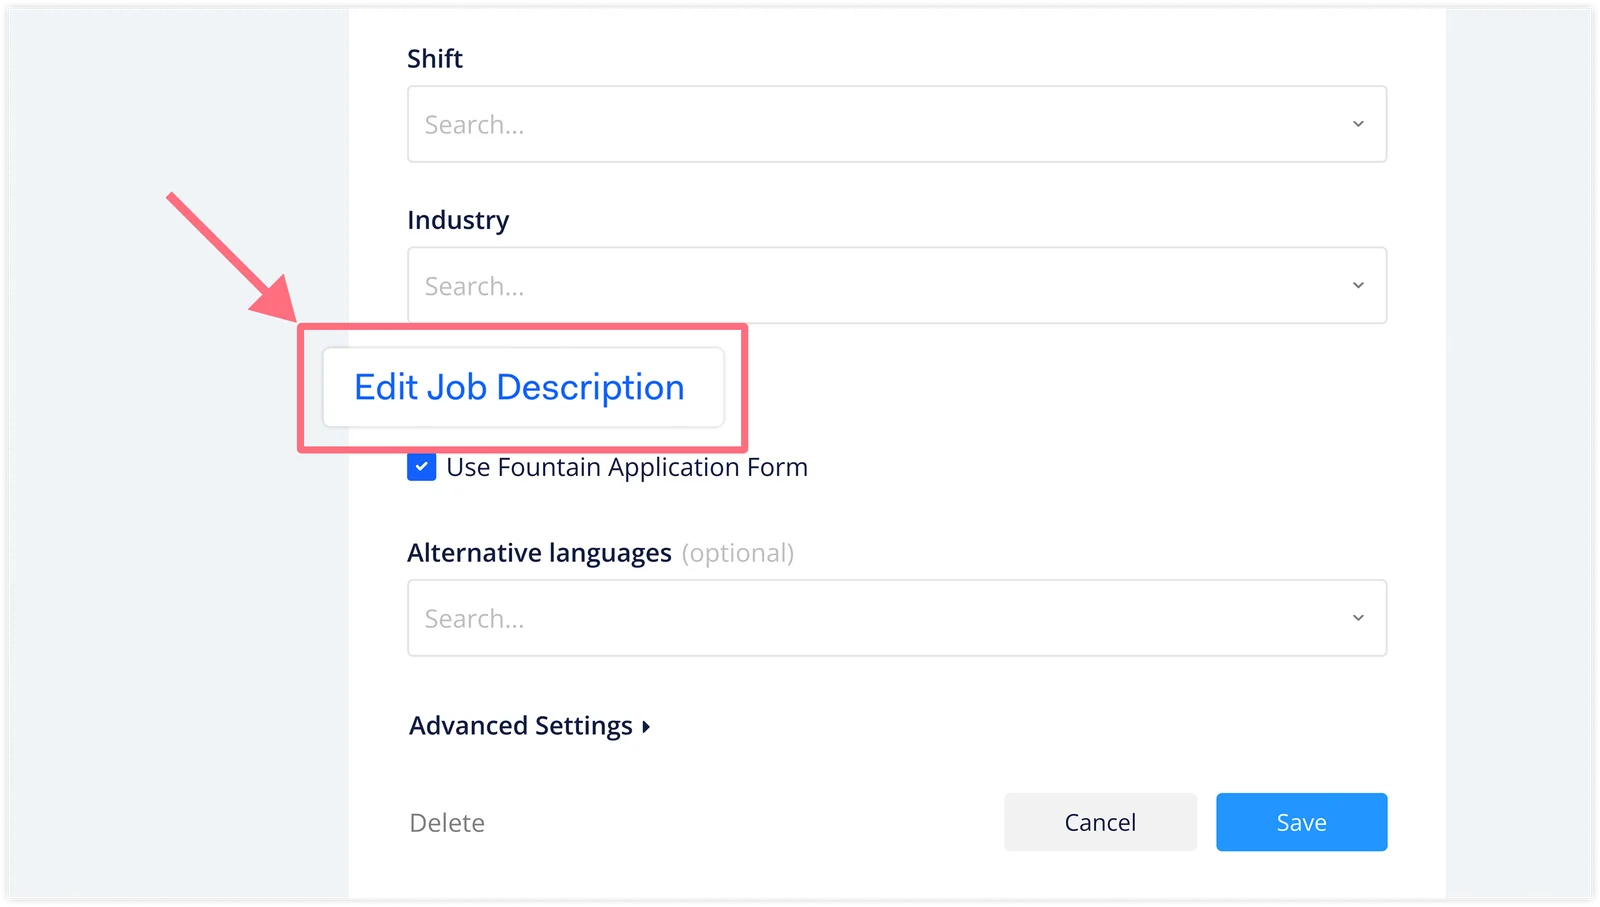
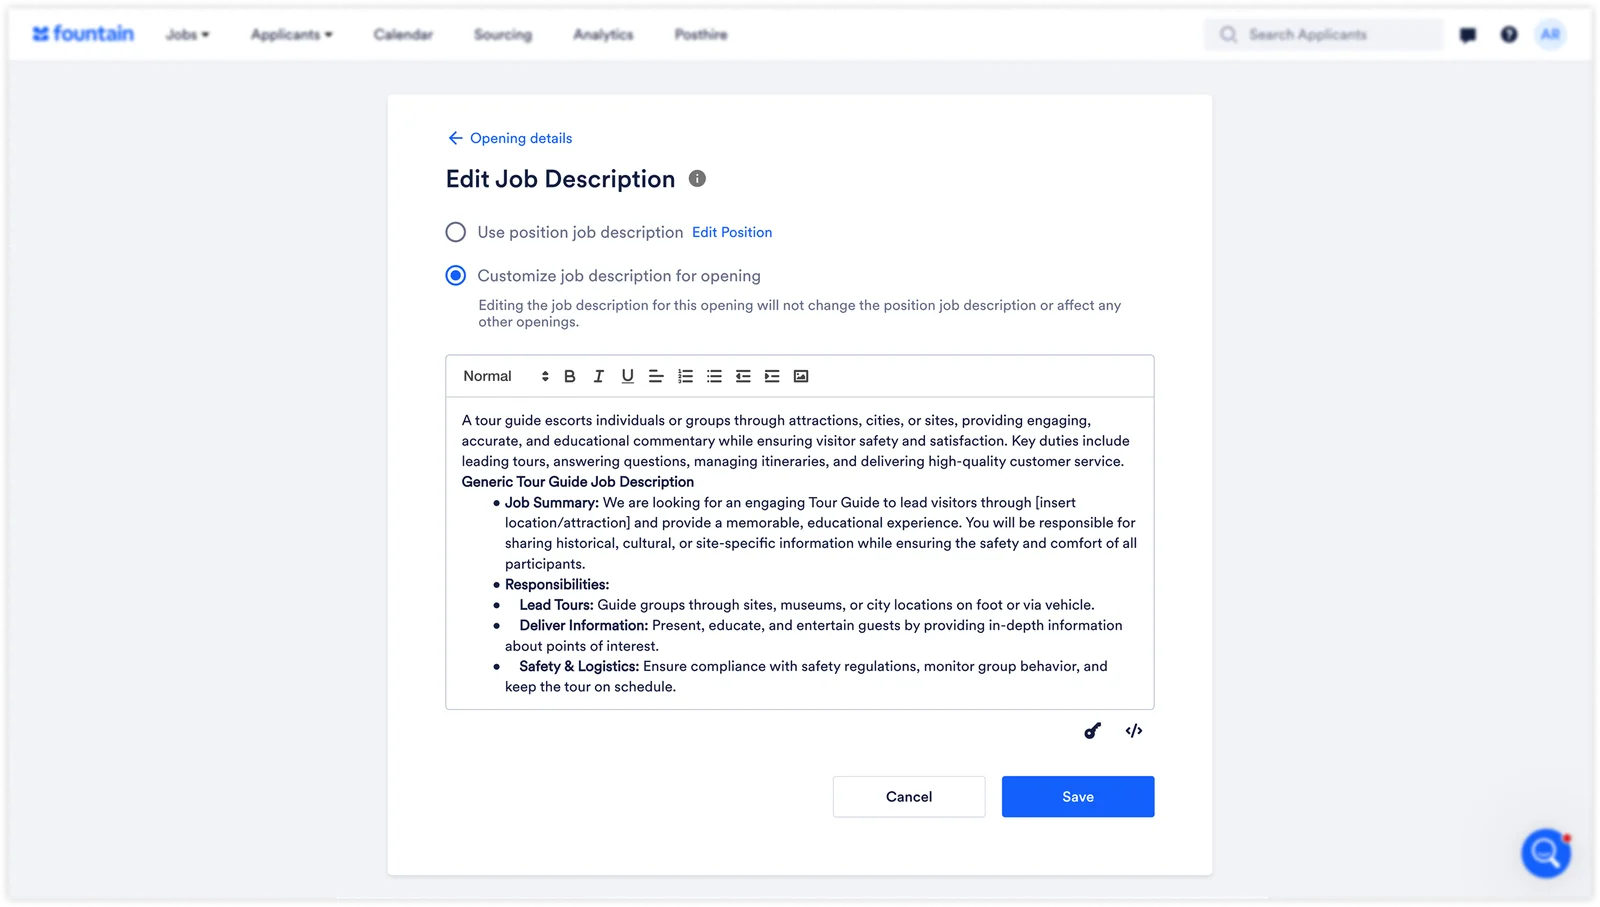
This opens the Edit Job Description modal where you can choose:
-
Use position job description (selected by default)
- Display the job description from the Position level
- Ensures consistency across all Openings using this Position
- Recommended if all Openings share the same job requirements
-
Customize job description for opening
- Create a unique job description for this specific Opening
- Allows tailoring content for location-specific needs
Best Practice: When to Customize Opening-Level Job Descriptions
Consider customizing job descriptions at the Opening level when:
- Different locations have varying travel requirements
- Specific certifications are needed in certain states or regions
- Team-specific skills differ (e.g., night shift vs. day shift requirements)
The customized job description is pre-populated with the Position-level description by default, making it easy to edit rather than starting from scratch. You can format text, add images, and use merge keys just like you would in the Position-level description.
Additional Advanced Settings When Editing
Section titled “Additional Advanced Settings When Editing”When editing an Opening, you’ll see additional options under Advanced Settings:
| Application Deadline | An optional field where you can add an application deadline. This data will be available as the Merge Key [APPLICATION DEADLINE] that can be used in the Position or Opening description. |
|---|---|
| Enable Opening in Hire Go | If you are using Fountain’s Hire Go app for your Hiring Managers, you’ll use this checkbox to make the Opening visible in Hire Go. |
| Applicant Sourcing | If you are using an external application form, you will be required to create Sorting conditions to filter applicants to the appropriate Openings. When an applicant matches the Opening’s sorting conditions, they will be automatically placed in that Opening. Learn more in this Help Center article. |
Deactivate Opening
Section titled “Deactivate Opening”You can mark an opening as inactive, which moves the opening to a separate folder to organize your openings.
To mark an Opening as inactive, follow the steps below.
-
Next to the Opening, click the three dots and select Edit Job Details.
-
Select the dropdown arrow located in the top right area of the Edit Opening window and choose Inactive.
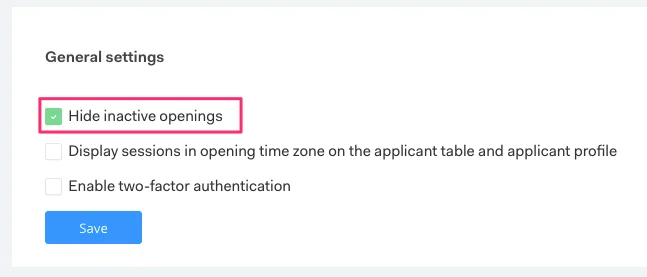
Hover over your username on the top right > My Profile > General Settings > Hide Inactive Openings. You can hide inactive Openings in the shared openings selector (i.e. the one on the applicant table), Sessions Page, Rule Stage, and Data Validation Setup.
Set Opening Language and Time Zone
Section titled “Set Opening Language and Time Zone”To set the language and time zone of the application, follow the steps below.
-
For new Openings, click Add Opening. For existing Openings, navigate to the Opening you want to edit, click the three dots and click Edit Job Details in the dropdown.
-
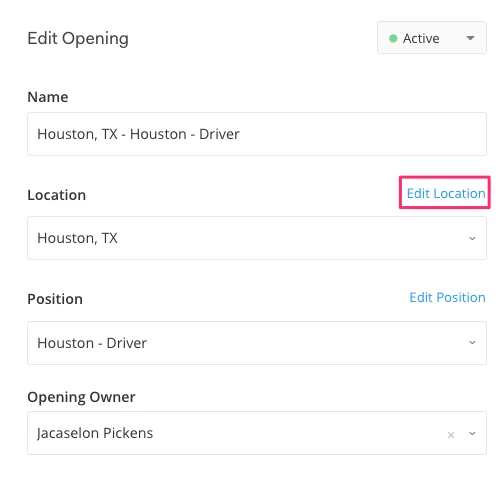
For new Openings, select the location you would like to use. For existing Openings, click Edit Location.
-
Scroll down to Time Zone and Language. Fountain offers various languages to support your locations. For more details, visit this article.
- Make edits as necessary. Click Save.
Set Your Time Zone
Section titled “Set Your Time Zone”By setting your own Time Zone in settings, you can schedule sessions in your time and have it reflected in the applicant’s Time Zone. For example, if you are a recruiter based in California and you are recruiting in Hong Kong, setting a session for 7 PM your time will mean that the applicant will see an 8 AM appointment.
-
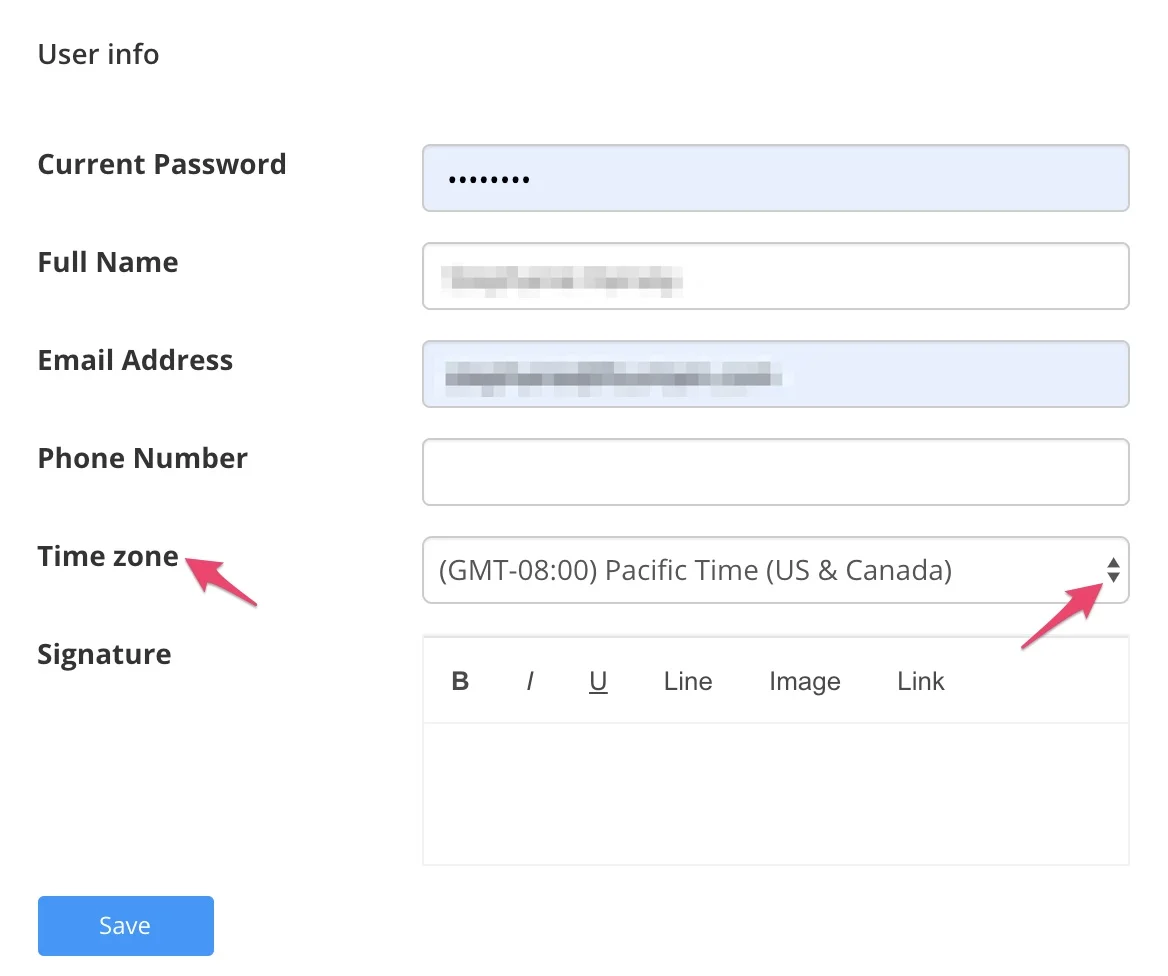
Hover over your username on the top right. In the menu, click My Profile.
-
Select your Time zone in the Time zone drop-down menu.
-
Click Save.
-
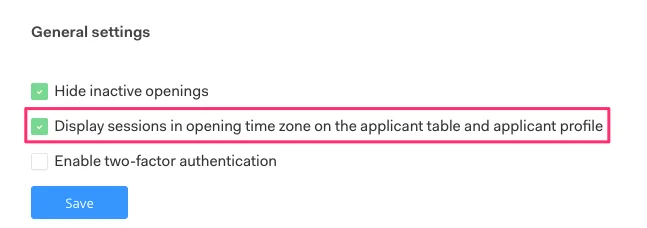
Scroll down to General Settings. Check the box Display sessions in opening time zone on the applicant table and applicant profile.
-
Click Save. You’re set!