
Rekrutek Sub-Accounts
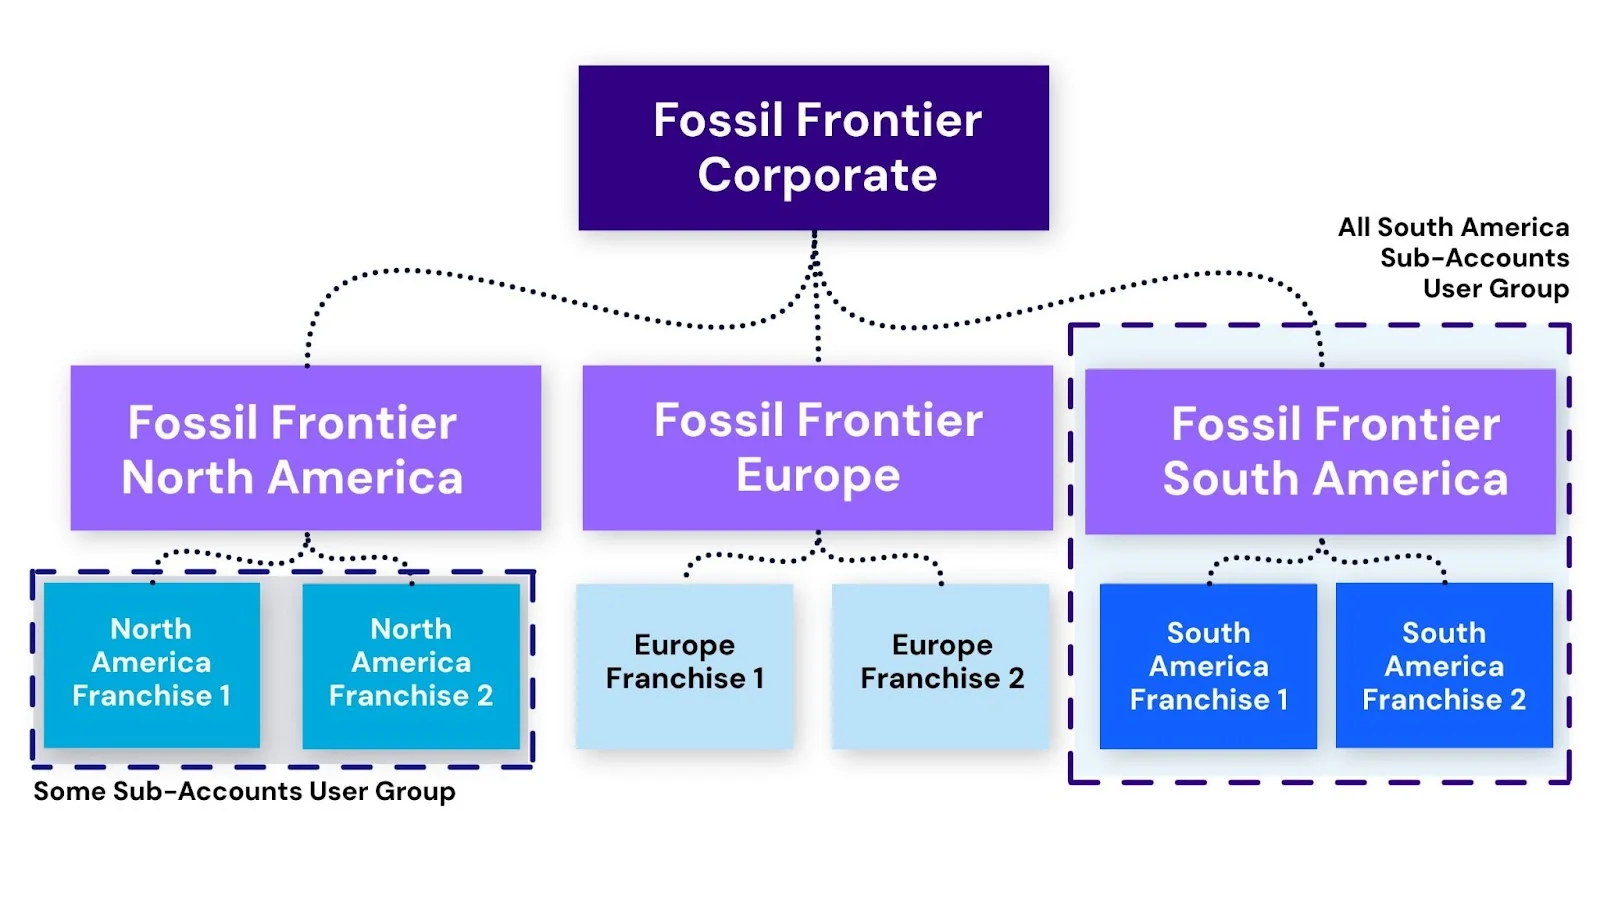
The Rekrutek Sub-Accounts feature allows for the creation of Parent-Accounts that oversee and manage Sub-Accounts beneath the Parent-Account. Sub-Accounts can also have additional Sub-Accounts beneath them, leading to more than one layer.
Sub-Accounts are accounts in their own right, meaning all of the Sub-Account’s data and integrations will be separate from any other Sub-Accounts connected to the Parent-Account.
Users with access to the Parent-Accounts and that have the appropriate permissions, can view and manage Sub-Accounts.
The types of management Parent-Account users can take are:
- Switching into Sub-Accounts and changing account information as if they were a user in that account. Examples: creating Openings, positions, and locations, setting Hiring Goals, and managing applicants within the Sub-Account.
- Bulk managing messaging across multiple Sub-Accounts by creating Message or Document Signing templates that can then be used by all Sub-Accounts.
Parent and Sub-Account Permissioning
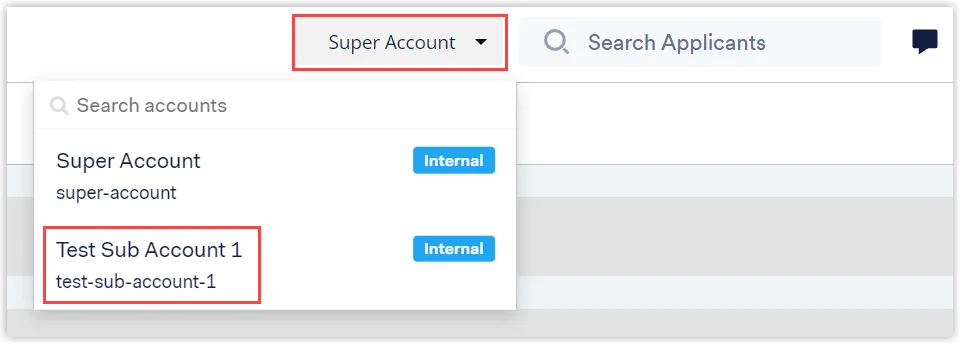
Section titled “Parent and Sub-Account Permissioning”Parent and Sub-Accounts will be created by your Rekrutek Customer Success contacts. However, Parent-Account users can invite new Sub-Account users at any time. During the invitation process, the Parent-Account user will assign permissions to the Sub-Account user. Sub-Account user permissions behave exactly as they behave if they were regular accounts. To switch into a Sub-Account, use the toggle towards the top right on the Company Settings page of the Parent-Account.
Parent-Account users can be granted access to all Sub-Accounts or some Sub-Accounts via the permission page. Sub-Accounts can also be granted access to additional Sub-Accounts beneath them. To grant a user access to a Sub-Account, follow the steps below:
-
Log in to the Parent-Account. Note, you must have Admin access to give a user permission to access a Sub-Account.
-
Click on your initial icon in the top right corner of any Rekrutek page. Then click Company Settings in the dropdown.
-
On the left side panel, click User Groups.
-
Click Create User Group.
-
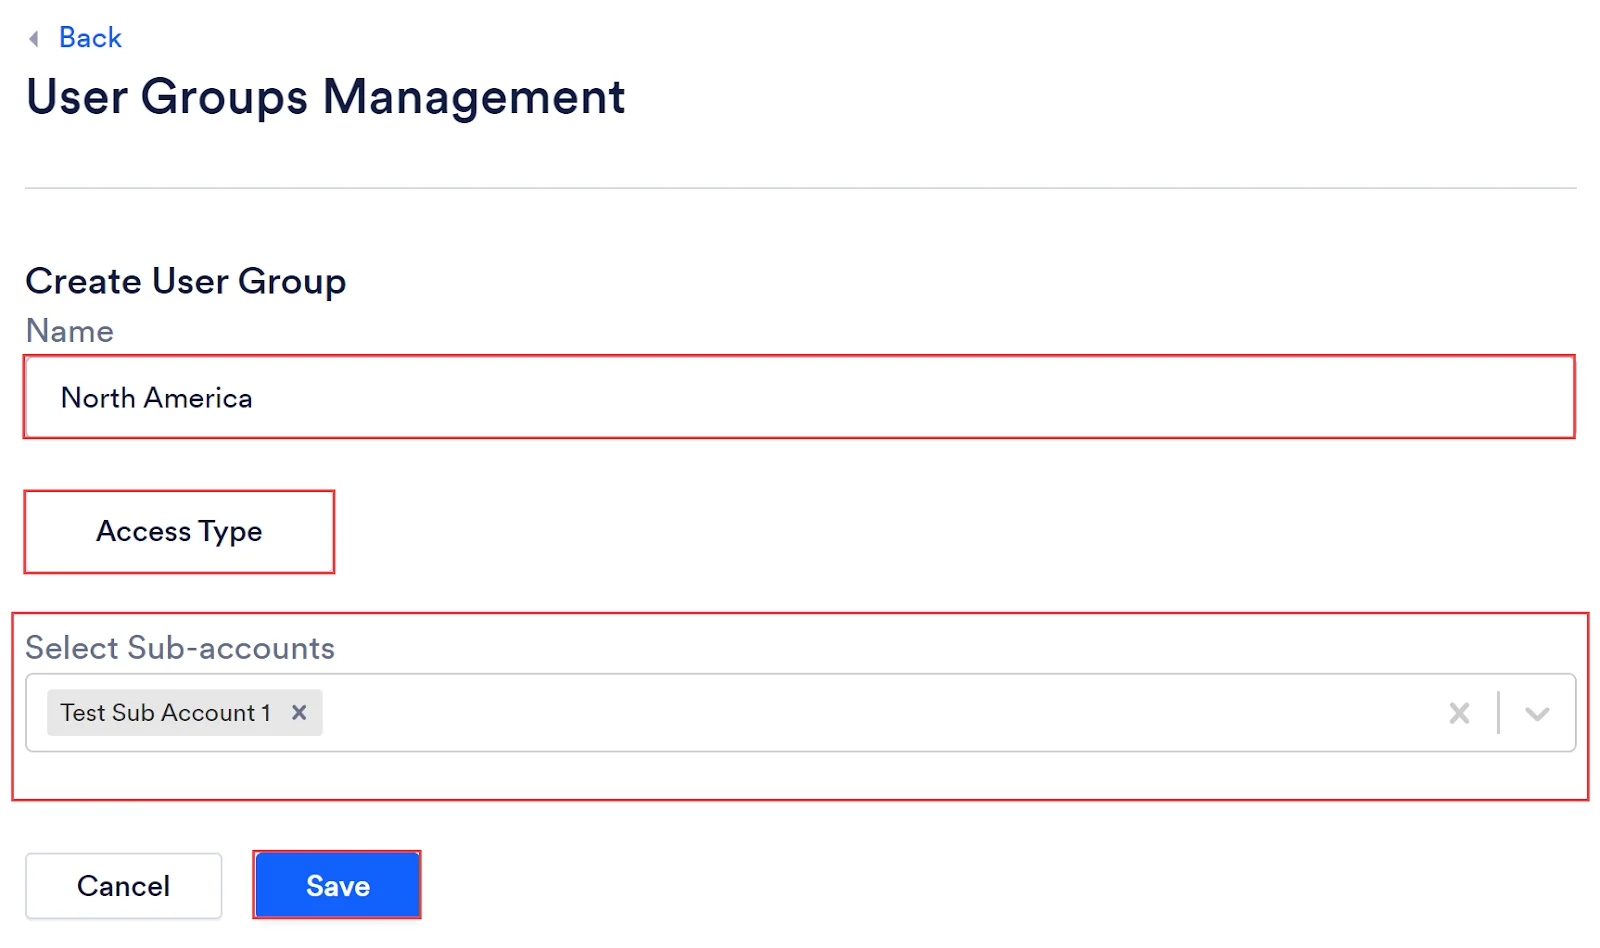
Type a name for the User Group. For Access Type, select Sub-Accounts. If you want to link additional Sub-Accounts beneath this Sub-Account, select them in the dropdown. Click Save.
-
Click Back at the top of the User Groups Management page.
-
Click Users in the left side panel of Company Settings.
-
Find the user you want to grant access to. Click Actions then Edit User.
-
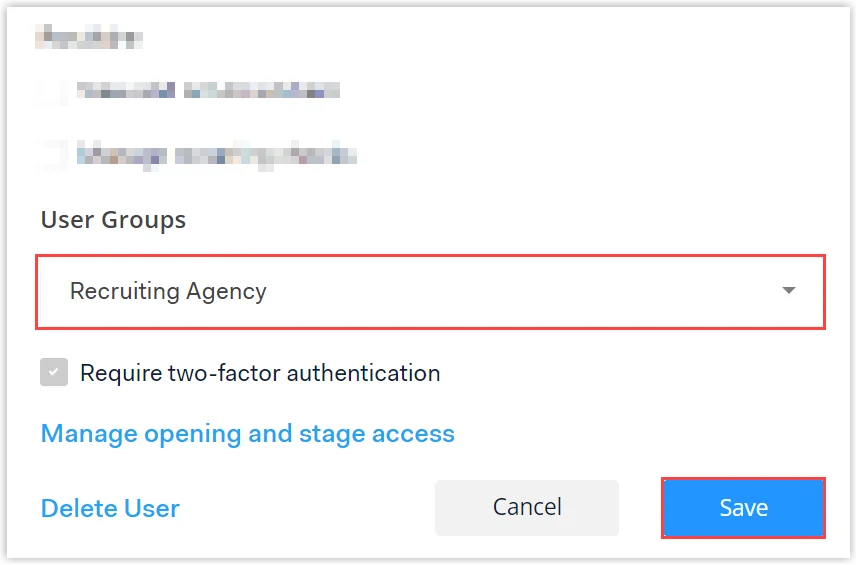
Scroll down to the User Groups permissions. Select the User Group that you just created in the dropdown.
-
Click Save.
Management of Sub-Accounts
Section titled “Management of Sub-Accounts”Message and Document Signing Templates
Section titled “Message and Document Signing Templates”Parent-Accounts can create Message and Document Signing templates for their Sub-Accounts to use. This is a great way to ensure consistent company messaging and processes. To create and share these templates, follow the steps below.
- Follow normal steps to create a message or Document Signing template within Company Settings of the Parent-Account or higher level Sub-Account. Review the Document Signing Templates Interactive Walkthrough for step-by-step instructions.
- On the first page when creating the Message or Document Signing template, check the box for Available to all Sub-Accounts.
- Once your template is saved, it will be automatically visible under the saved templates section within any Sub-Accounts below the account the template was created in. These templates can be used by the Sub-Account but cannot be edited. However, the Sub-Account can create a copy of the template, and that can then be edited.

Positions, Locations, and Location Groups
Section titled “Positions, Locations, and Location Groups”Additionally, within the Parent-Account on the Locations page, there is a new column for Account which will show which Sub-Account the location belongs to. When creating new locations or Location Groups in the Parent-Account, you can select the Sub-Account the location or Location Group should belong to.
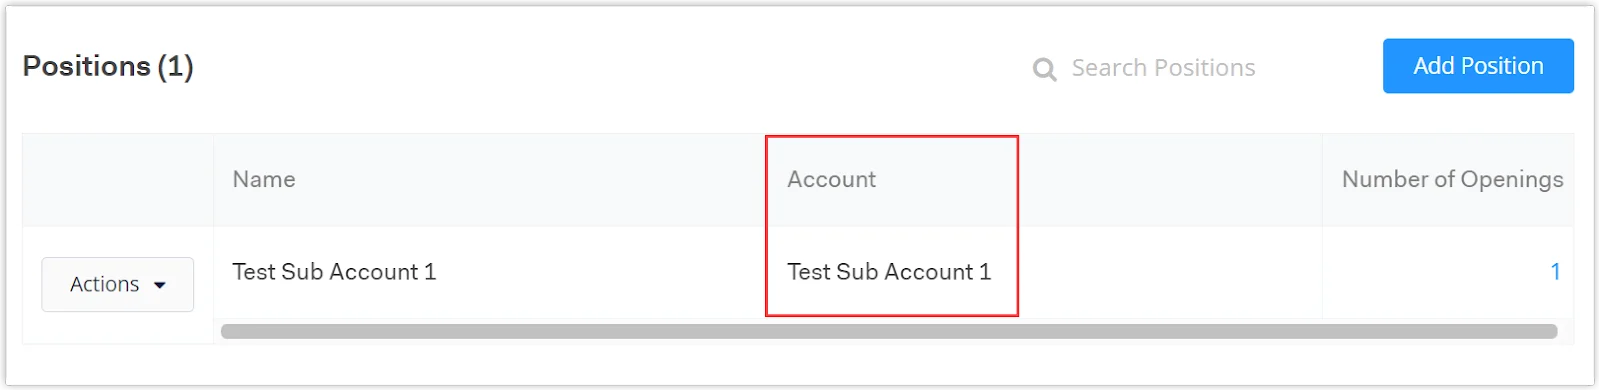
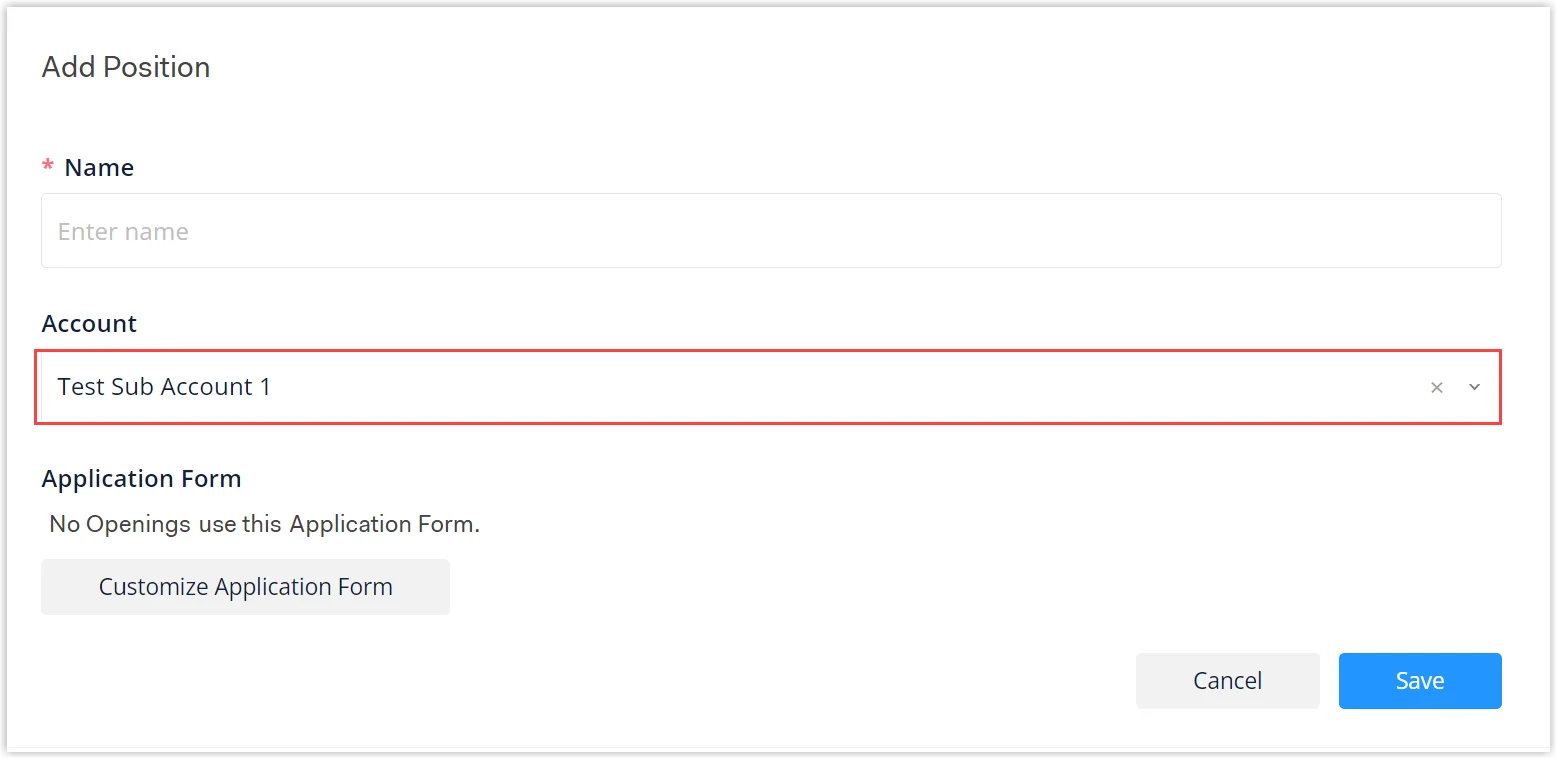
The same concept applies to the Positions page in the Parent-Account. The account associated with the position will be listed in the Account column. When creating new positions in the Parent-Account, you can select the Sub-Account the position should belong to.
Rejection and On Hold Reasons
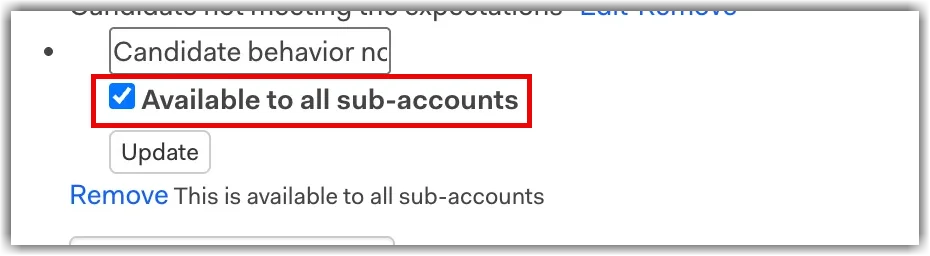
Section titled “Rejection and On Hold Reasons”When creating rejection or on hold reasons in the Parent-Account, you will have the option to make the reason available to all Sub-Accounts, streamlining reason management.
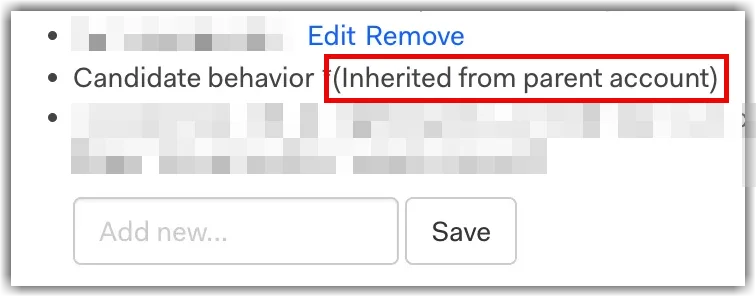
When this option is selected within the Parent-Account, the reason will be available on the Sub-Account’s Rejection and On Hold reasons Company Settings page with the label “Inherited from the Parent-Account”. It will also not be editable within the Sub-Account.
Distribute Applicants Rule Stage
Section titled “Distribute Applicants Rule Stage”When using the Distribute Applicants Rule stage in the Parent-Account, you will have the option to select the account (Sub-Account or Parent-Account) when creating the rule. This option is not available when creating a Distribute Applicants rule within a Sub-Account.
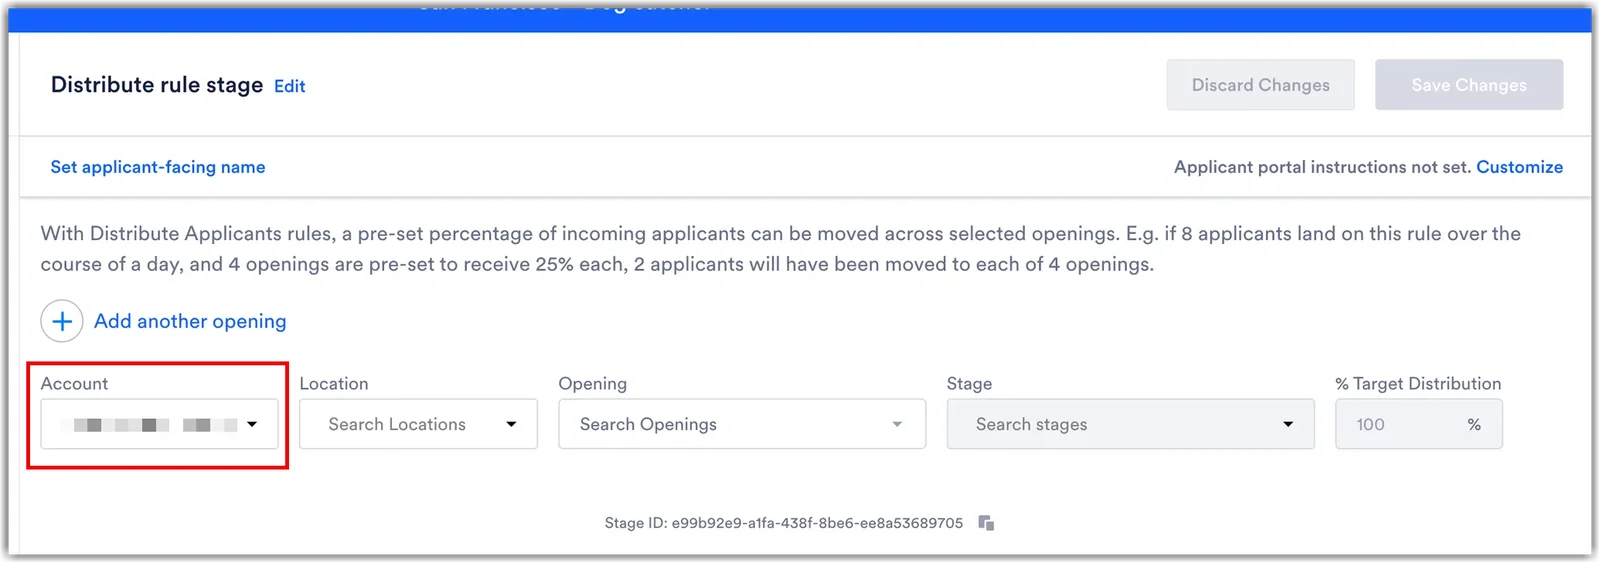
When an applicant moves into the Distribute Rule stage within the Parent-Account, the rule will be executed, and the applicant will be distributed to the Sub-Account(s).
Key Considerations
Section titled “Key Considerations”Please consider the following when using Rekrutek’s Sub-Accounts feature:
- When reviewing Analytics, you must switch to a Sub-Account and click Analytics in the top toolbar of any Rekrutek page. You cannot see an overarching view of all Sub-Accounts Analytics via the Parent-Account.
- Any message templates or Document Signing templates pushed down to a Sub-Account cannot be edited. However, the Sub-Account can create a copy of these templates and then make updates.
- If there are additional Sub-Accounts beneath the first level of Sub-Accounts, those top-tier Sub-Accounts can push templates down to any Sub-Accounts beneath their level.