
Locations and Location Groups (Hire)
A Location is where your Job Position would be located in and makes up an Opening. This can be an address or a general area e.g. market or district.
Each Location determines an Opening’s:
- Address
- Country
- Time Zone
- Language
- Brand
- SMS Number
You can also place Locations into different Location Groups. You can think of Location Groups as folders used for organizing Locations. While Rekrutek will initially bring you to your organization’s Location Groups page upon editing Locations, this article will first demonstrate how to create Locations and put them into Groups.
Add Location
Section titled “Add Location”-
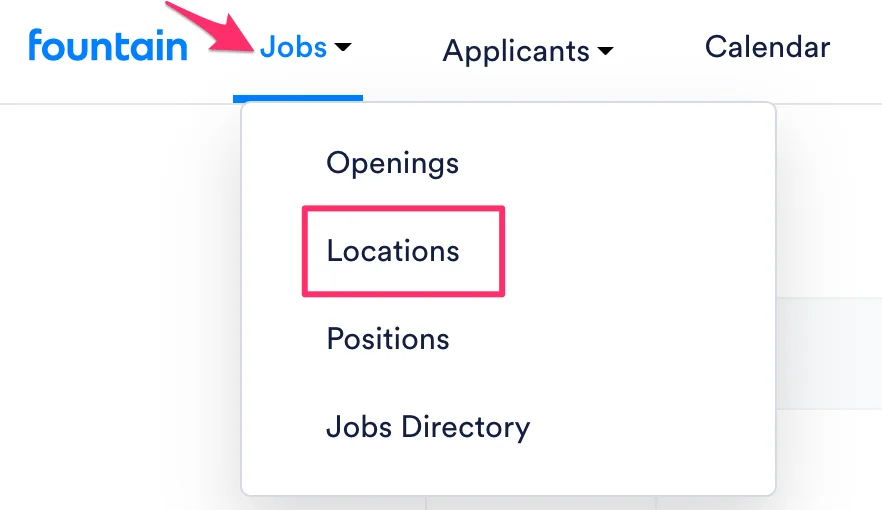
Click Jobs in the top navigation bar and select Locations.
-
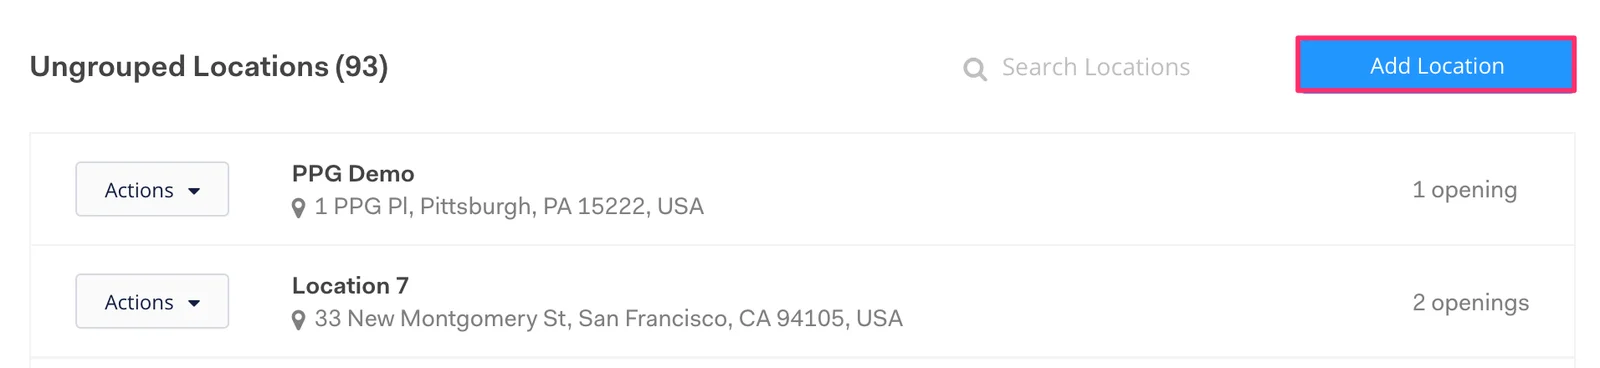
Click the blue Add Location button.
-
Enter the details for your new Location including Location Group, Location Owner, Address, Country, Time Zone, Language, Brand, and SMS Number.
-
In the Address field, begin typing the location address. Google address suggestions will appear as you type.
-
Select the correct address from the suggestions. The address automatically populates and splits into individual components: street address, city, state, zip code, and country.
-
If any individual component needs correction, click the Edit address button to manually edit specific fields.
-
-
Click Save.
Edit Location
Section titled “Edit Location”- Click Jobs in the top navigation bar and select Locations.
- Next to Location, click Action then Edit.
- Make your changes and click Save.
Delete Location
Section titled “Delete Location”- Click Jobs in the top navigation bar, and select Locations.
- Next to Location, click Action then Edit.
- Click the red Delete on the lower left corner.
- A confirmation message will pop up. Click Delete to confirm.
Add Location Group
Section titled “Add Location Group”You can place Locations in different Location Groups. You can think of Location Groups as folders used for organizing Locations. This allows you to better organize and find your openings faster, as well as assign owners.
For example, if you had two Locations (San Francisco and Los Angeles), you could place them into a “California” Location Group.
-
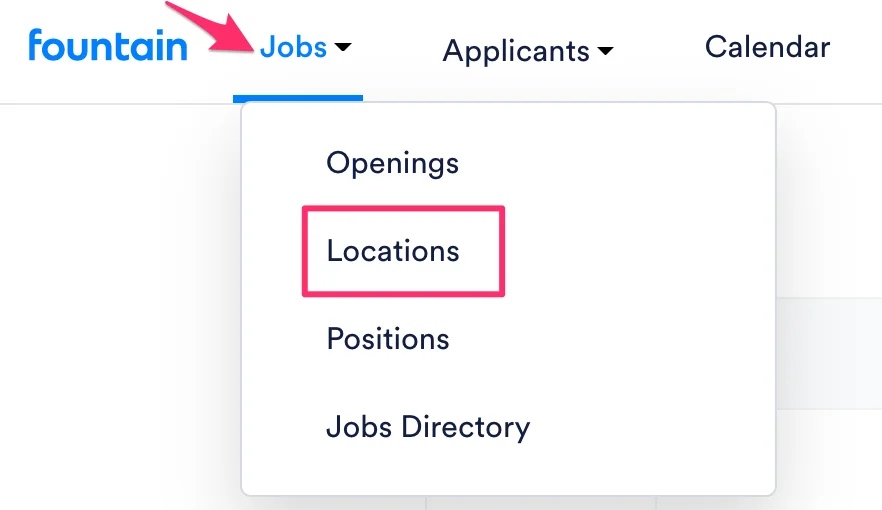
Click Jobs in the main navigation and select Locations.
-
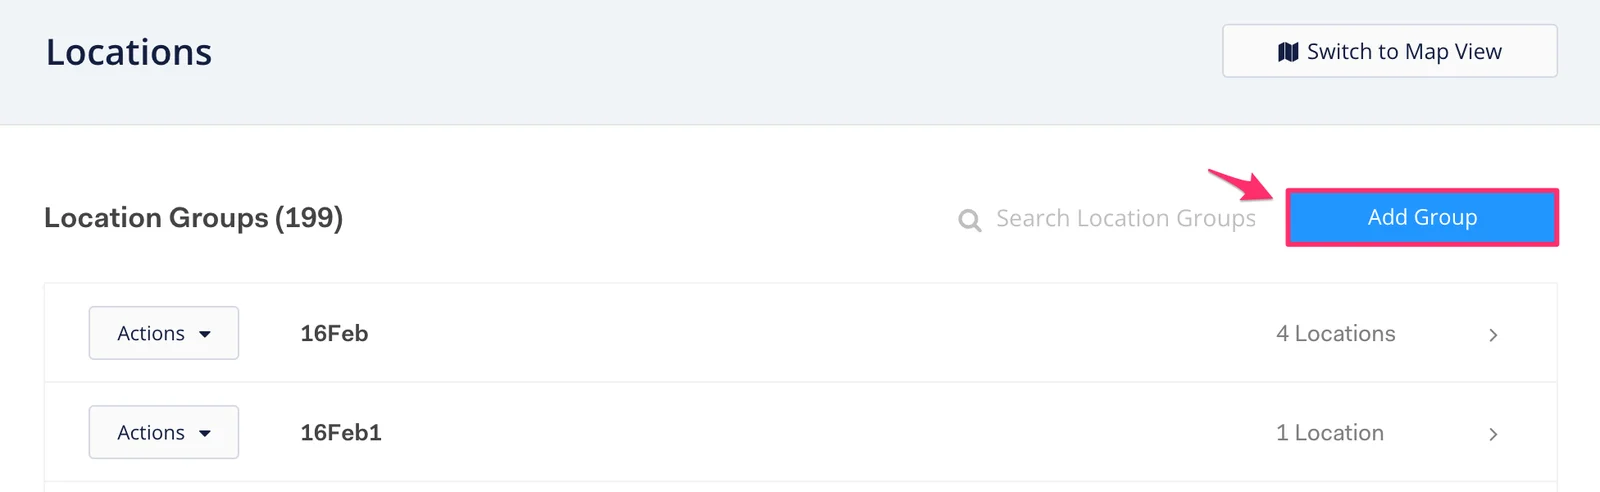
Click the blue Add Group button.
-
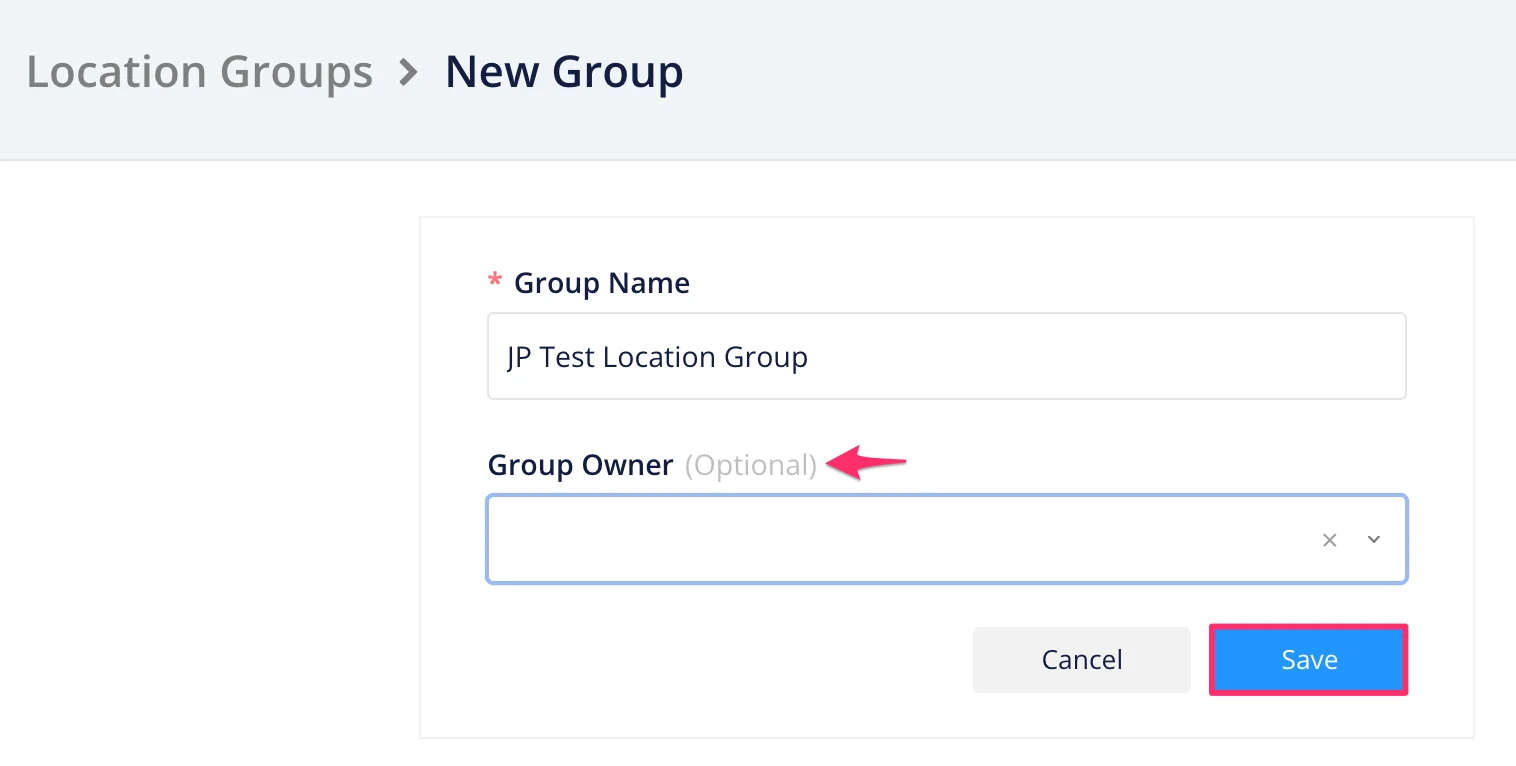
Name your group and assign a Group Owner. Group ownership is useful for teams where individual user manages a set of Openings based on Groups, otherwise, you can assign owners at a per Opening basis.
-
Click Save and you’re all set!
Move Location Into Group
Section titled “Move Location Into Group”-
Click Jobs in the top navigation and select Locations.
-
Find the Location: You may need to go into existing Location Groups or use the search bar if it’s already been assigned to a Location Group.
-
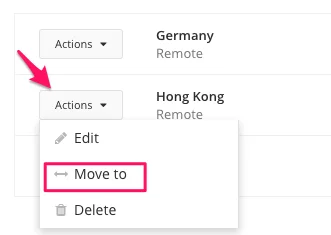
Next to Location, click on Action then Move to.
-
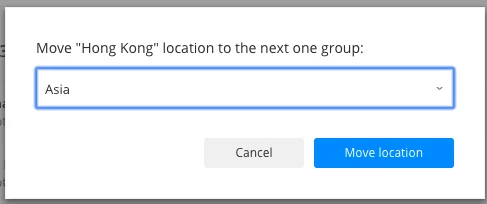
Select a Group from the dropdown menu.
-
Confirm by clicking on Move location.
Edit Location Group
Section titled “Edit Location Group”- Next to the Location Group, click on Action then Edit.
- Enter your updates.
- Click Save.
Delete Location Group
Section titled “Delete Location Group”-
Next to the Location Group, click Action then Delete.
-
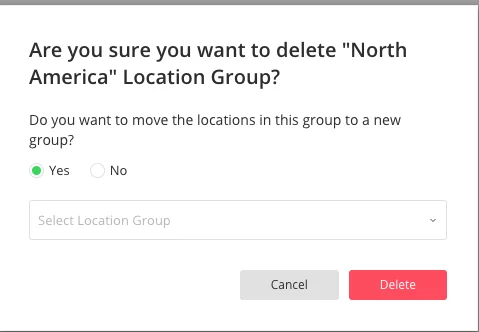
If you want to move the Locations in this Group into another Group, select Yes and choose the destination from the dropdown. If you choose No, the Locations will be in unassigned.
-
Click Delete.