Calendar 2.0 - Scheduler Stage Setup
Rekrutek’s Appointment Scheduling stage allows you to create availability to interact with applicants, whether that’s for an interview, orientation, start date, or even to pick up equipment. In this stage, you can define the event (e.g., duration, location, etc.) and determine what users can host that event.
Setting Up the Appointment Scheduling Stage
Section titled “Setting Up the Appointment Scheduling Stage”- Navigate to the Workflow Editor through the Applicant Table
- Add the Appointment Scheduling stage to your workflow. Fill in the sections outlined below.
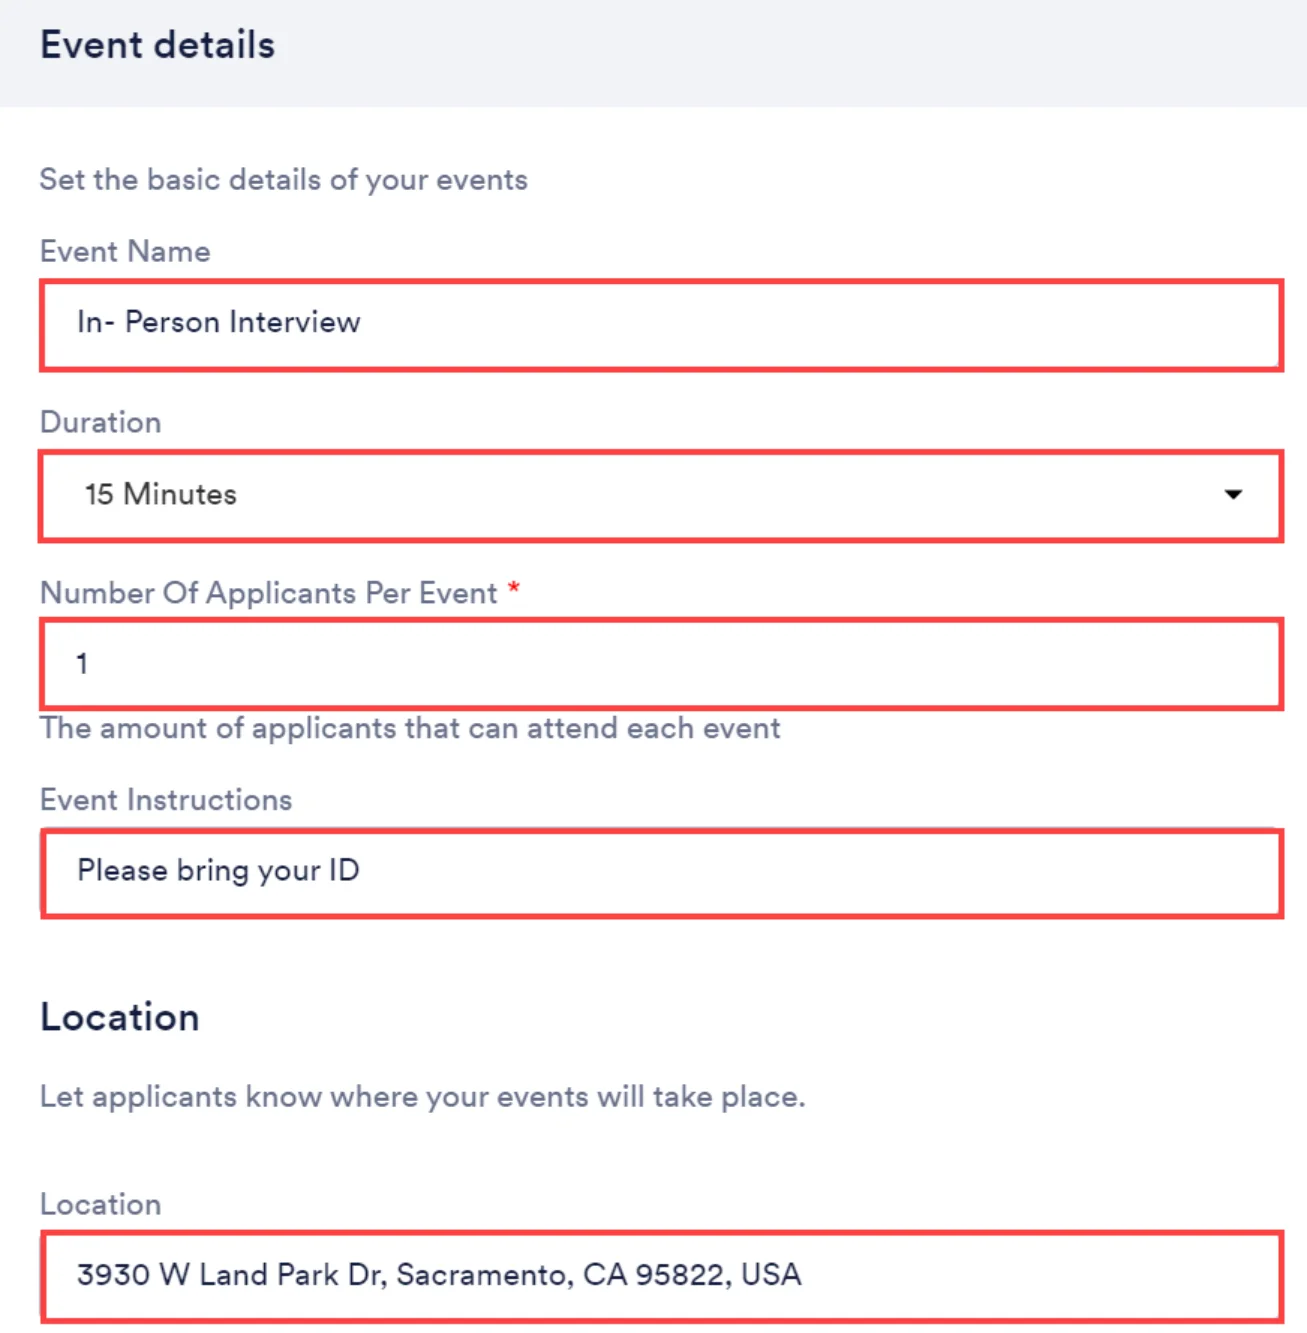
In the Event details section, enter the event details:
| Field Name | Details |
|---|---|
| Event Name | Enter the duration for a single event such as an interview that will last 145 minutes. This field will default to 15 minutes. The custom max amount is 1439 minutes. |
| Duration | Enter the duration for a single event such as an interview that will last 145 minutes. This field will default to 15 minutes. The custom max amount is 1439 minutes. |
| Number of Applicants Per Event | How many applicants can select a single slot when landing on this stage in the application. This field defaults to 1 which is typically used for interviews but can go up to 200. |
| Event Instructions | Enter any helpful instructions such as bring your resume or ID. This field has a 255-character limit. |
| Location | Where will this event take place? Be sure to change this if the event is taking place on the phone or virtually. The field will default to the Opening location. |
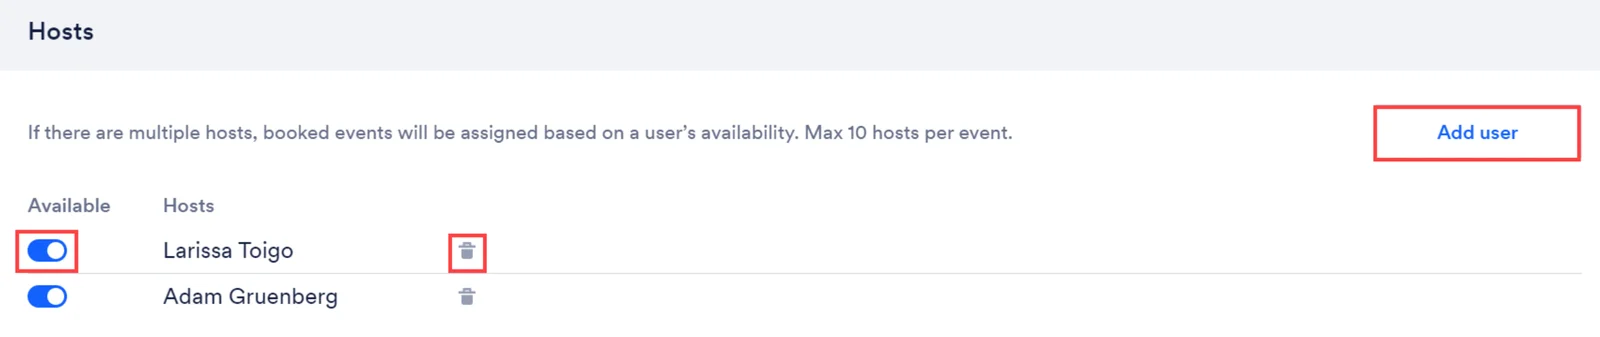
In the Hosts section, click Add User to add users who will host the events.
- Any user in the account can be assigned as a host.
- Users can be hosts on multiple Openings.
- Each Appointment Scheduling stage can support up to 10 hosts.
- By default, hosts are set as available but can be made unavailable by using the toggle to the left of the host’s name.
- Hosts can also be removed entirely by clicking the trashcan icon to the right of the host’s name.
- When applicants land in an Appointment Scheduling stage, they will see the availability of the added hosts when booking.
Advanced Settings
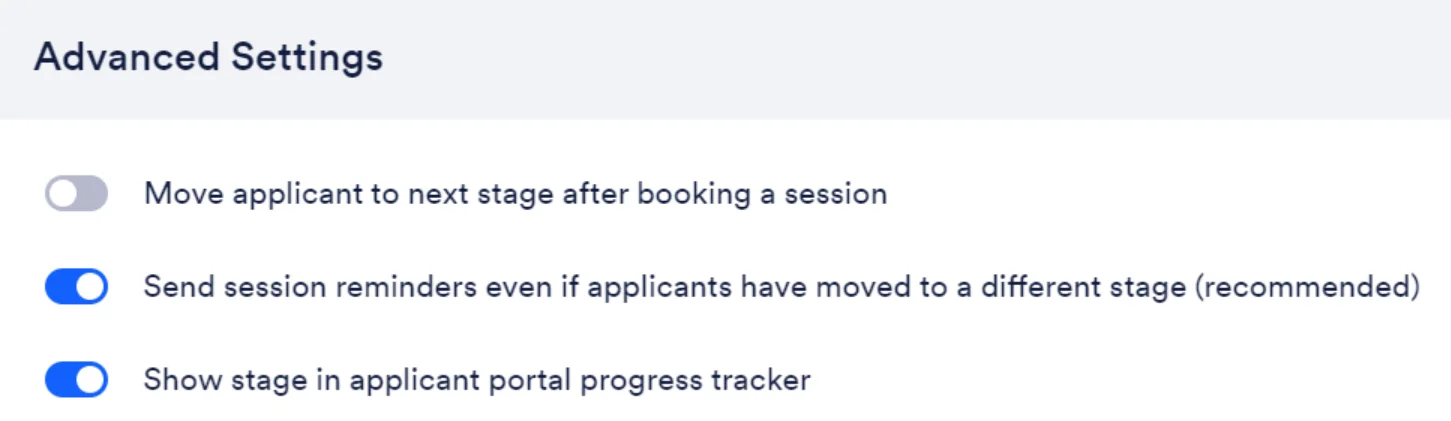
Section titled “Advanced Settings”In the Advanced Settings section, set advanced scheduler controls (optional):
| Field Name | Details |
|---|---|
| Move applicant to next stage after booking a session | This field is defaulted off but could be helpful depending on what stage is after the Appointment Scheduling stage. For example, if you want the applicant to review a video about your company in the next stage, you may want to turn this one. |
| Send session reminders even if applicants have moved to a different stage | This field is defaulted to be on and Rekrutek does recommend you leave this on. This means the applicant will receive reminders about their booked event even if they move out of the stage. |
| Show stage in applicant portal progress tracker | This field is defaulted on. If you do not want the applicant to see this stage in the progress tracker, turn the toggle off. |
In the Advanced Settings section, click to expand the Advanced Booking Options (optional):
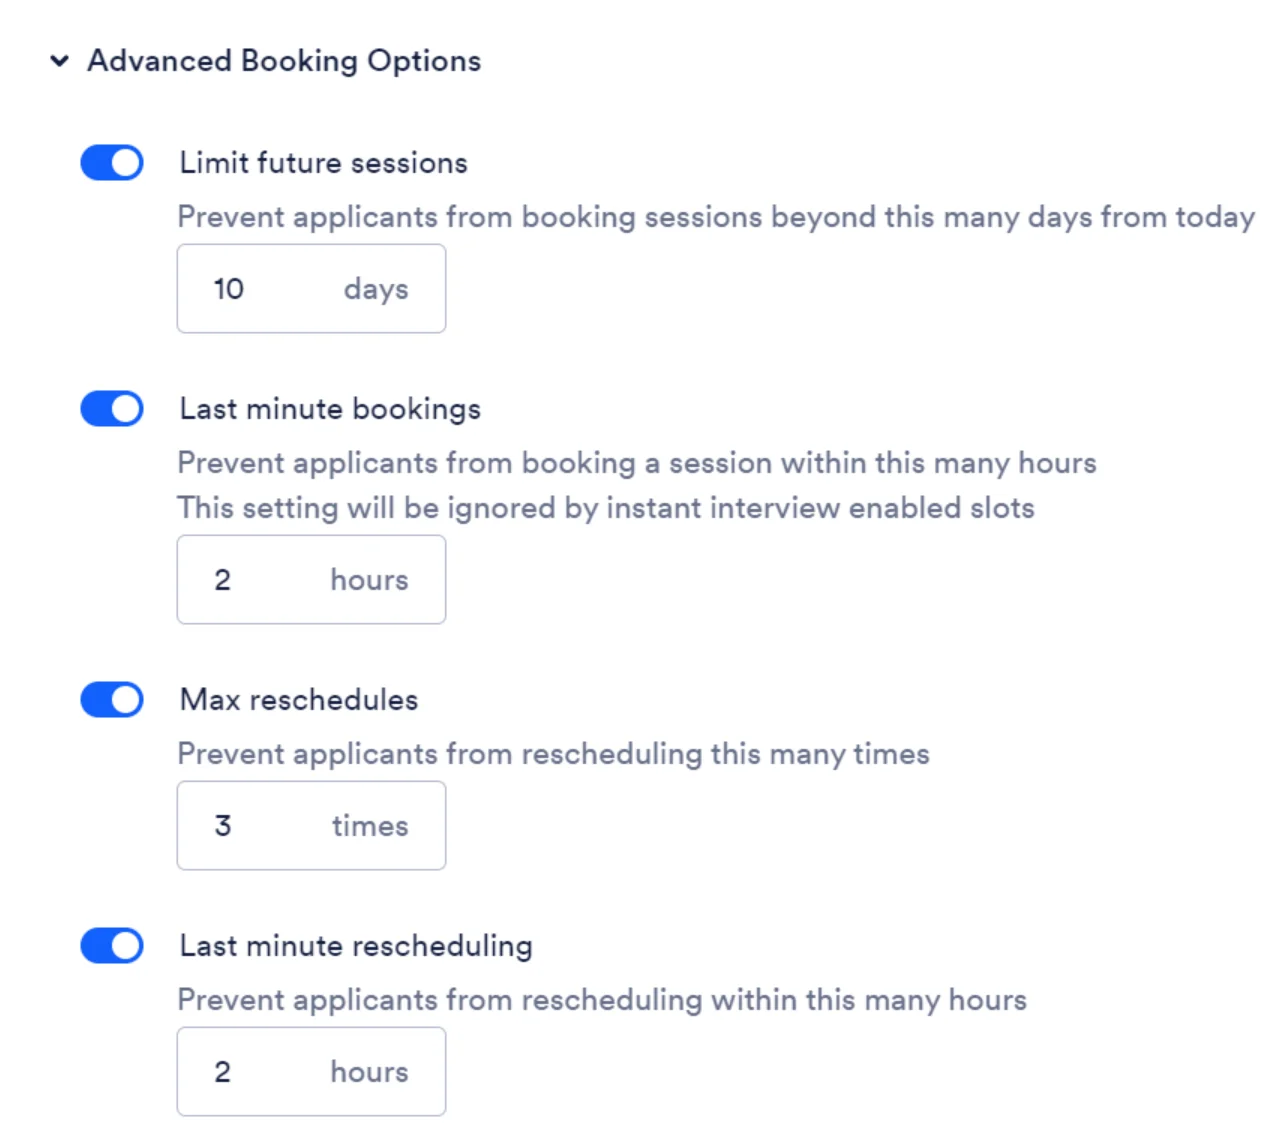
| Field Name | Details |
|---|---|
| Limit future sessions | this is helpful if you have a long pattern of availability. You probably do not want an applicant to book an interview 2 months from now because there is a good chance they will not show up to the event. |
| Last minute bookings | stops applicants from booking a slot too close to the present time which makes it difficult for the host to prepare. |
| Max reschedules | will stop applicants from rescheduling too many times. |
| Last minute rescheduling | will stop applicants from rescheduling too close to the day’s scheduled interview. |
Live Video
Section titled “Live Video”In the Live Video section, enable live video if desired (optional).
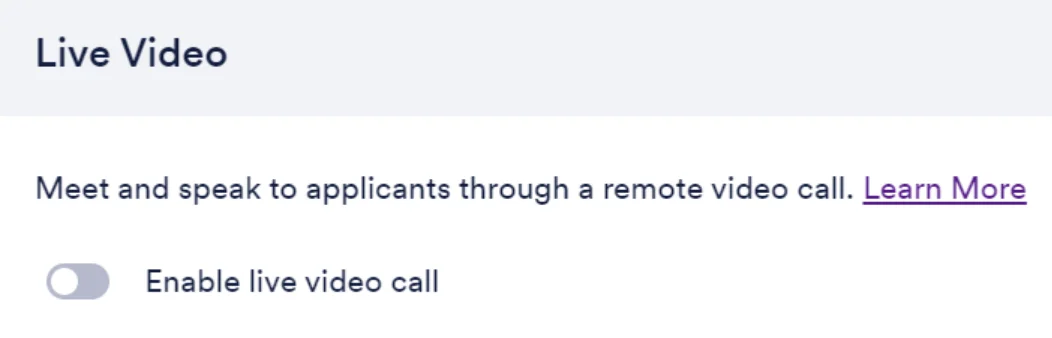
- This will allow you to meet and speak to applicants through a remote video call hosted by Whereby.
Idle Move Rules
Section titled “Idle Move Rules”In the Idle Move Rules section, add move rules if desired (optional)
- This will move idle applicants out of the stage based on preset criteria.
Messages
Section titled “Messages”In the Messages sections, update/add automated communication (optional).
| Field Name | Details |
|---|---|
| Initial Message | Sent when the applicant lands within the stage. |
| Confirmation Message | Sends confirmation to applicants after booking a session on the calendar. It contains all details for the scheduled event. |
| Cancellation Message | Sends a message when an applicant or host cancels the event with an option to reschedule. |
| Reminder Message | Sends a reminder to applicants before their scheduled session. |
| Follow-up Message | Sends a reminder to idle applicants to take action within the stage. |
Availability Overview
Section titled “Availability Overview”Availability for an Opening is determined by the availability of hosts linked to the Appointment Scheduling stage. By default, availability is Monday through Friday 9am - 5pm based on the host’s timezone. Learn more about availability here[setting availability link article].
For example, if you have two hosts both with 5 hours of availability on Monday, and your event is 1 hour long and only supports a single applicant, there would be 10 available timeslots on Monday that applicants could select from.
If you find there is not enough availability to meet the demand of applicants you can either add hosts or have the hosts increase their availability.
It is also important to note that applicants can only see a maximum of 35 days of availability in the future.
Events Overview
Section titled “Events Overview”When an applicant selects and confirms a time slot, a calendar event will automatically be created on your external calendar. Some important notes:
- For events with a single applicant, the title is Event name: Applicant name <> Brand(company) name. For events with multiple applicants, the title is Event name <> Brand(company) name.
- The applicant’s phone number, location, and event instructions are included in the calendar event.
- If either party deletes the calendar event, an email is sent informing all parties of the change. The message sent will depend on the external email provider.
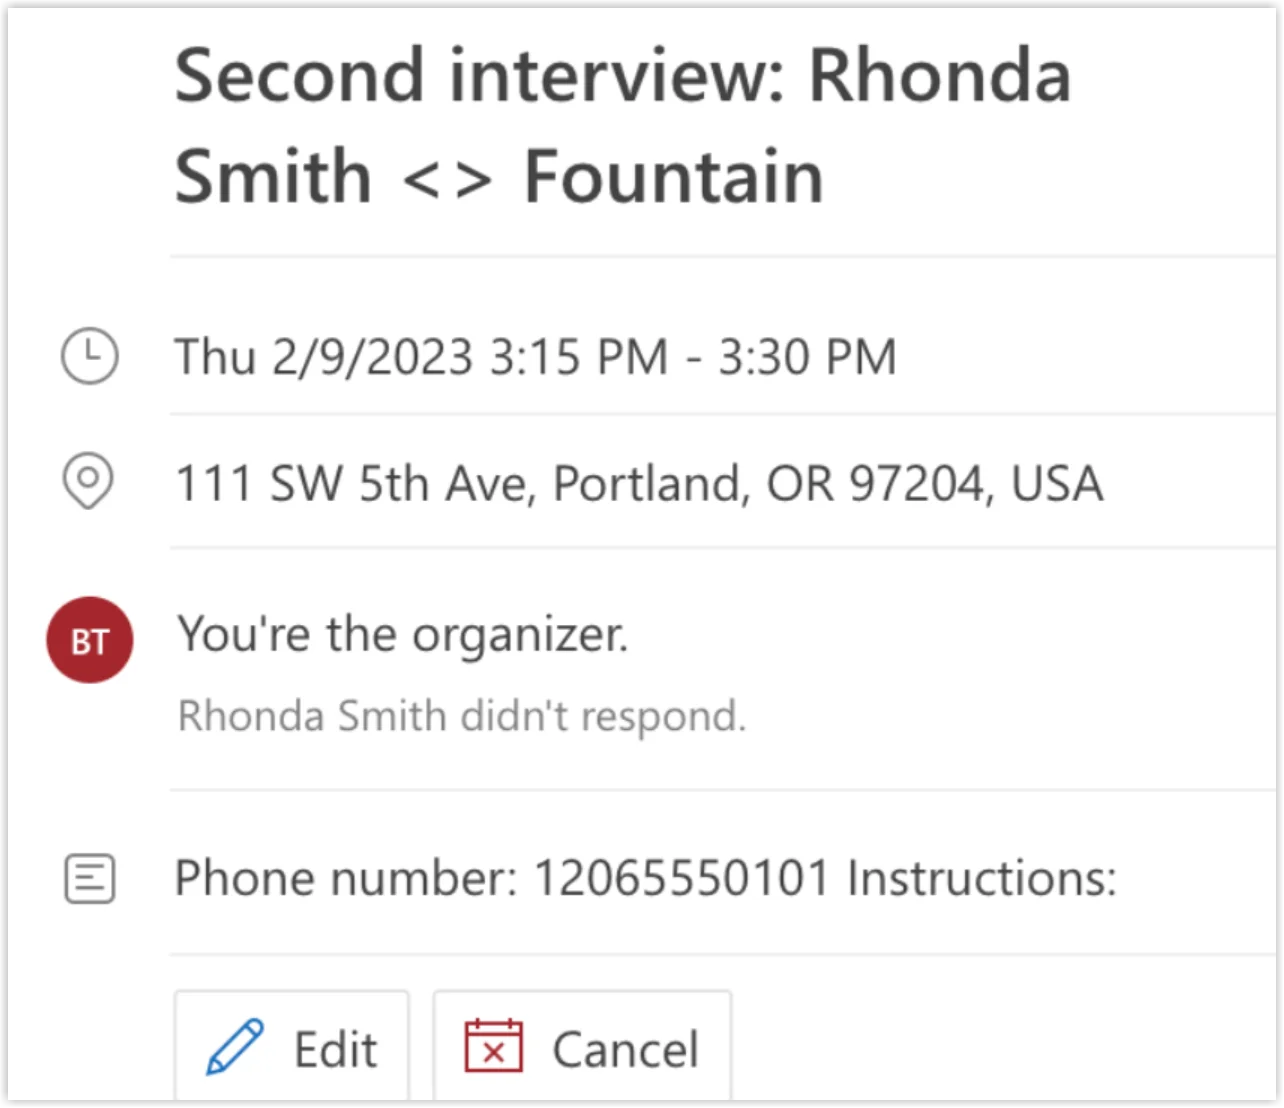
Changes made to booked slots (events) on an external calendar are not reflected in Rekrutek’s Applicant Table or Universal Applicant View.
Applicants
Section titled “Applicants”When an applicant books time they will receive a link to add the event to their calendar.
- Applicants must first add the event to their calendar via the stage and then they can mark their response as no response, accepted, maybe, or declined.
- Applicants can cancel or reschedule via the applicant portal or from the email they received confirming their booked session.
If the host has an external calendar connected when an applicant books a time with that host, the event will automatically be added to their external calendar. If the host does not have an external calendar connected they will see an applicant has booked time in Rekrutek’s Applicant Table or Universal Applicant View.
- Hosts are automatically marked as accepted on the calendar invite.
- Hosts can cancel, or ask an applicant to reschedule by using the appropriate Status Label within the Applicant Table or Universal Applicant View.