
Create and Manage Custom Opening Attributes
Overview
Section titled “Overview”Custom Opening Attributes allow you to define custom fields for your openings beyond the standard fields (like pay rate, location, job hours). You can create attributes such as application deadlines, department IDs, labor union codes, OEM status, or any opening-specific information your organization needs to track.
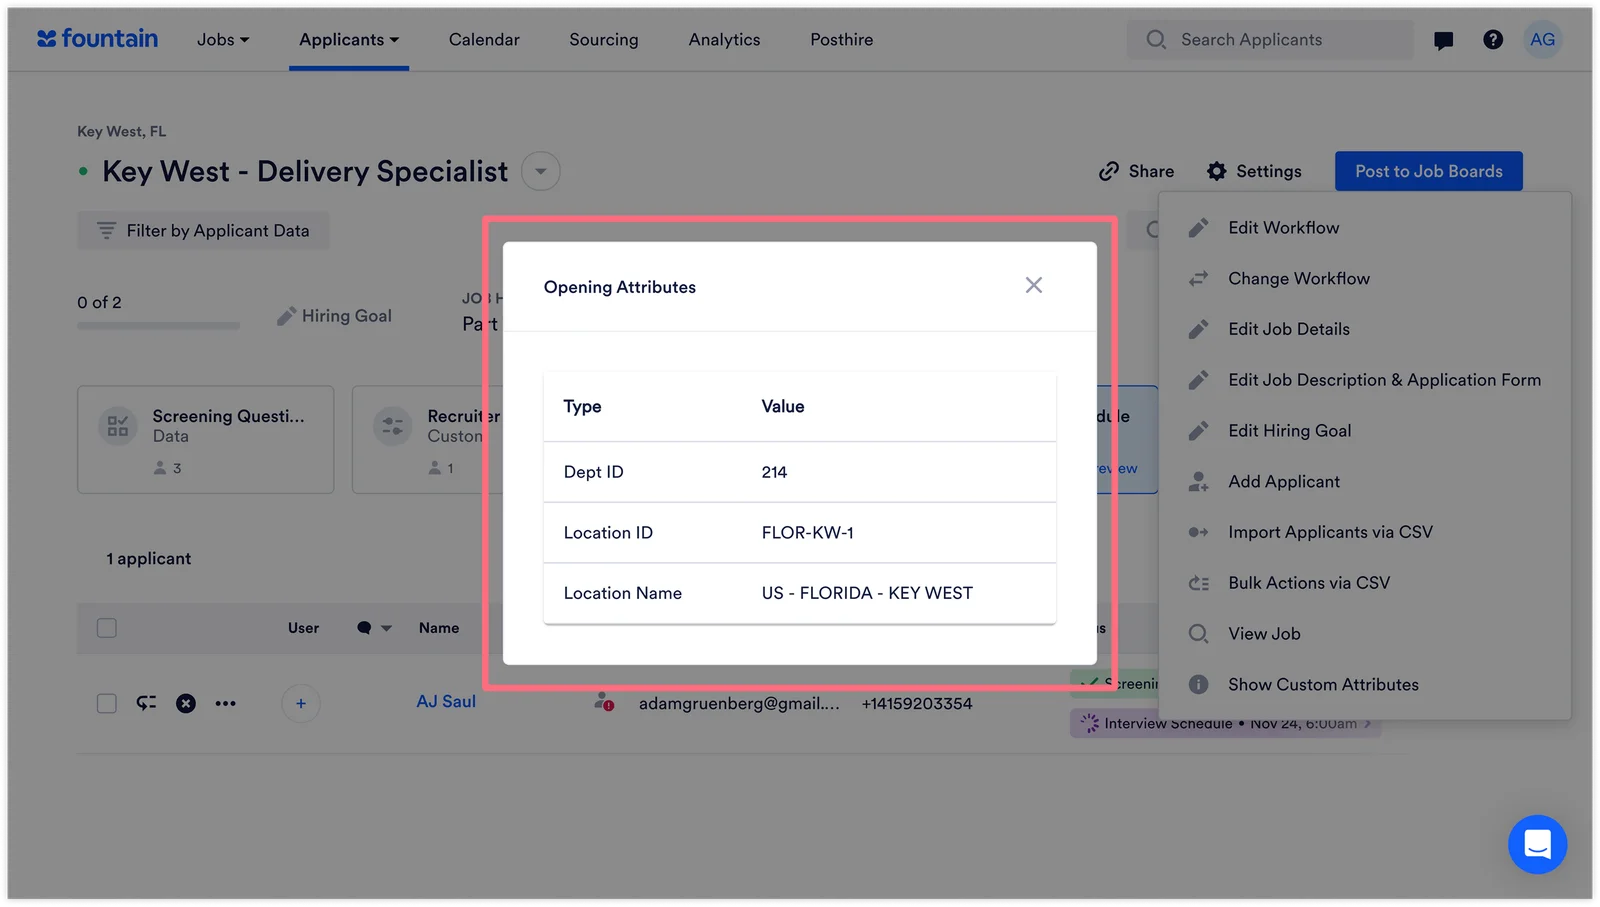
Opening Attributes provide flexibility to define opening-specific fields without requiring API or engineering support. Depending on your permissions, you can view existing attributes, set values for attributes on openings, or create and manage new attributes across your organization.
Permissions
Section titled “Permissions”Your ability to work with Opening Attributes depends on your user permissions:
- View Job Attributes: Read-only access to view attribute values on openings
- Set Values For Attributes: View all attributes and set/edit values on openings, but cannot create new attributes
- Manage Attributes: Full access to create, view, and manage attributes plus set values
Contact your Rekrutek administrator if you need different permission levels. Learn more about Opening Attributes permissions.
Viewing Custom Opening Attributes
Section titled “Viewing Custom Opening Attributes”There are two ways to view Custom Opening Attributes for an opening:
Method 1: From the Applicant Table
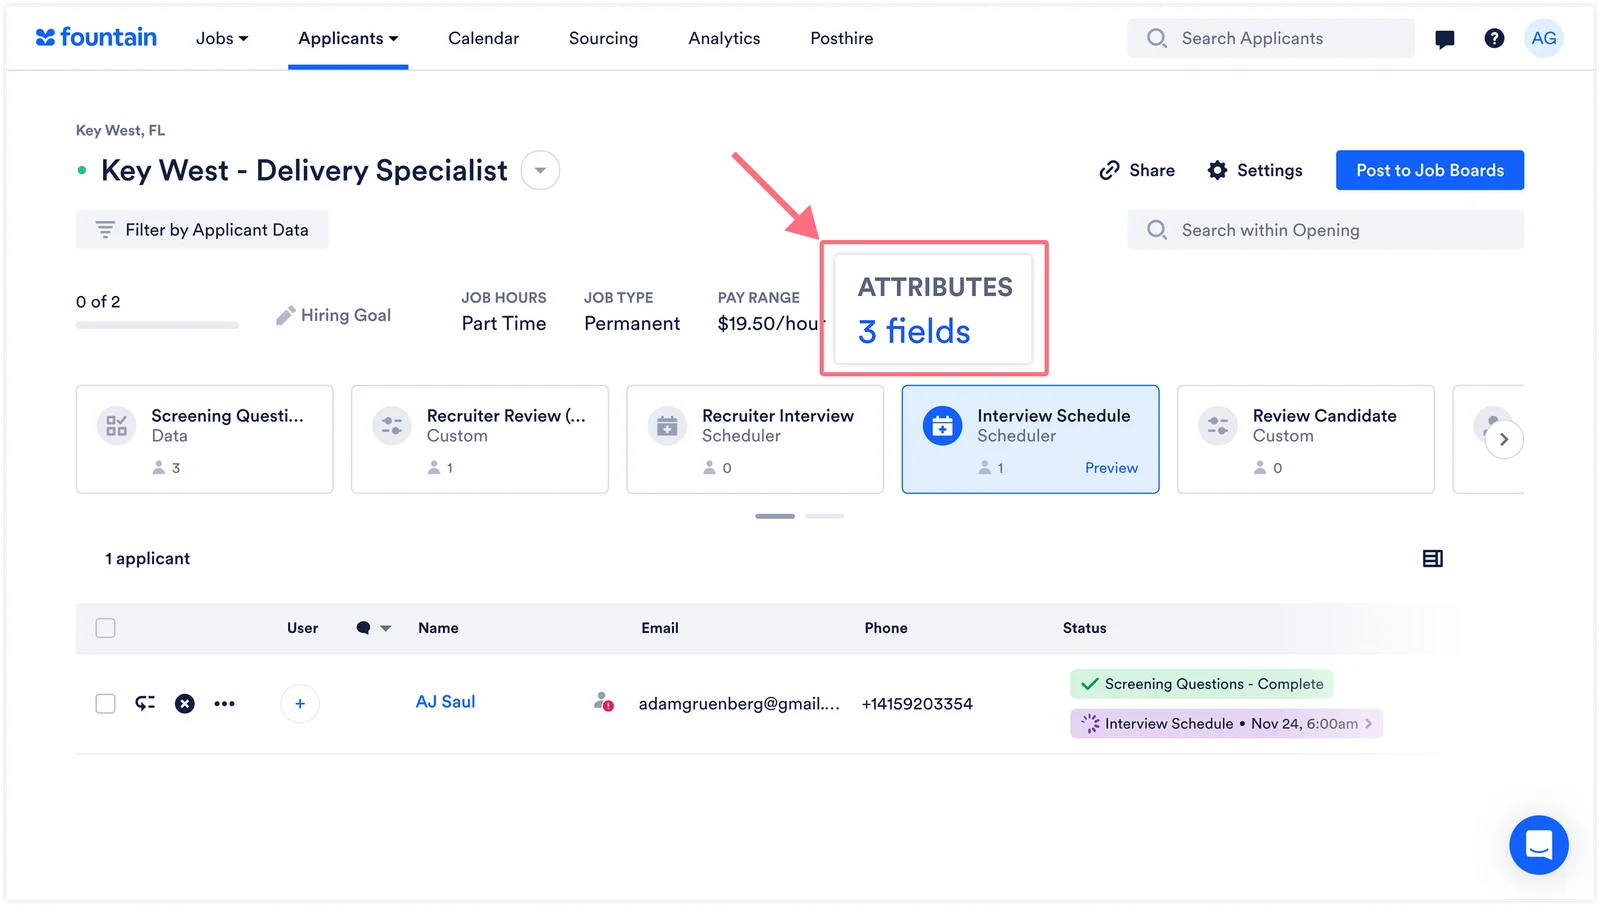
Section titled “Method 1: From the Applicant Table”When viewing the Applicant Table for an opening, Custom Opening Attributes appear at the top of the table, at the end of the standard opening attributes.
-
From the Applicant Table, look at the top of the table where attributes are displayed.
-
You’ll see standard opening attributes your organization has opted to include, such as: External Title, Job Hours, Job Type, Pay Range, Location Name
-
At the end of this row, you’ll see ATTRIBUTES showing the count of custom attributes as fields (e.g., “3 fields” if 3 custom attributes are set)
-
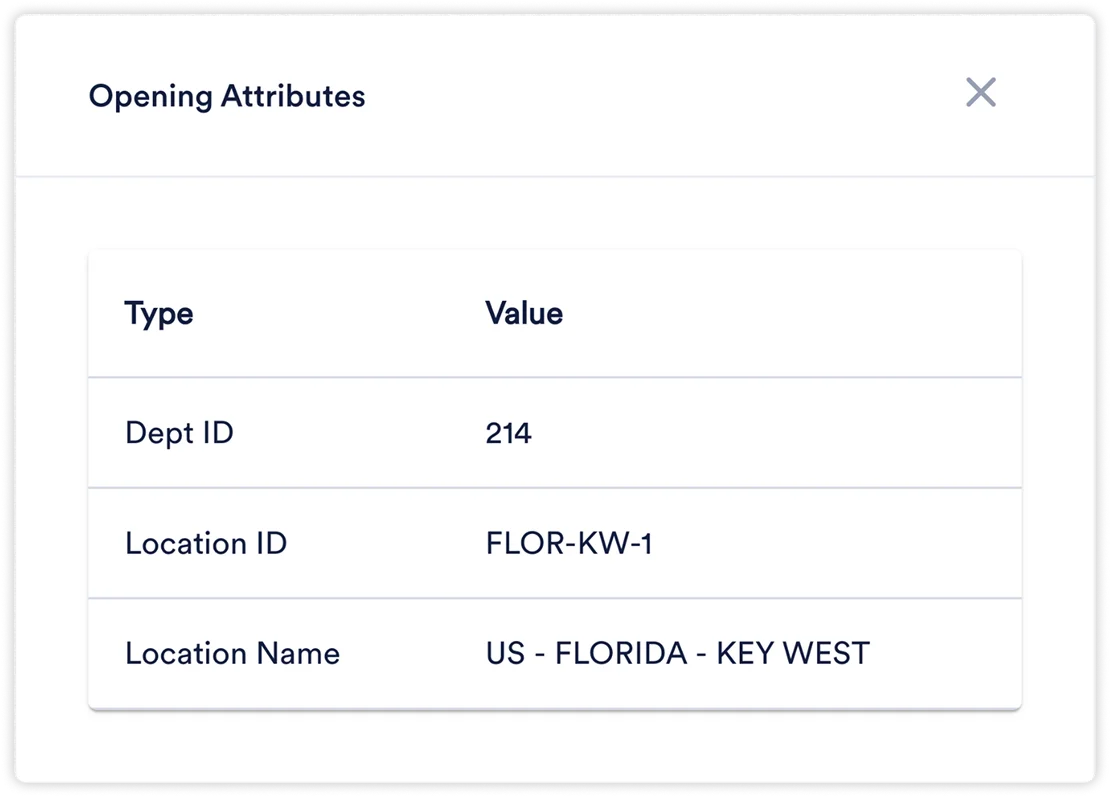
Click on the “X fields” link to open a modal displaying all Custom Opening Attributes and their values for this opening
Method 2: Settings Menu on Applicant Table
Section titled “Method 2: Settings Menu on Applicant Table”From the Applicant Table, you can also access custom attributes through the Settings menu:
-
Navigate to an opening and view the Applicant Table
-
Click Settings (gear icon or Settings button)
-
Select Show Custom Attributes
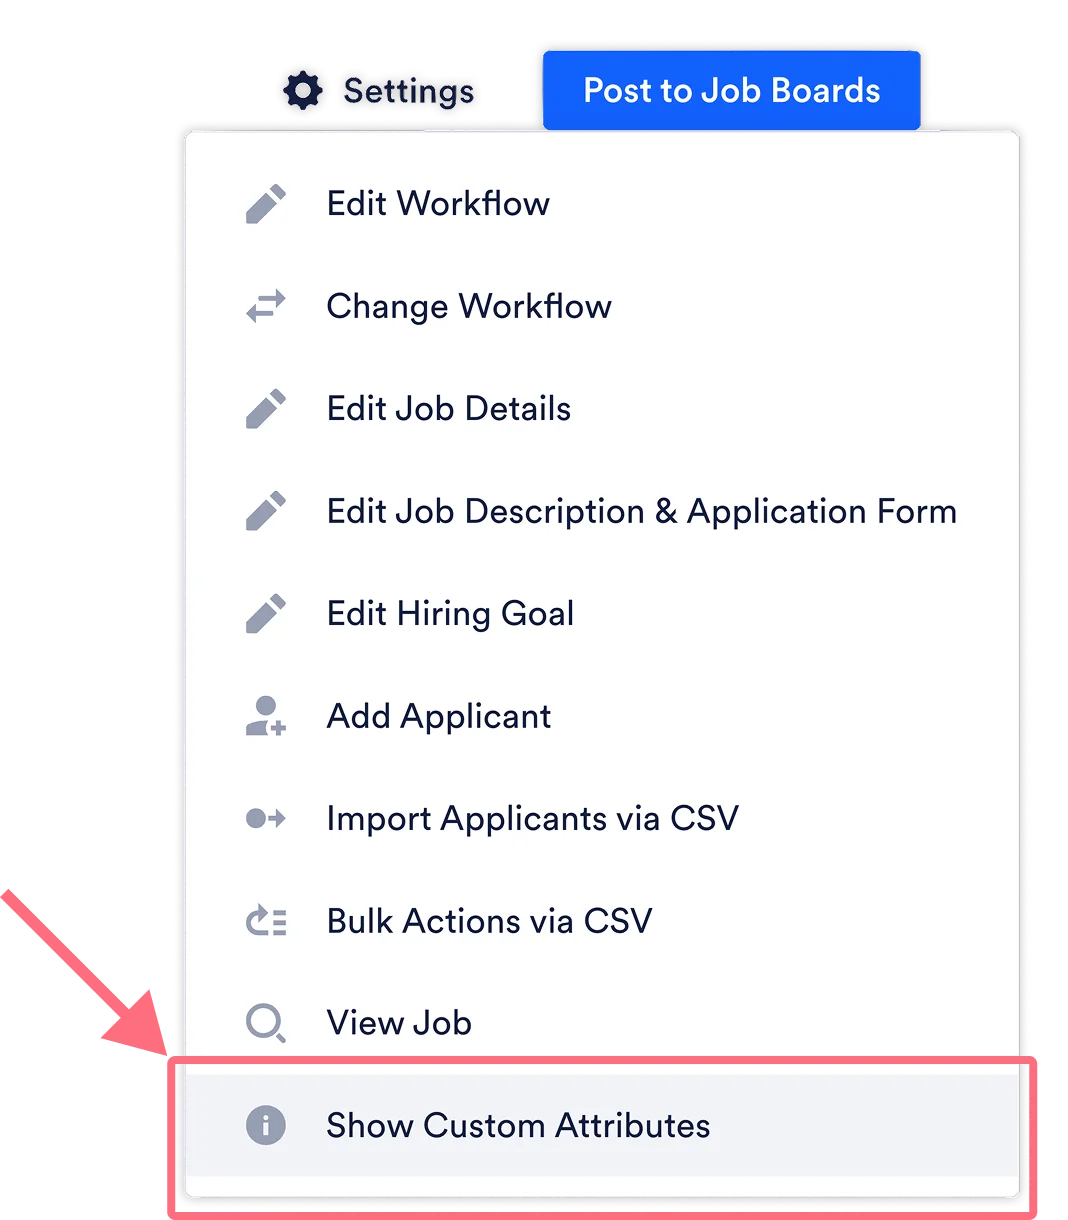
This will display the Custom Opening Attributes for the current opening.
Creating and Managing Custom Opening Attributes
Section titled “Creating and Managing Custom Opening Attributes”To create or edit Custom Opening Attributes, you must navigate through an Opening’s Edit Job Details page.
Accessing the Custom Opening Attributes Management Page
Section titled “Accessing the Custom Opening Attributes Management Page”-
Navigate to an opening from your Openings list or go to the Applicant Table
- From Openings, click More actions > Edit Job Details
- From Applicant Table, click Settings > Edit Job Details
-
On the Edit Opening page, click Opening Attributes to access the attribute management page
This is where you can:
- View all custom attributes created for your account
- Create new custom attributes (with Manage Attributes permission)
- Set or edit custom attribute values for this specific opening
Creating a New Custom Attribute
Section titled “Creating a New Custom Attribute”-
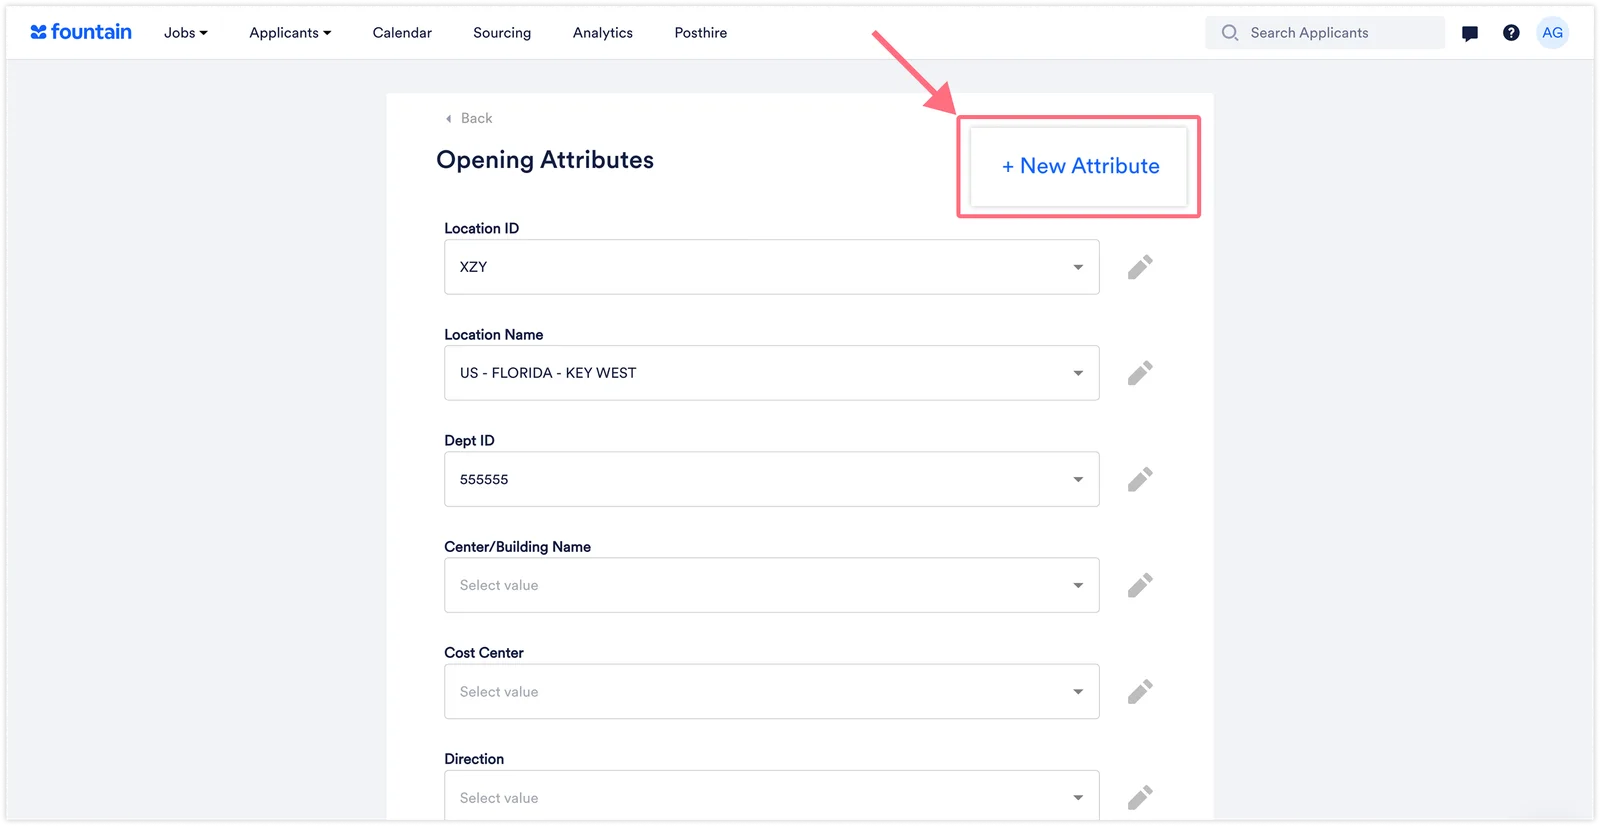
On the Opening Attributes page, click + New Attribute in the top right corner
-
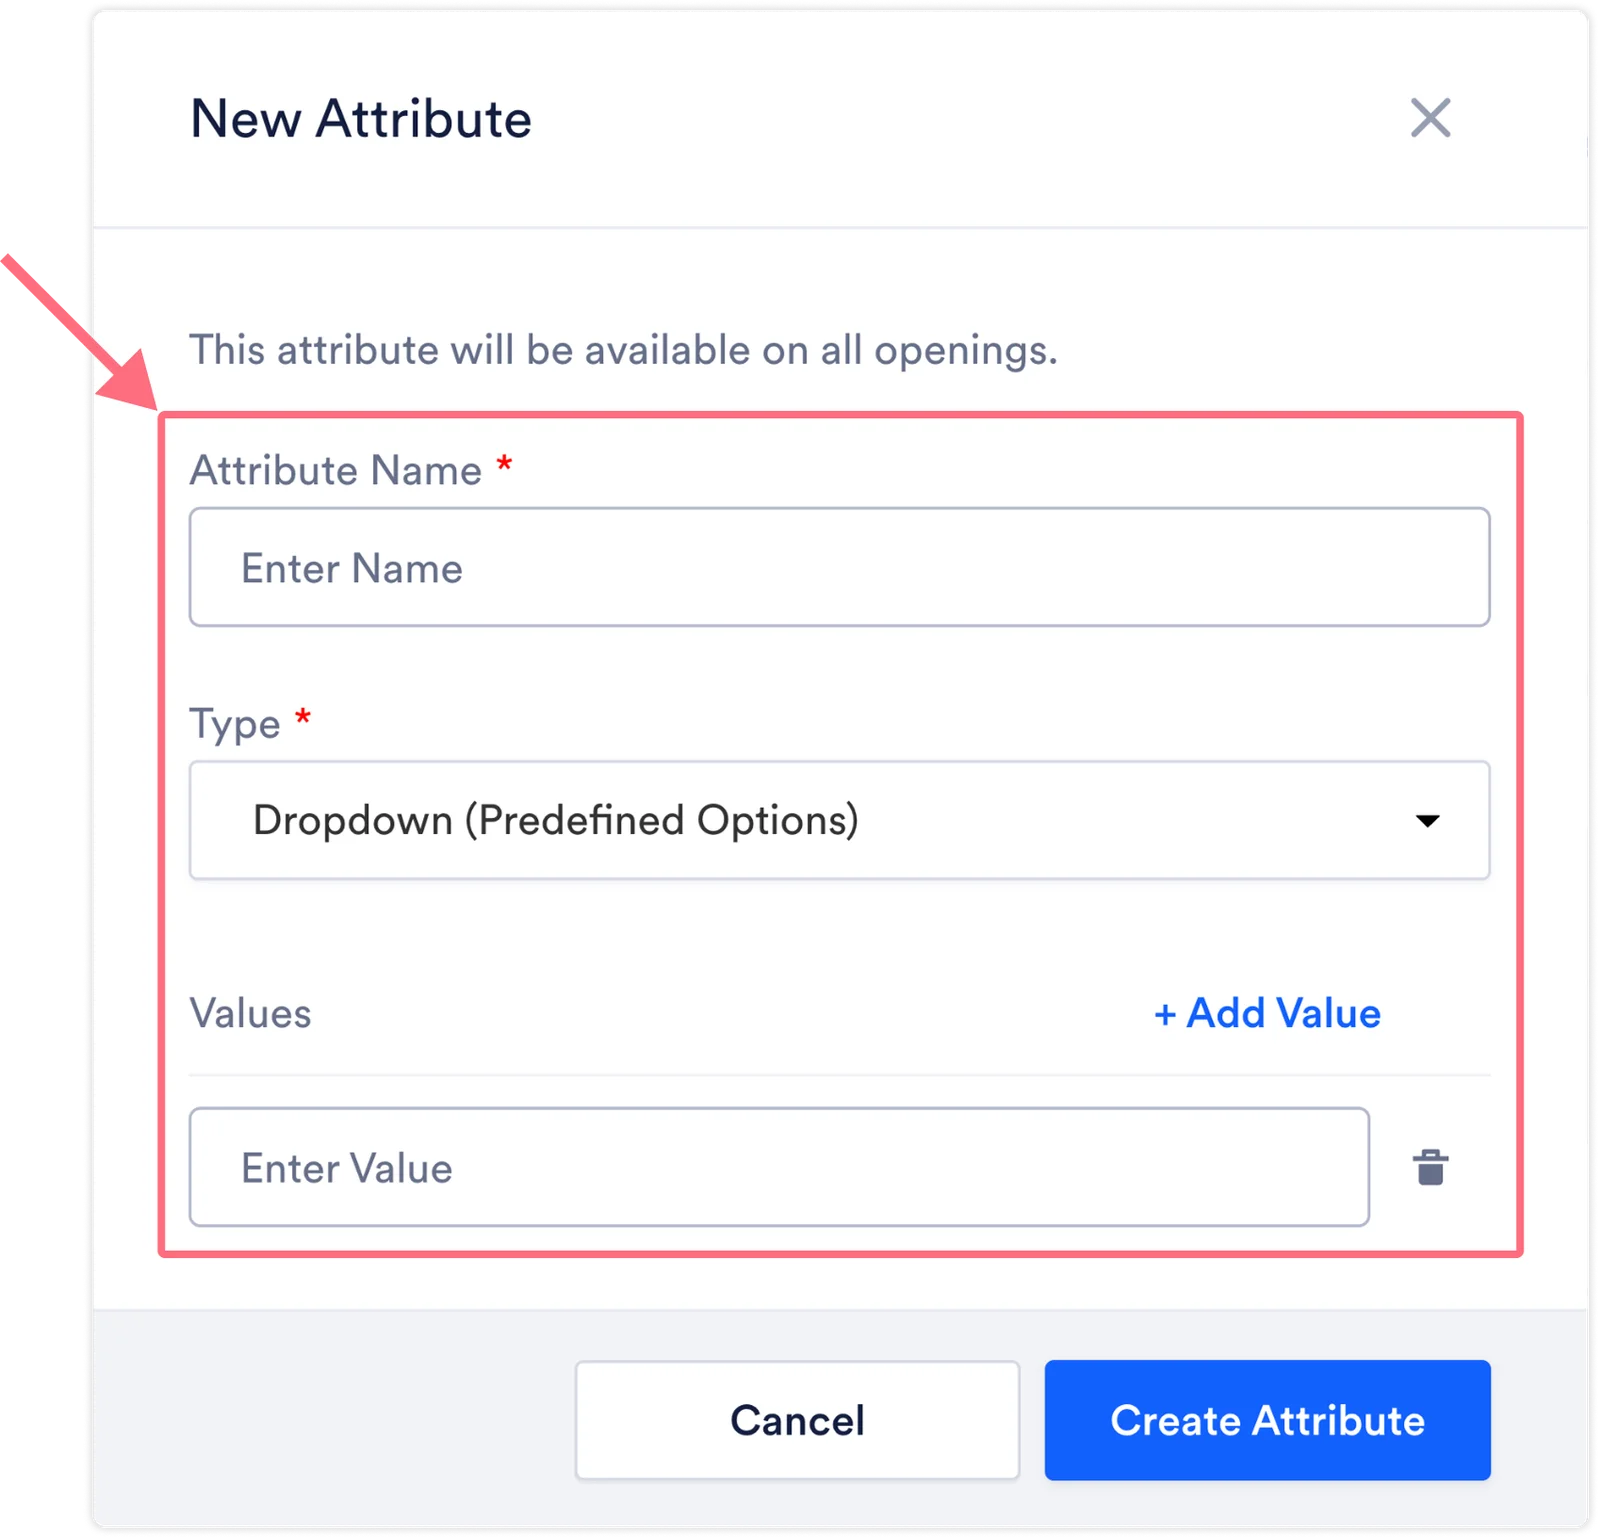
In the “New Attribute” dialog, complete the following fields:
-
Attribute Name (Required)
- Enter a descriptive name for the attribute.
-
Type (Required)
-
Select the attribute type from the dropdown. This determines what kind of data can be entered for this attribute:
- String: Free text entry (e.g., department names, notes, internal codes)
- Number: Numeric values only (e.g., budget amounts, office counts, employee capacity)
- Date: Date picker (e.g., application deadlines, hiring start dates)
- Boolean: True/false or yes/no toggle (e.g., “Waitlist Active”, “Union Required”)
- Dropdown (Predefined Options): Single-select from predefined values you define (e.g., cost center codes, building names, directions, departments)
-
-
Values (Dropdown Type Only)
-
If you selected Dropdown (Predefined Options), you must define the available options:
- In the Values section, enter a value in the “Enter Value” field
- Click + Add Value to add additional options
- Repeat for each dropdown option you want to create
- To remove a value before saving, click the trash icon next to it
-
-
-
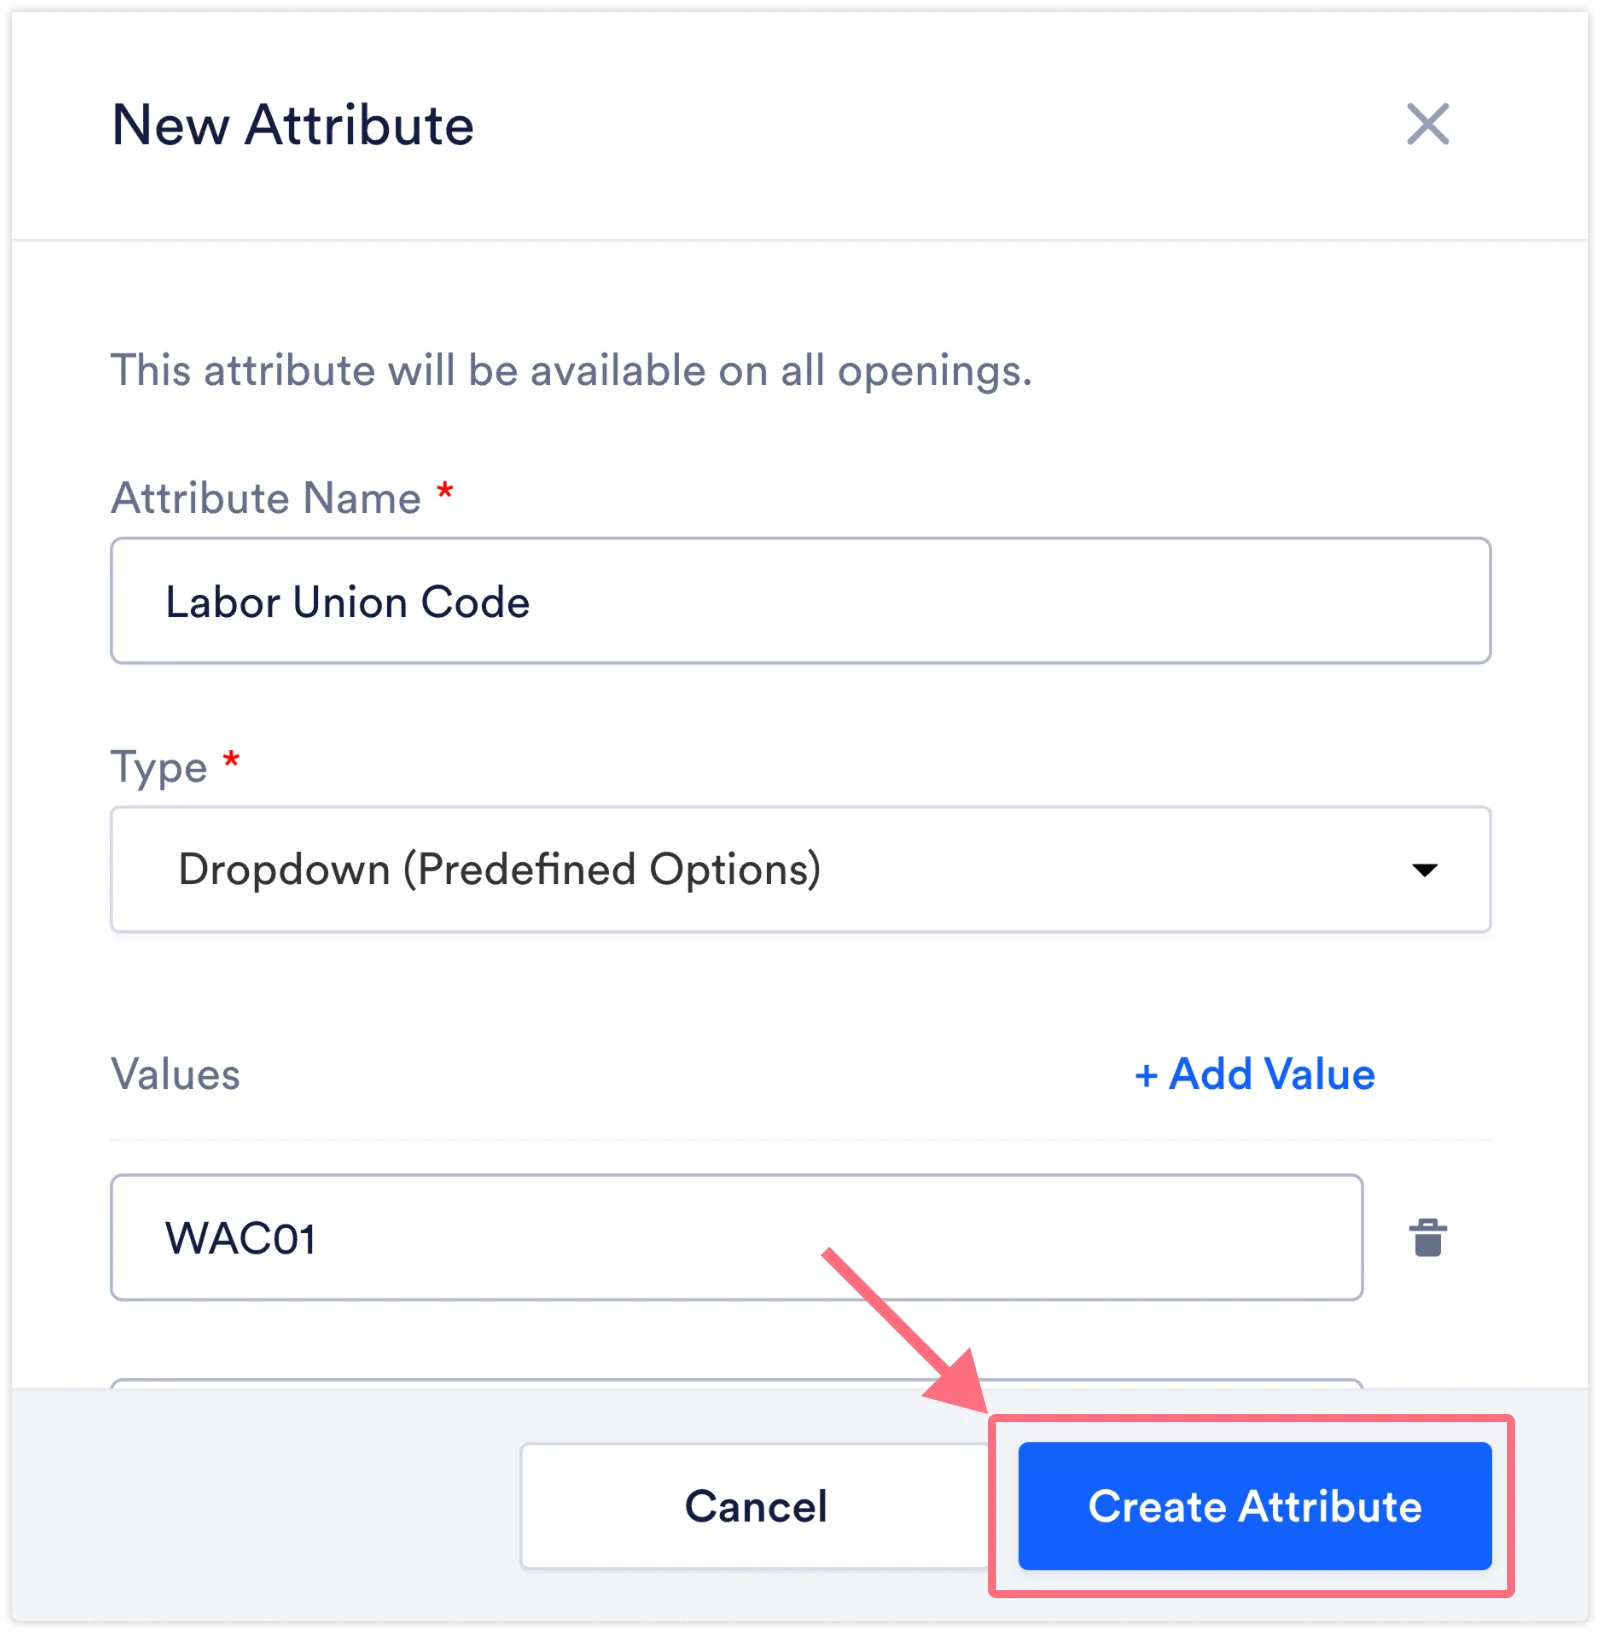
Click Create Attribute
Viewing Attribute Usage
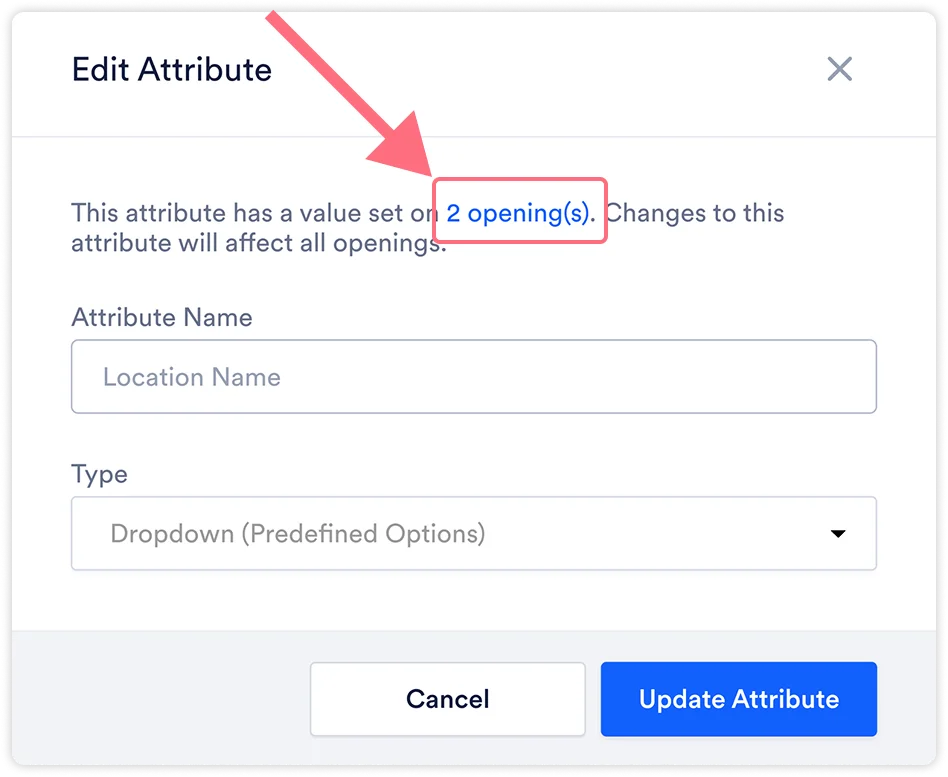
Section titled “Viewing Attribute Usage”When viewing an attribute’s details, you can see how many openings currently use that attribute. To view an an attributes usage:
-
Go to the Opening Attributes page for an Opening
-
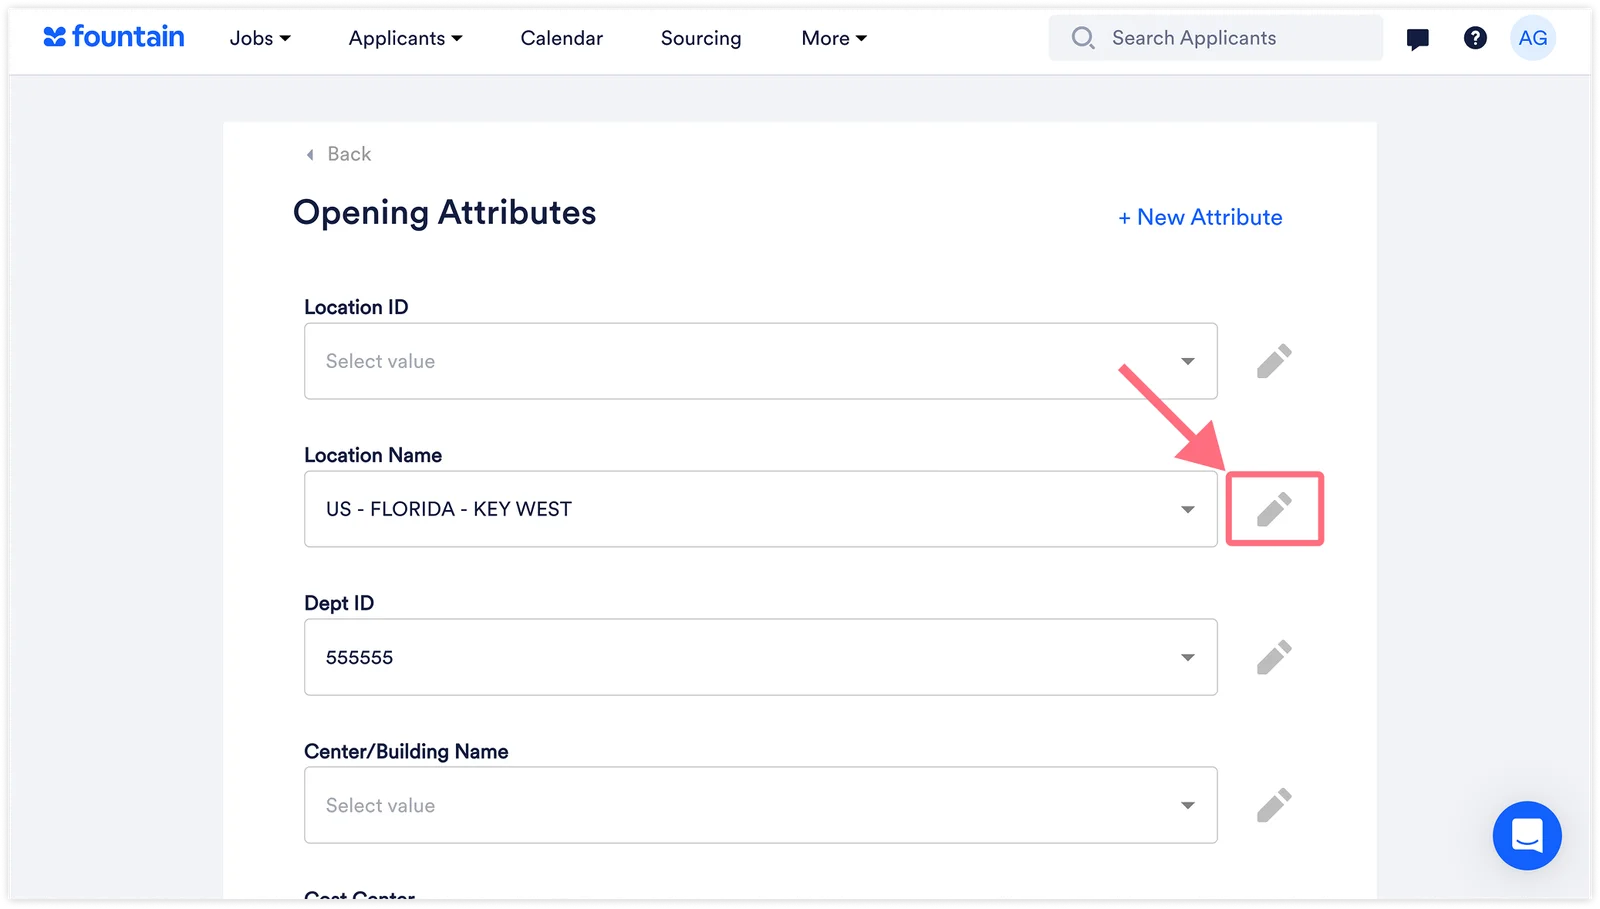
Click the Pencil icon next to an attribute
-
Click the “X opening(s)” link within “This attribute has a value set on X opening(s). This will bring you to a list of all openings featuring the attribute.
Current Limitations
Section titled “Current Limitations”You cannot currently:
- Edit an attribute’s name after creation
- Edit an attribute’s type after creation
- Delete attributes once created
- Add attributes during the opening creation process (must be added after opening is created)
For dropdown attributes:
- You can add new values to existing dropdowns
- You cannot edit or remove existing dropdown values