
Conversion Tracking Manager
The Conversion Tracking Manager enables you to manage all tracking scripts in one place.
Tracking scripts measure the performance of ad networks and job boards and may be placed on any application form, opening, stage, or the jobs directory page. Once placed, Rekrutek sends information to the network source.
Some of the most popular tracking tools supported are Google and Facebook. We also support custom scripts.
The Conversion Tracking Feature enables you to:
- Manage all conversion tracking scripts for ad networks and job boards in one place
- Pass the count of Applicants landings in the Jobs Directory or any Opening, Stage, or Application form to the network source
- Trace these landings to their source ads and job boards
Supported Networks
Section titled “Supported Networks”- Google Adwords
- Custom JavaScript
- Google Analytics 4
- Google Tag Manager
- Perengo
- Recruitics
- Adzuna
Add a Conversion Tracker
Section titled “Add a Conversion Tracker”To add a conversion tracker, follow the steps below:
-
Hover over your username to access Company Settings > Conversion Tracking under App Settings.
-
Click the blue Add Conversion Tracker on the top right corner.
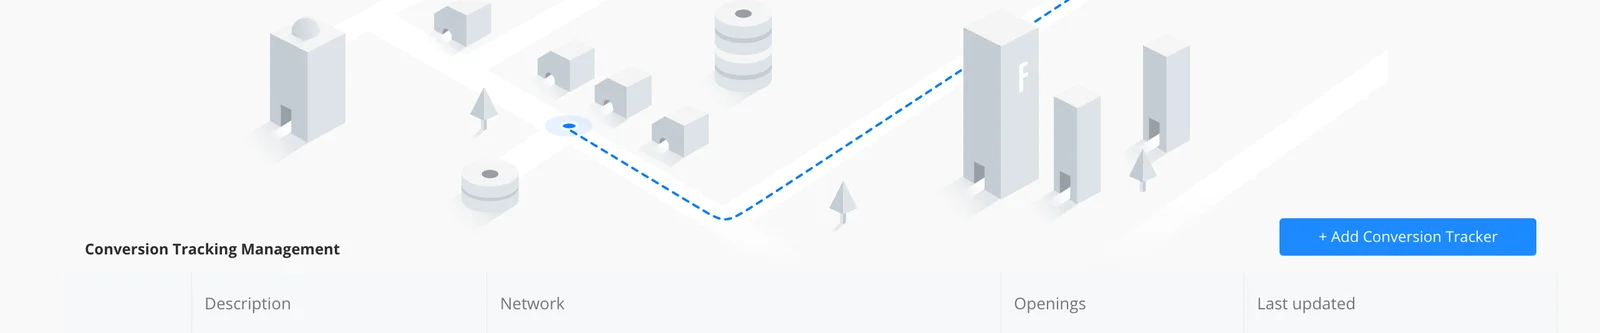
-
Pick a Network in the drop-down menu and provide a description. Click Next Step.
- Rekrutek recommends that you provide a specific description for your conversion tracker for future reference.
-
Label your tracker ID or API key with a unique identifier for the script. Click Next Step.
- The tracker ID or API key must match the key provided by the network the uniquely identifies your account or campaign.
- While Rekrutek supports custom scripts, Rekrutek does not edit any code.
-
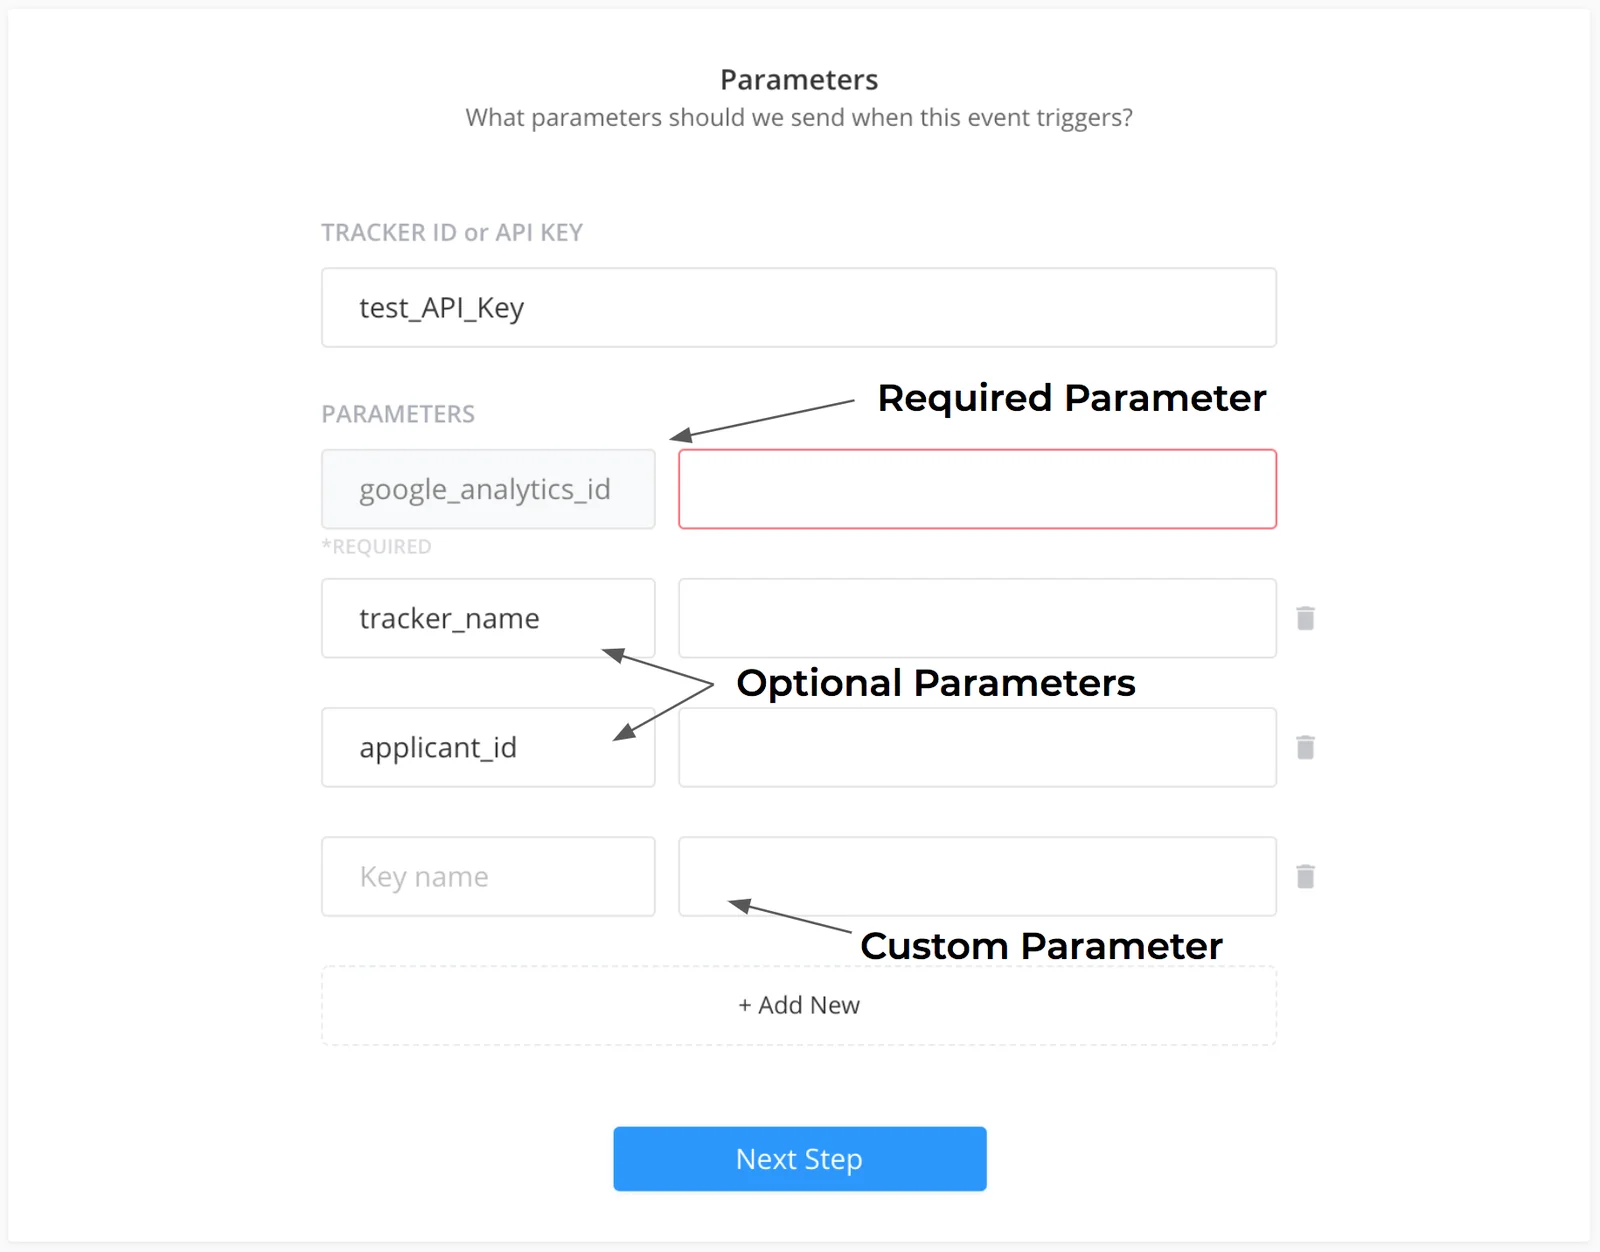
Add parameters based on the network. There are three types of parameters that you can submit values for. See the Merge Keys article for supported keys that can be set as parameters. Parameter options are dependent on the network, and they may differ from network to network.
-
Required Parameters Required Parameters are keys that you must provide values for, or else the conversion tracker will not be triggered. Networks that have required parameters are Facebook, Google, and Google Adwords.
-
Optional Parameters Optional Parameters are keys with static keys that you can optionally provide values for, but are not required. You would use these keys based on what points of data you want to collect.
-
Custom Parameters
Custom Parameters are parameters that allow you to provide your own keys and values. You can use a custom parameter when you want to connect an applicant action with a unique identifier. When you select the network as Custom, you can enter in your own JavaScript into the Custom JavaScript menu.
-
-
Select which Openings, Stages, forms, or pages you want the tracker to trigger on. Click Next Step.
-
Specify when to trigger the tracker. You can choose if you want the tracker to trigger the first time applicant lands on the specified page or if you want the tracker to trigger every time the applicant lands on the specified page.
-
Click Complete.
If you still have questions about the conversion tracker settings for a specific network, navigate to their documentation page.
Add a Custom Conversion Tracker
Section titled “Add a Custom Conversion Tracker”Note: As mentioned, Rekrutek does support custom scripts for conversion tracking, however, Rekrutek does not edit/review any custom code. Your development or IT team will be responsible for management of any custom code.
- Follow steps 1-3 from Add a Conversion Tracker. On the Network drop-down menu, choose Custom. Click Next Step.
- Insert your developed custom JavaScript for your Custom Conversion Tracker. Click Next Step.
- Follow steps 4-7 from Add a Conversion Tracker.
Editing and Deleting your Conversion Tracker
Section titled “Editing and Deleting your Conversion Tracker”-
Hover over your username to access Company Settings > Conversion Tracking under App Settings.
-
Click Actions on the right side of tracker you want to test.

-
Click Edit if you want to edit the tracker, and delete if you want to delete it.
Test your Conversion Tracker
Section titled “Test your Conversion Tracker”-
Hover over your username to access Company Settings > Conversion Tracking under App Settings.
-
Click Actions on the right side of tracker you want to test.

-
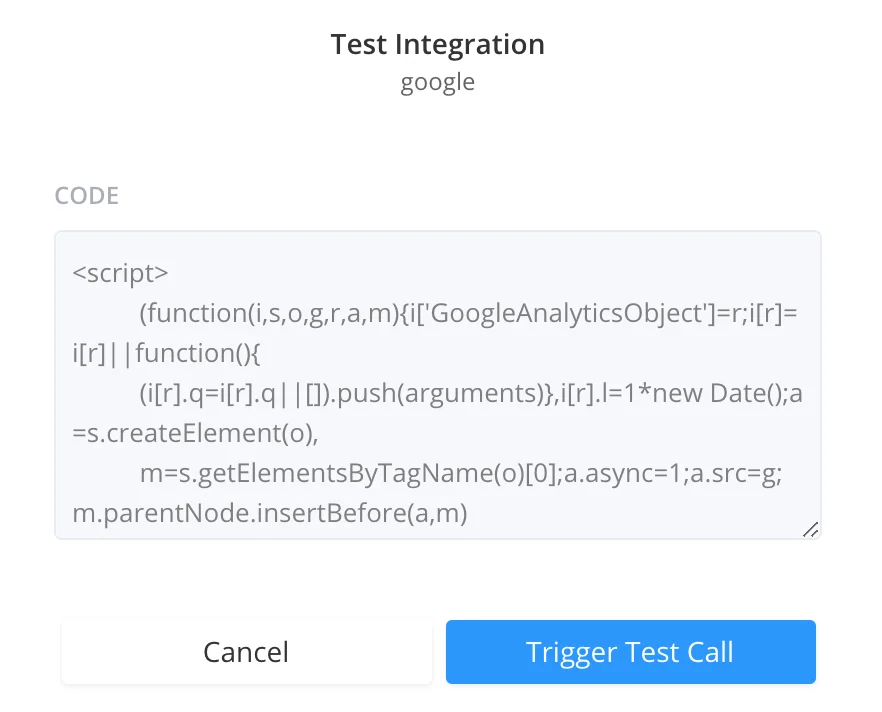
Click Test Integration.
-
Click Trigger Test Call.
-
After you see the message Tracker has been fired, navigate to the network website to see if the tracker has been successfully triggered.
Performing an Advanced Test
Section titled “Performing an Advanced Test”Depending on the browser, you can perform an advanced test to inspect the code and see if it fired by looking into the network tab. Click the browser type below to learn more:
Safari
- Choose Safari > Preferences, and click Advanced.
- At the bottom of the pane, select the Show Develop menu in menu bar checkbox.
- Go back to Safari browser and use (Option+Cmd+C) to open the console.
- Select the network tab to view if your script has run.
Firefox
Use (Option+Cmd+E) on Mac or (Ctrl+Shift+E) to open the network console to view if your script has run.
Google Chrome
- Use (Option+Cmd+J) on Mac or (Ctrl+Shift+J) on Windows to open the console.
- Select the network tab to view if your script has run.