Brand
The Brand controls the look and feel of the Applicant Portal, Job Directory, and Application Form of an Opening. Rekrutek supports multiple Brands with each having its own Brand name, logo, and Brand color. The Brand is applied to the Location level of the Opening, which allows you to apply the branded visual to multiple Openings that are in this Location at once.
Additionally, accounts using Rekrutek AI have access to a sleeker Jobs portal, which may more closely align with your brand. See Rekrutek AI on the Help Center for more information
Add a Brand
Section titled “Add a Brand”Follow the steps below to add a new brand to your account:
-
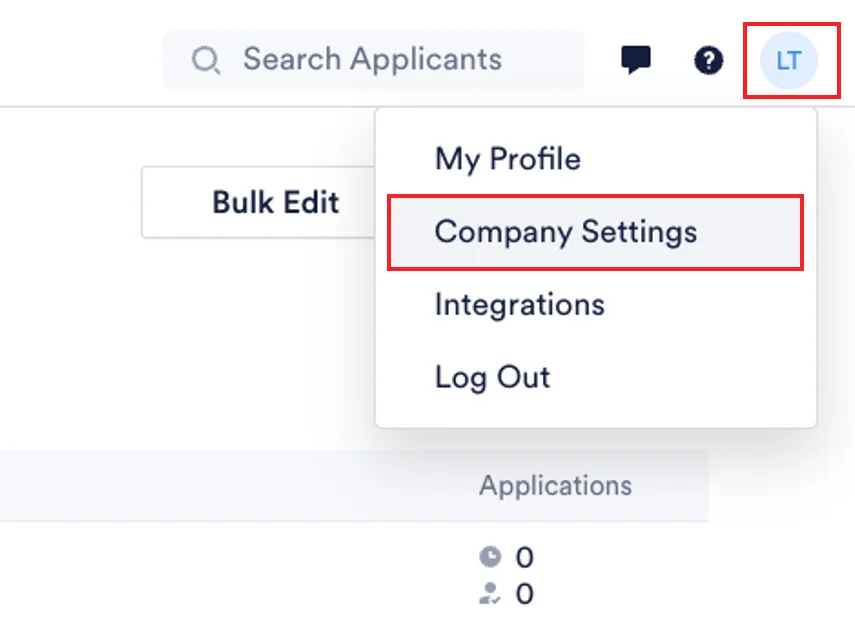
Go to Company Settings by clicking on your profile icon on the top right.
-
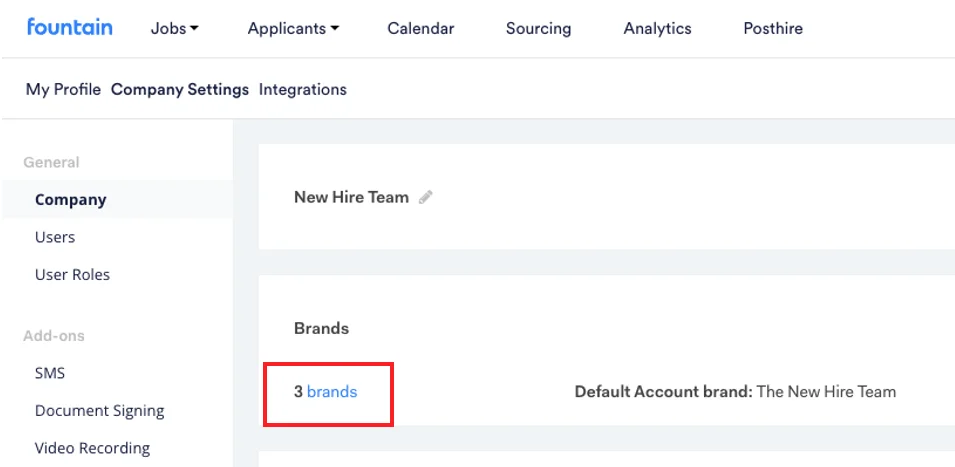
Under the Brands section, click on brand(s).
-
Click the blue Add brand button.
-
Customize your brand by first typing in the Brand name (this name will be used externally).
-
Choose a Brand color with the color picker or enter the hex code for the color.
-
Upload a Brand logo.
-
Upload a square logo if you have one (highly recommend).
-
Click Save on the top bar.
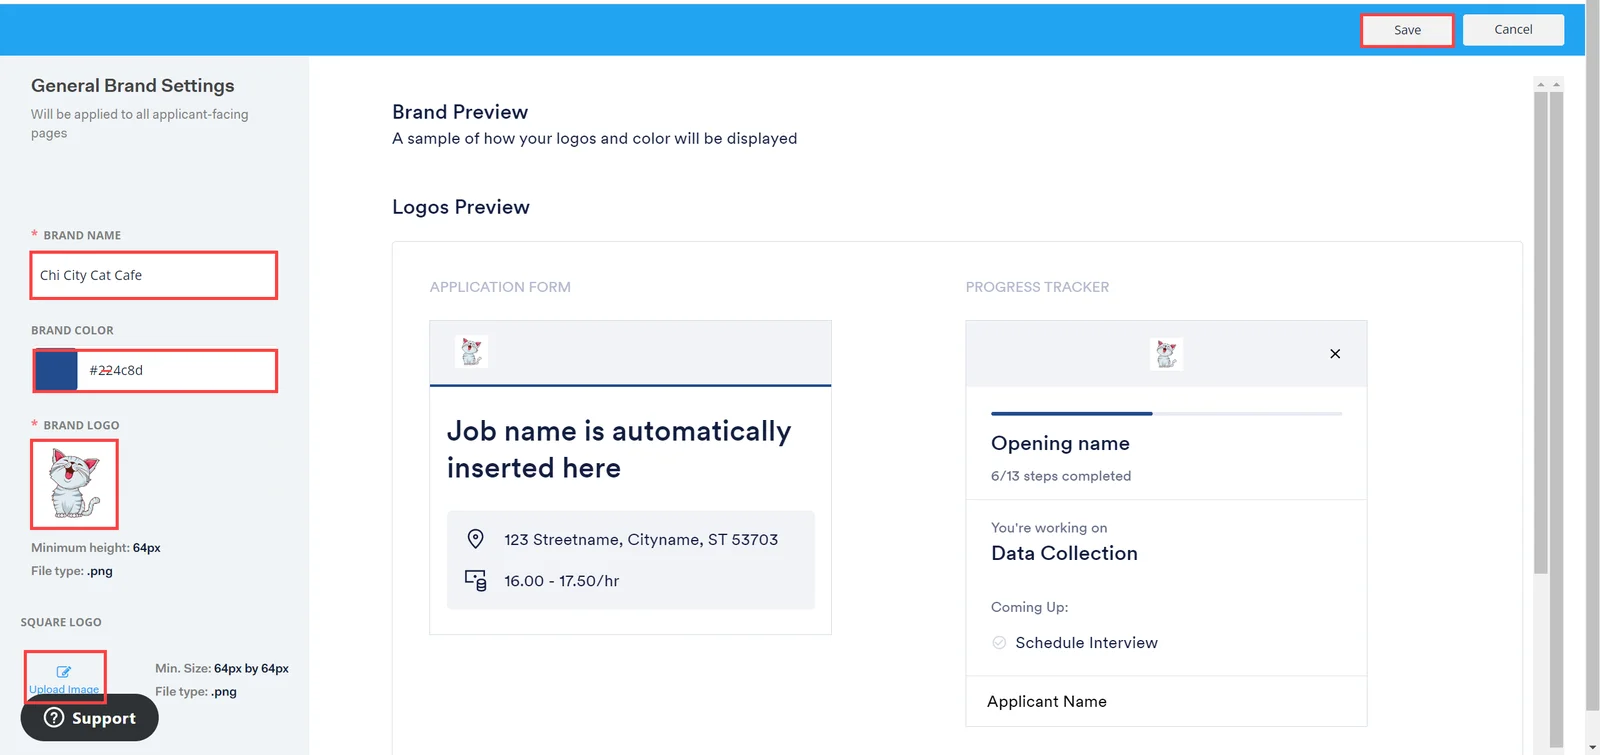
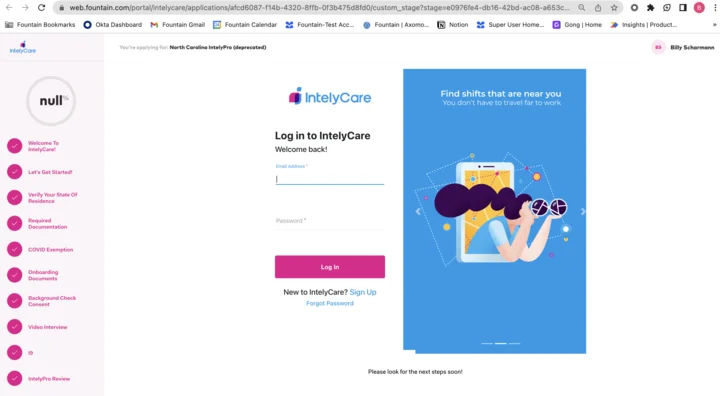
Once you have uploaded your brand, your users will see it implemented throughout all steps of the application process:
Updating or Removing a Brand
Section titled “Updating or Removing a Brand”-
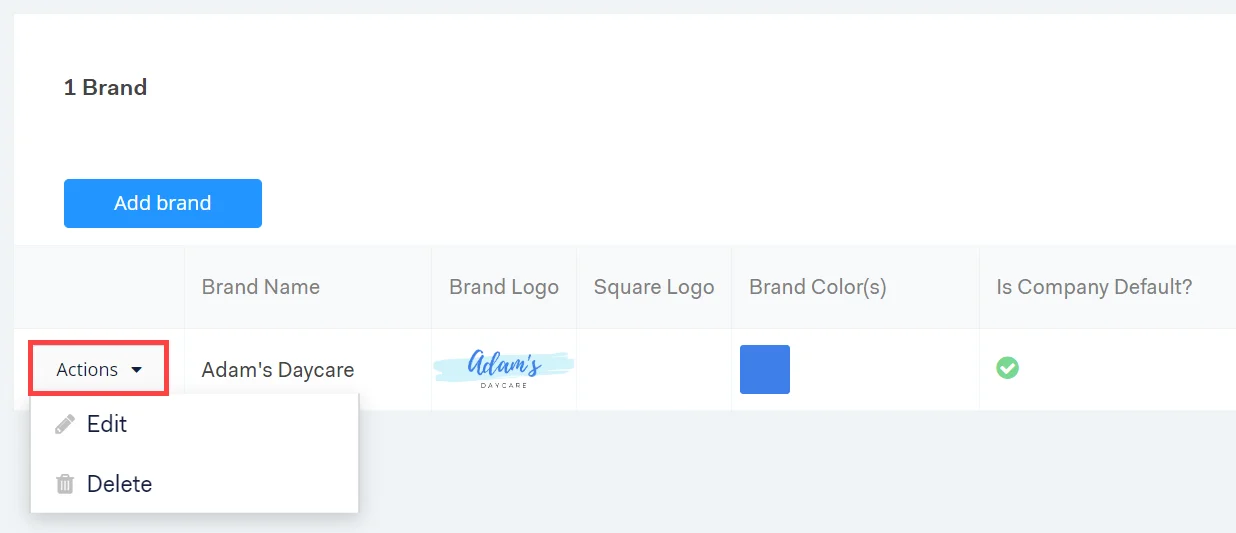
To edit a brand, click on Actions next to the Brand you want to edit.
-
Click Edit.
-
To delete a brand click on Actions next to the Brand you want to delete.
-
Click Delete.
-
Click on the red Delete Brand to confirm.
Apply Brand to Location
Section titled “Apply Brand to Location”When you add a Location there is an option to set the Brand. Any Openings using that Location will now have this branded look for its Applicant Portal, Job Directory and Application Form.
Setting a Default Brand
Section titled “Setting a Default Brand”If you have multiple brands, you want to set one as the default Brand so Locations that don’t have a Brand selected will have this default Brand applied.
The default Brand is also applied to pages that are not Location-specific (for example, the Job Directory).
-
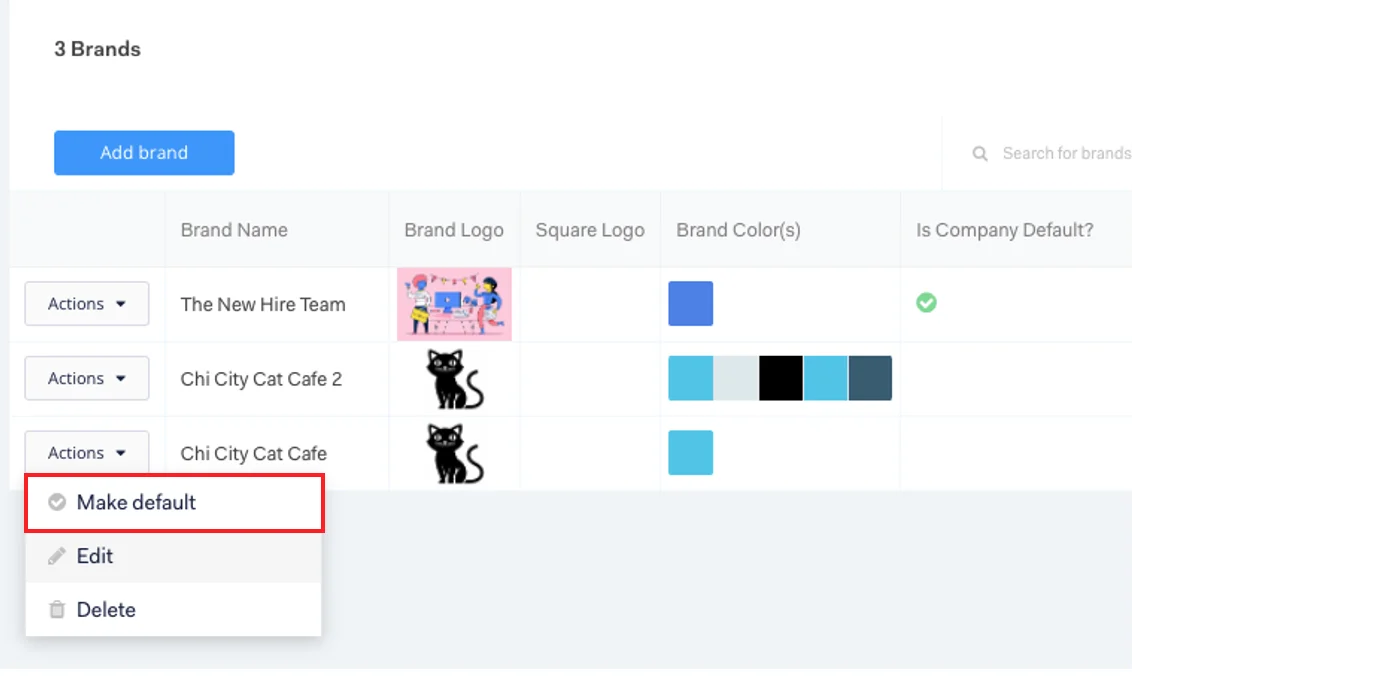
Click on Actions next to the brand you want to make as your default.
-
Click Make default.
Color Contrast and Accessibility
Section titled “Color Contrast and Accessibility”Within the Brand Editor, if the brand color that you’ve selected does not meet the accessibility contrast minimum, you will see a warning message alerting you that the color is not accessible.

Why is Color Contrast Important?
Section titled “Why is Color Contrast Important?”Color contrast refers to the level of contrast between the text and the background on a website. If contrast is low, then the text can be hard or almost impossible to read. Higher contrast means that the text is easier to read.
Rekrutek will review for a background color with a high enough contrast to allow all individuals to easily view the colors in the application. This includes applicants with various kinds of color blindness.
Using HTML for Templated Email Messages
Section titled “Using HTML for Templated Email Messages”Rekrutek allows you to utilize HTML to include your branding in templated emails sent to applicants. Users should partner with their company’s web development and brand teams to create custom code for how they would like their messages to look. To add an email template with custom HTML branding:
-
Click your initials in the top right corner of any Rekrutek screen and then click Company Settings.
-
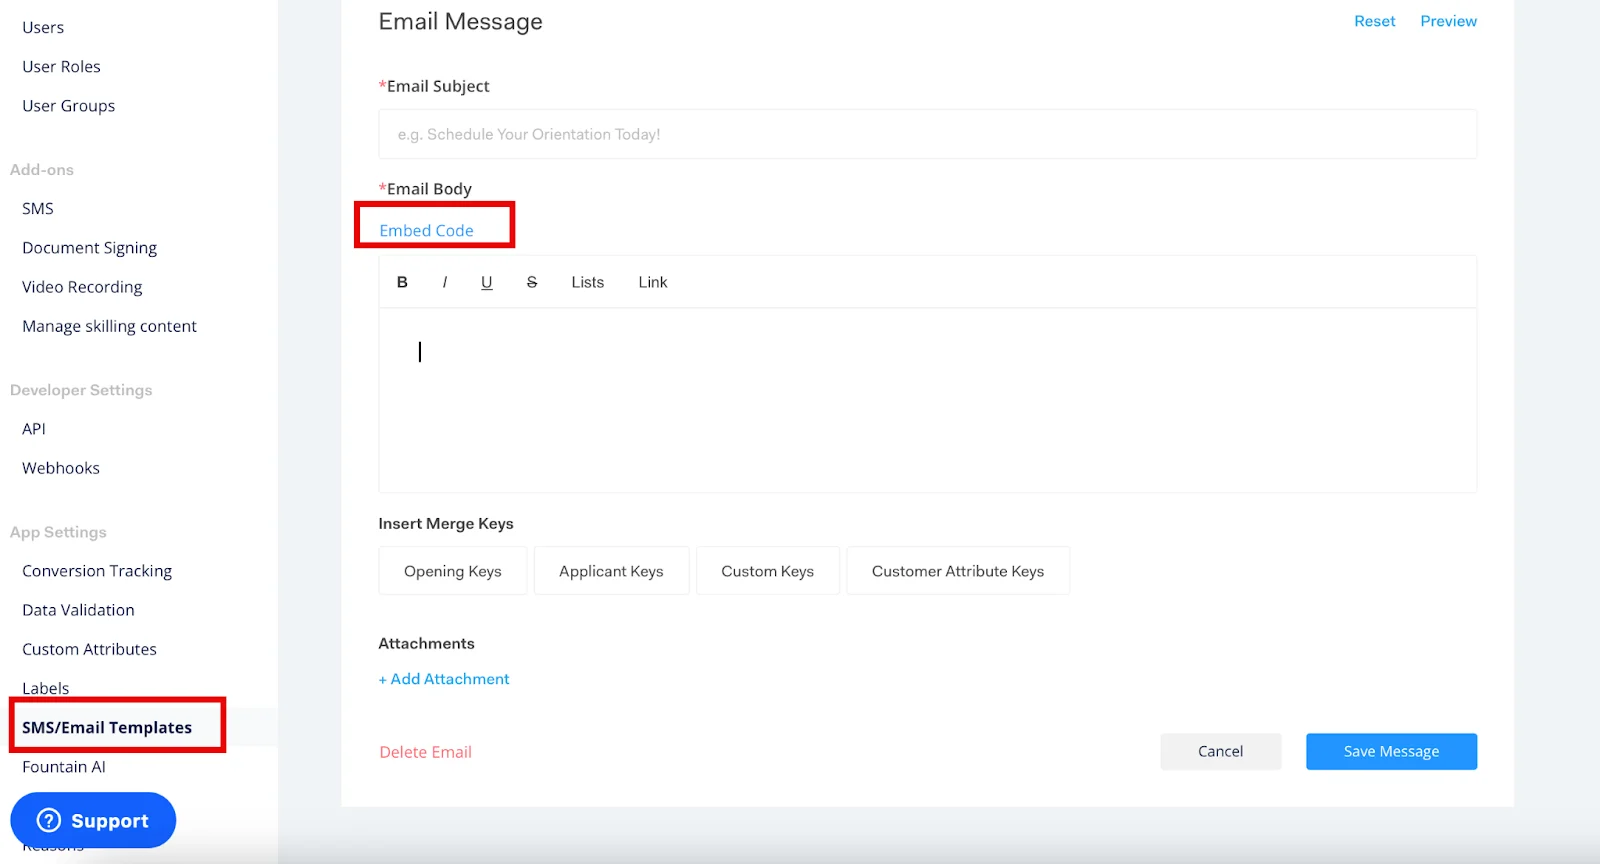
From the menu on the left side of the screen, click SMS/Email Templates under App Settings. Click the blue Add Template button.
-
Enter a title for your new template, select the type of email you would like to template, and click the box next to Add Email.
-
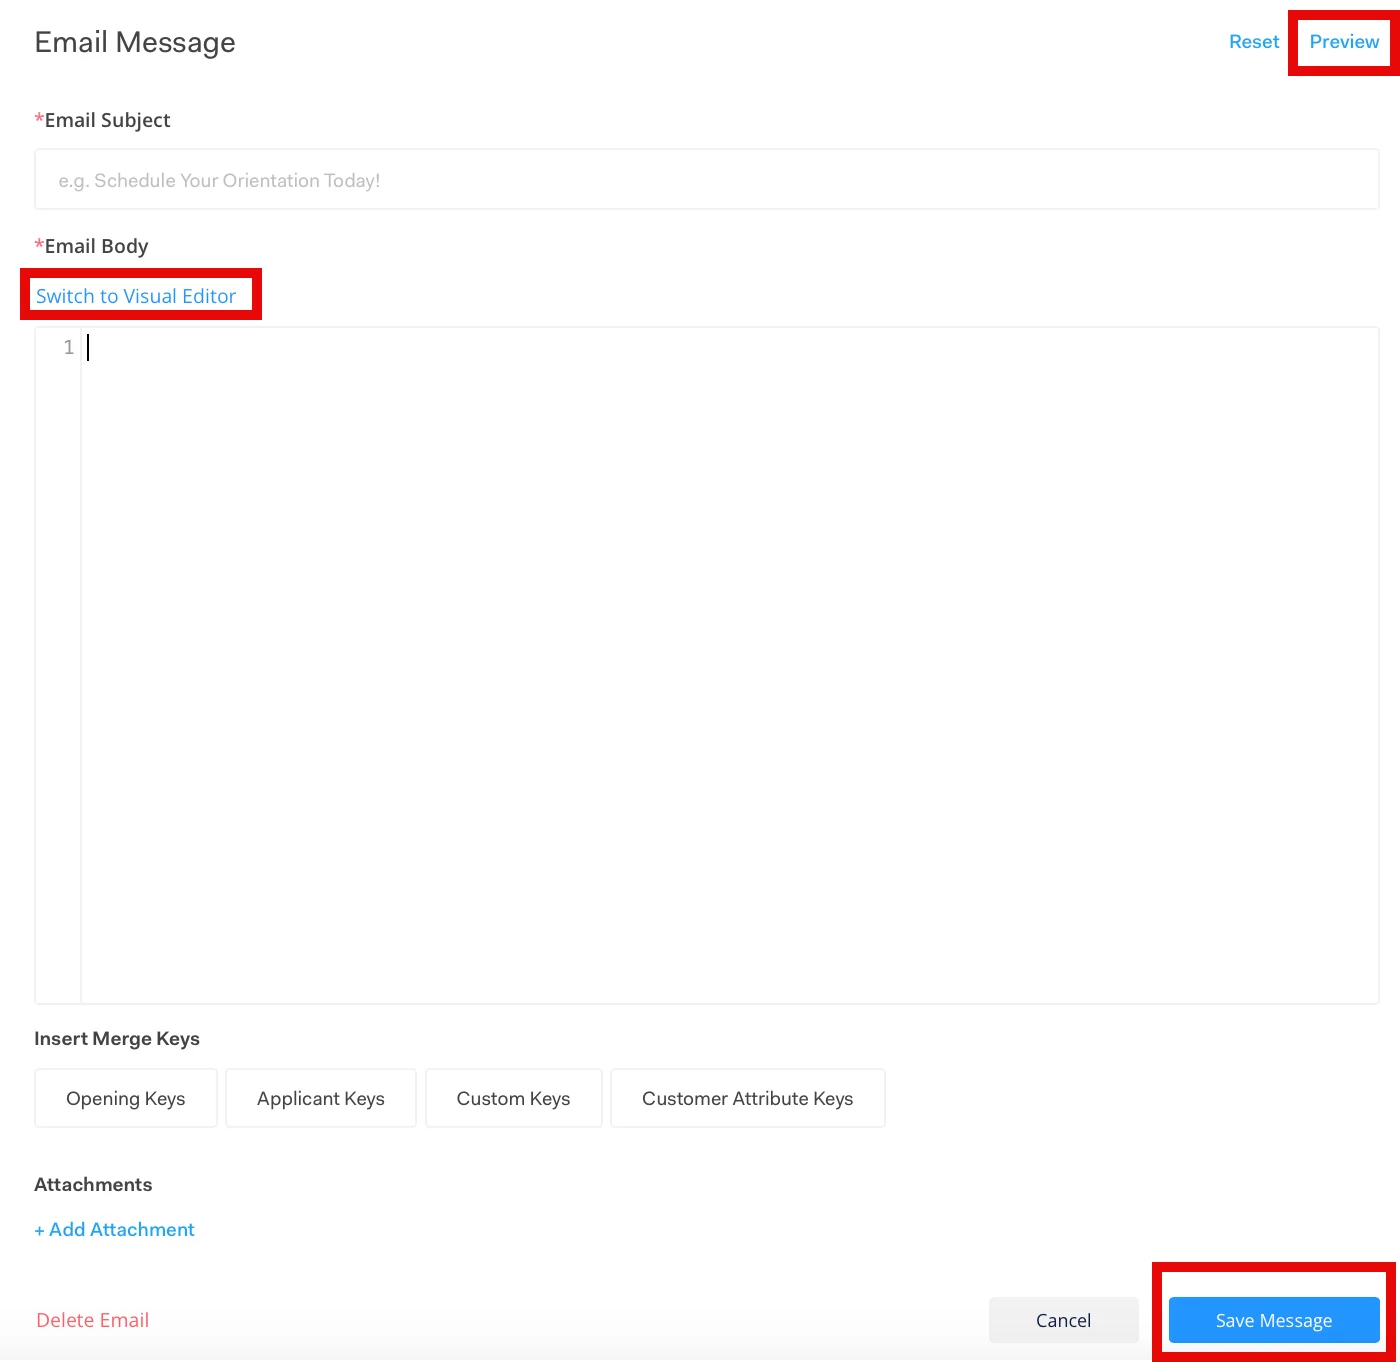
Enter a subject line for the email and then click Embed Code. Copy and paste the HTML developed by your web and branding teams into the HTML entry form.
-
Once entered, click Switch to Visual Editor.
-
If desired, you can enter merge keys or attachments for further personalization and to deliver the right information to your applicants.
-
To preview your message, click Preview in the right corner next to Email Template.
-
Once everything is to your liking, click Save Message.
Brand Design Best Practices
Section titled “Brand Design Best Practices”To keep the integrity of your brand’s design, we recommend:
-
Limit custom text to 50-75 words or fewer
-
Show the Progress Bar and list of stages in the Applicant Portal. If the Progress Bar and the list of stages are NOT showing on your Applicant Portal, you may have disabled the setting to show all your stages to applicants. Go to Company Settings and under the Applicants section, check the checkbox that says Make all stages in an opening visible to applicants.
-
Limit data collection forms to 5-7 questions or fewer
-
Only include photos in your stage details when absolutely necessary
-
Use a custom stage as an informational stage if you have a lot of text/content to display
-
Add/edit text to the Pop-up Modal.
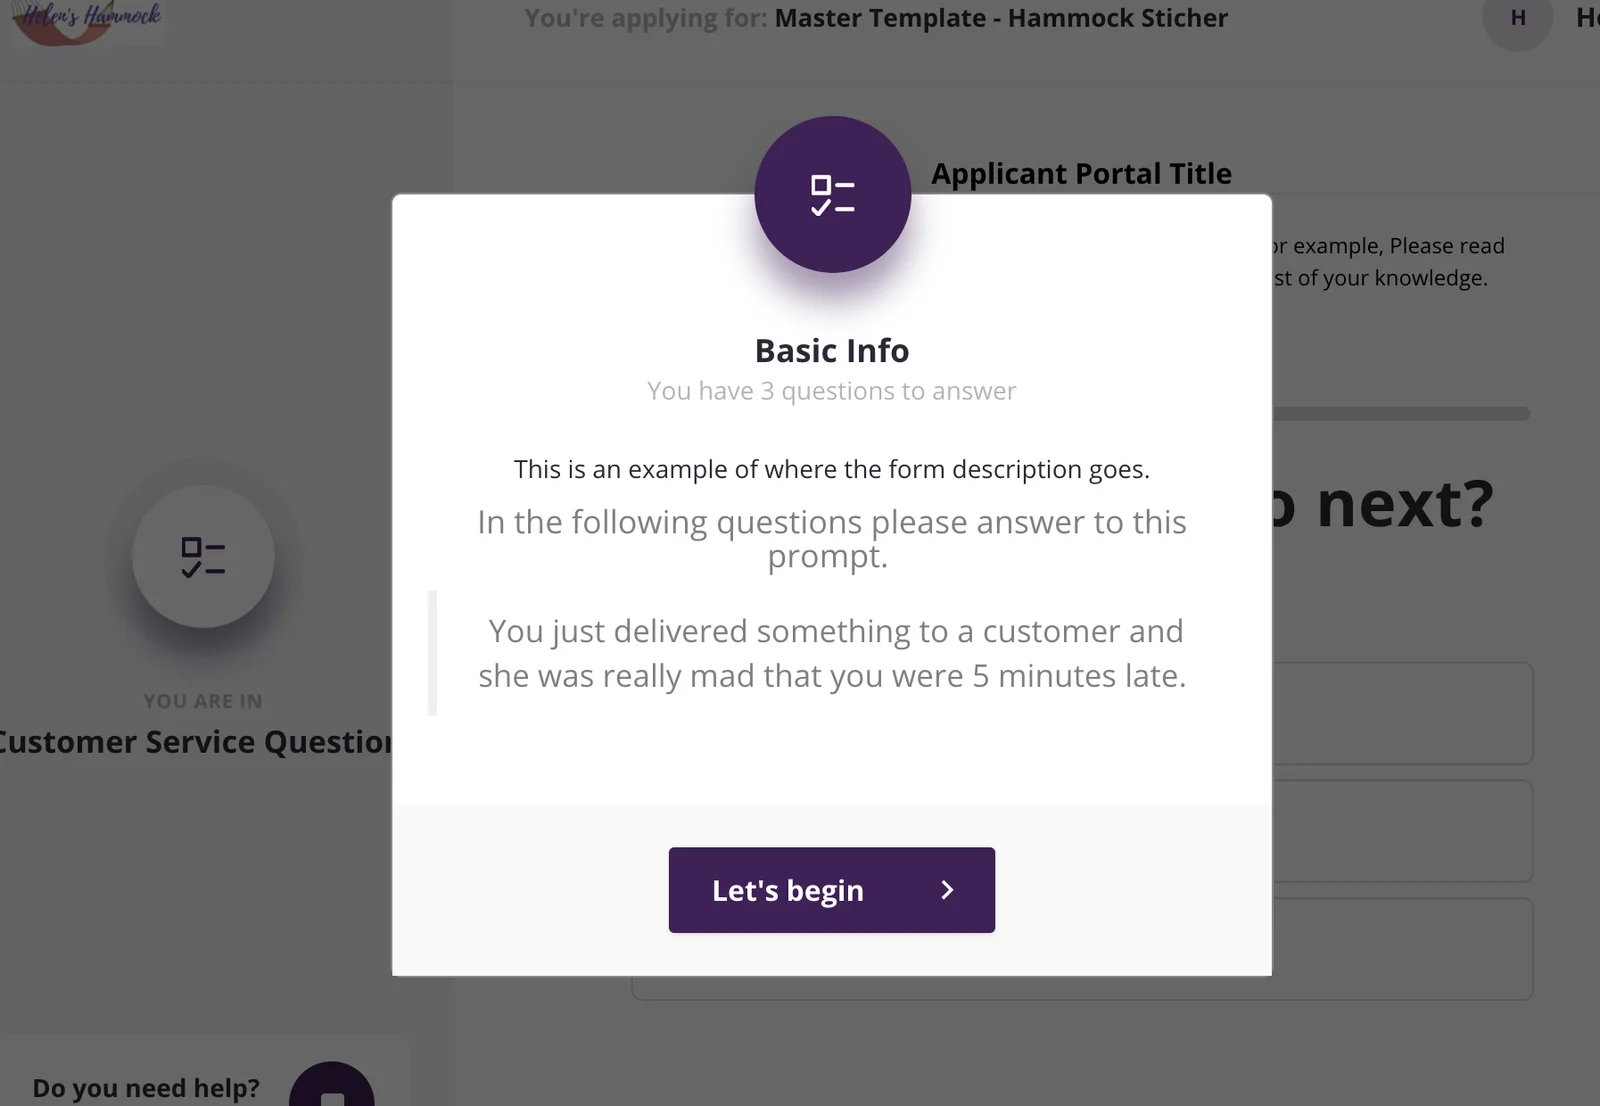
The Form Description will show up as a pop-up modal when the applicant first lands on the stage. In the Data Collection Stage settings page, click Edit Questions. Then edit the text in the Form description section. The Success Message will show up as a pop-up modal when an applicant completes the stage. In the Data Collection Stage settings page, click Customize in the top right corner. Then edit the text in the Success Message section.