Move and Update Applicants Rule Stage
Move and Update Applicants Rule stages can be used to skip a stage, fast-track applicants, auto-reject applicants, and more! In this article, you will learn how to build various Rule stages in Rekrutek Hireas well as real-life customer examples of when you might use these rules.
Rule Conditions and Action Types
Section titled “Rule Conditions and Action Types”The first step to creating a Rule stage is determining what kind of rule you need to create. What is the outcome you are trying to achieve with this rule? What information do you need from your applicants in order to create the rule? These types of questions can be helpful to understand what Conditions, Operators, Data Keys, and Action Types you’ll need to build as well as the questions and Data Keys you need to create in a Data Collection stage prior to the Rule stage.
Let’s start by discussing Condition Types. Conditions help you identify the attribute the rule is related to.
Some rules will then require you to select Data Keys. Data Keys are the unique identifier attached to each question created in a Data Collection stage. If you have not created the question and Data Key previously, it will not be available for selection when creating the Rule stage. Learn more about Data Collection stages and Data Keys by reading this article.
Finally, some rules require you to also select an Operator. Operators provide more instruction for the Rule. The Operators available are:
- Equals
- Does not equal
- Greater than
- Greater than or equal
- Less than
- Less than or equal
- Includes
- Does not include
- Is in the list
Condition Types
Section titled “Condition Types”The following table contains all the Condition Types available in the Rule stage builder, any additional required selections if you choose that Condition Type, and a real-life customer example of why you might choose this Condition Type.
Condition Type | Additional Selections | Customer Example |
|---|---|---|
Applicant field is | Select a Data Key, Operator, and enter a Value | Move applicants to rejected if they do not answer the question with a response that fits your requirements; i.e. Can you lift 50lbs? |
Applicant field exists | Select a Data Key | Have applicants skip a stage if they have previous work experience or a certification |
Applicant field doesn’t exist | Select a Data Key | Move applicants to a specific stage/location based upon a single data point; i.e. Not a rehire (and tagged as such) moves them to a specific flow. |
Applicant label is | Select a previously created Label | Create a custom holding stage where a recruiter will review the applicant. After the recruiter reviews the applicant, they complete a Qualified or Not Qualified label and the rule routes them to a specific stage appropriately |
Applicant label is not | Select a previously created Label | Create a custom holding stage where a recruiter will review the applicant. After the recruiter reviews the applicant, they complete a Qualified label. If the applicant does not have the qualified label, the rule routes them to a specific stage appropriately |
Applicant age is | Select an Operator and enter a Value (age in number) Important Note: The “age is” Data Key is calculated from the date_of_birth standard question which must be added to a prior Data Collection stage | Move applicants to rejected if they do not meet a basic age requirement needed for the role |
Applicant location | Select a previously created Location | Move applicants based on the Location assigned to the Opening they applied to. |
Applicant field comparison | Select a Data Key, Operator, and second Data Key for comparison | Validate whether or not two fields match; i.e. Bank Account or Bank Routing Number. If they do not match, you could move the candidate to a review bucket. |
Scorecard is | Select a previously created Scorecard template, Operator, and enter a numerical Value | Move applicant to rejected if scorecard score is too low |
Document is uploaded | Select a Data Key | Move applicants to rejected if they do not have a resume uploaded |
Applicant duplicate status | Select either “is duplicate” or “is not duplicate” | Move applicants to a custom holding stage or past a stage to advance them in the hiring process |
Document signing status (Dropbox Sign only) | Select a previously configured Dropbox Sign document template and either unopened, opened, signed by applicant, or signed by all parties Status | Move applicants to approved after their offer letter is signed |
Background check status (Checkr only) | Select a Checkr package and a Checkr background check Status | Move applicant to approved or rejected based on returned background check status |
Action Types
Section titled “Action Types”After determining your Condition Type, you must then select the action you want the Rule to take. The Action Types available are:
- Move applicant to next stage: If you choose Rejected as the stage, you will also need to select a previously configured rejection reason.
- Move applicant to stage: Requires you to then select the stage in this Opening you want to move the applicants to. If you choose Rejected as the stage, you will also need to select a previously configured rejection reason.
- Move applicant to Opening: Requires you to select then the Opening and stage within that Opening that you want to move applicants to
- Update applicant data: Requires you to then select a Data Key and type a Value. This action will update a Data Key to a Value you choose.
- Increment applicant data: Requires you to select the Data Key you want to increment and the number you want to increment by in the Change By field. Learn more about this action type below.
- Create or update WX worker: In order to use this action type, speak to your Rekrutek Customer Success contact to ensure the connector between Rekrutek Hire and Worker Experience is set up.
Increment Applicant Data
Section titled “Increment Applicant Data”The Increment Applicant Data Action Type allows you to pick a Data Key and create a rule that will coerce that value to a number and increment it by the number entered in the Change By field.
- Example: If the Change By field has 1, then the Data Key with a value of 2 would become 3
You can also set the Change By field to larger numbers.
- Example: If the Change By field has 2, then the Data Key with a value of 3 would become 5.
Negative numbers can also be entered.
- Example: If the Change By field has -3, then the Data Key with a value of 7 would become 4.
Add a Rule Stage
Section titled “Add a Rule Stage”To add a Rule stage, follow the steps below:
-
Navigate to the Workflow Editor for the Opening you want to add a Rule stage too. Remember, if this Opening shares a workflow with other Openings, you will add this stage to those Openings as well.
-
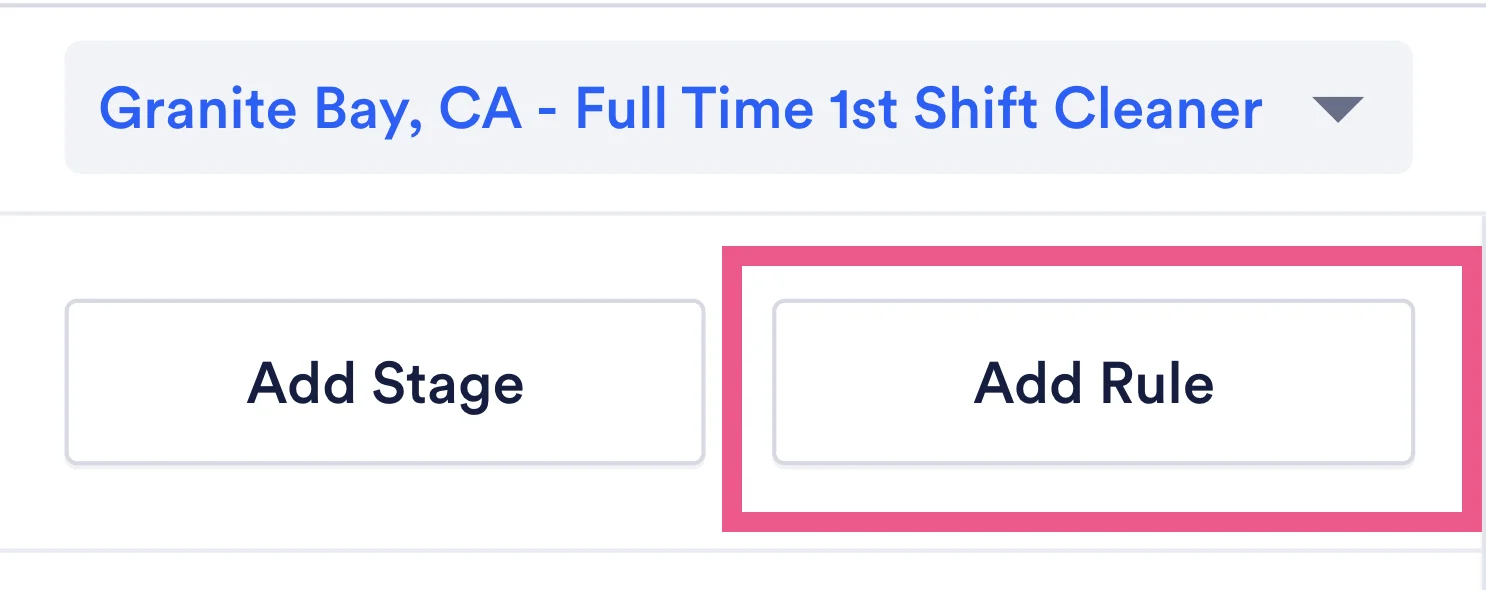
On the top left, click Add Rule.
-
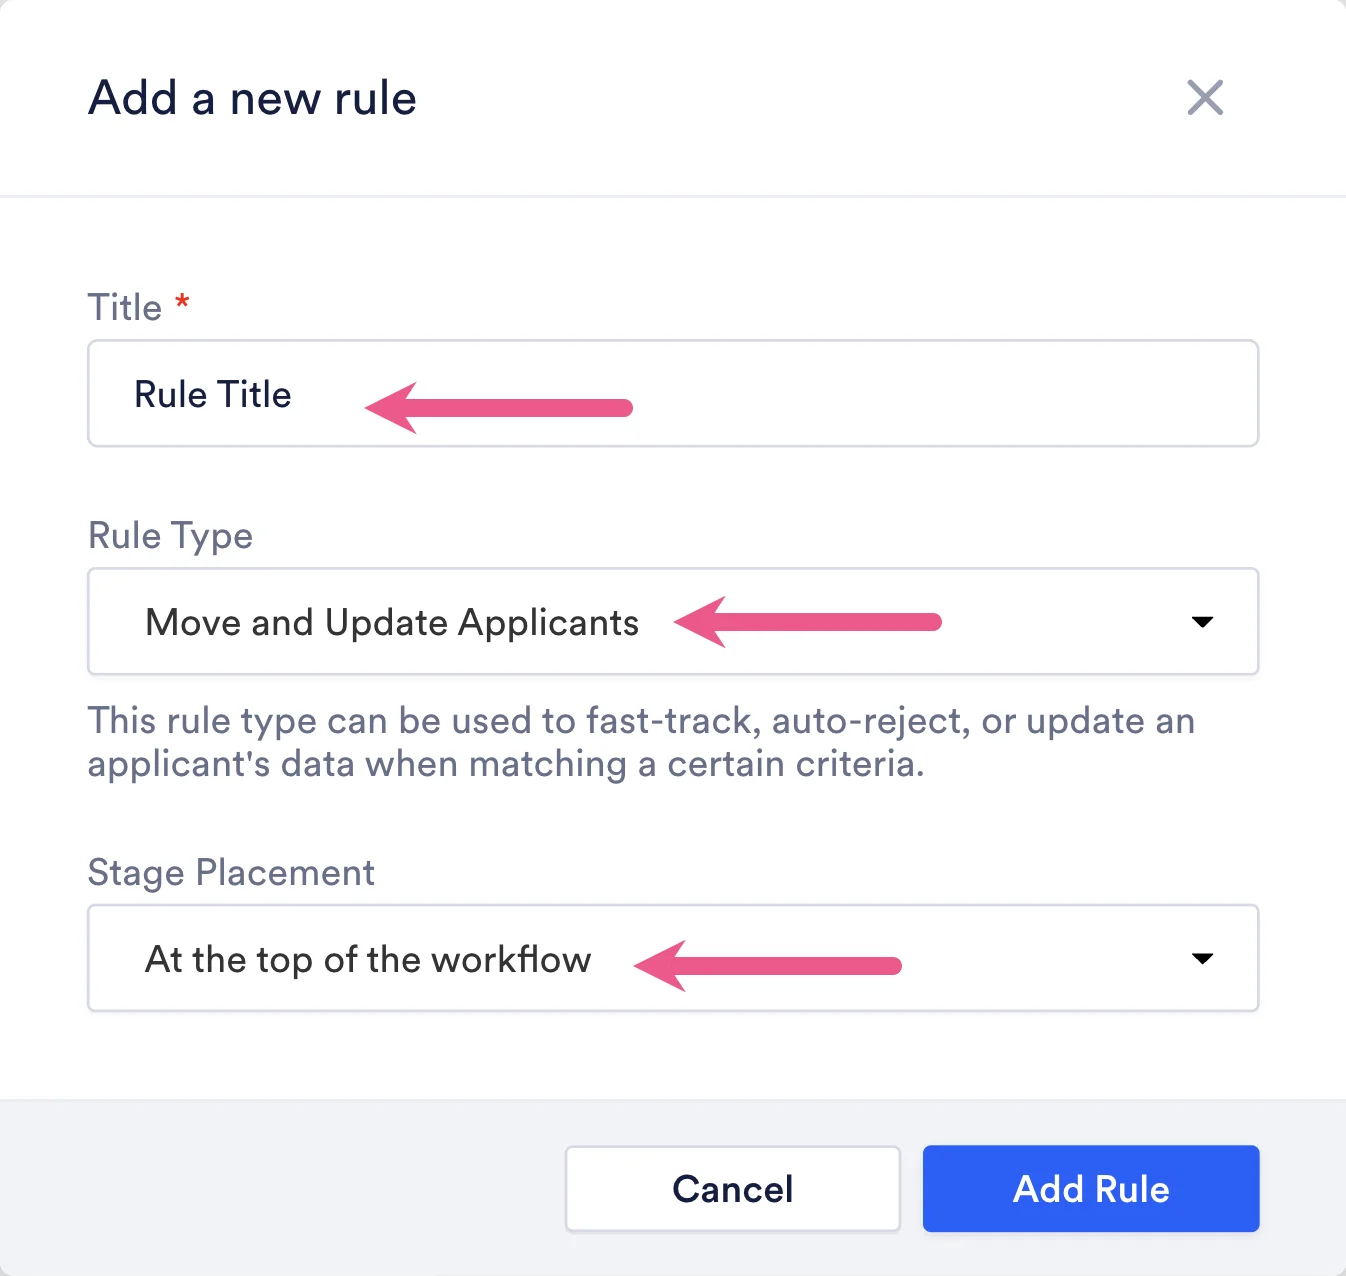
Type a Rule stage title, choose the rule type, and specify where you want to place it in the workflow. There are two rule types you can choose between - Move and Update Applicants and Distribute Applicants. Typically users will create a Move and Update Applicants rule. To learn about Distribute Applicant Rules, review this article.
-
Click the blue Add Rule button to confirm.
-
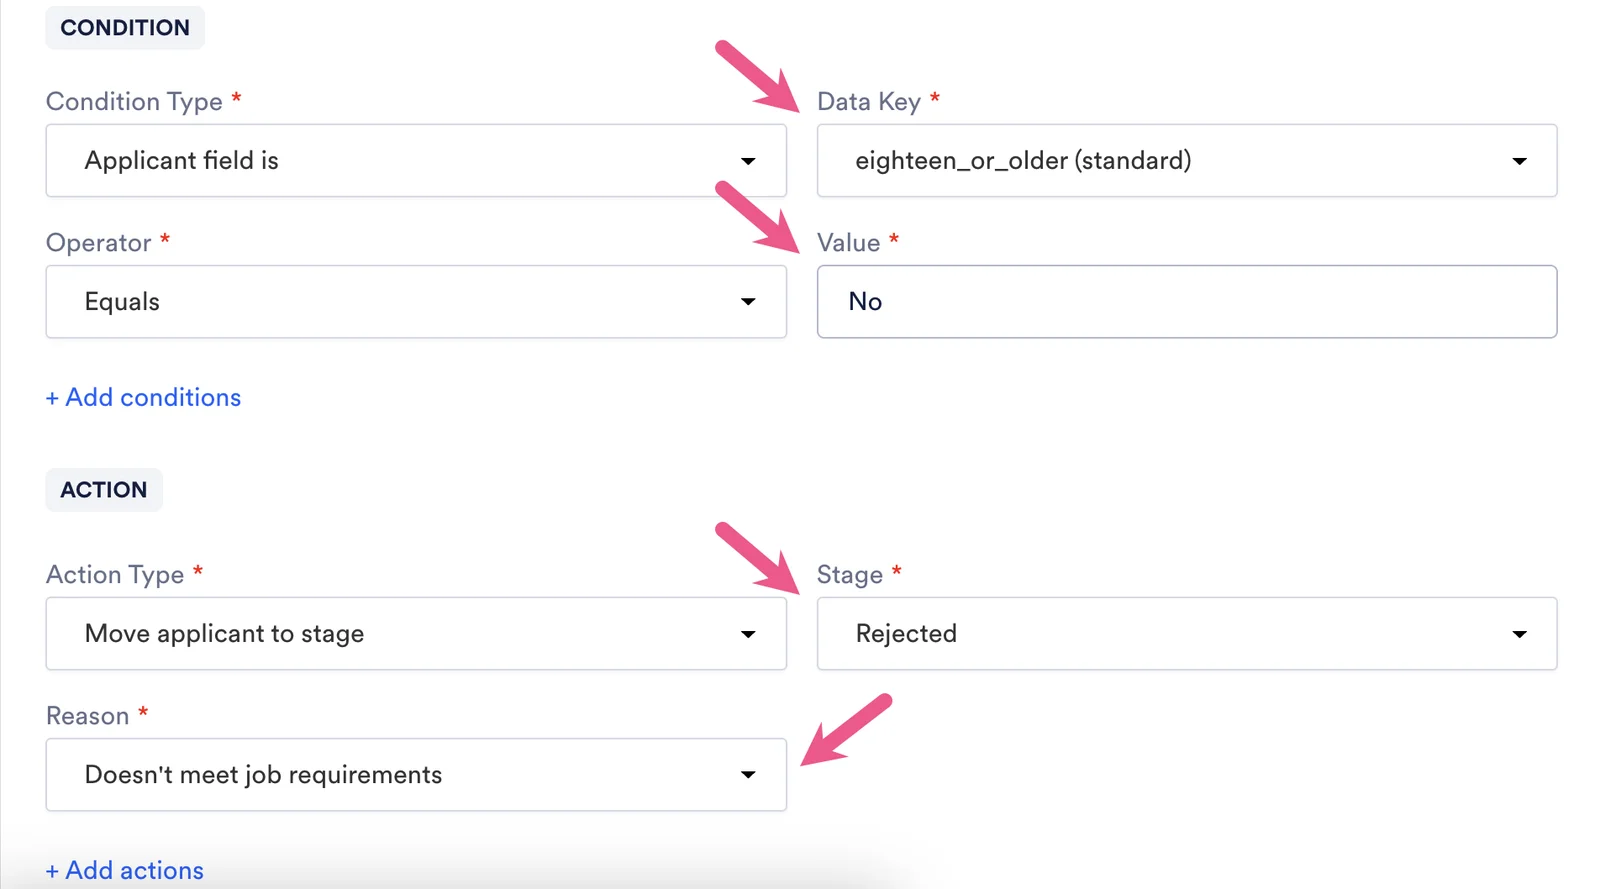
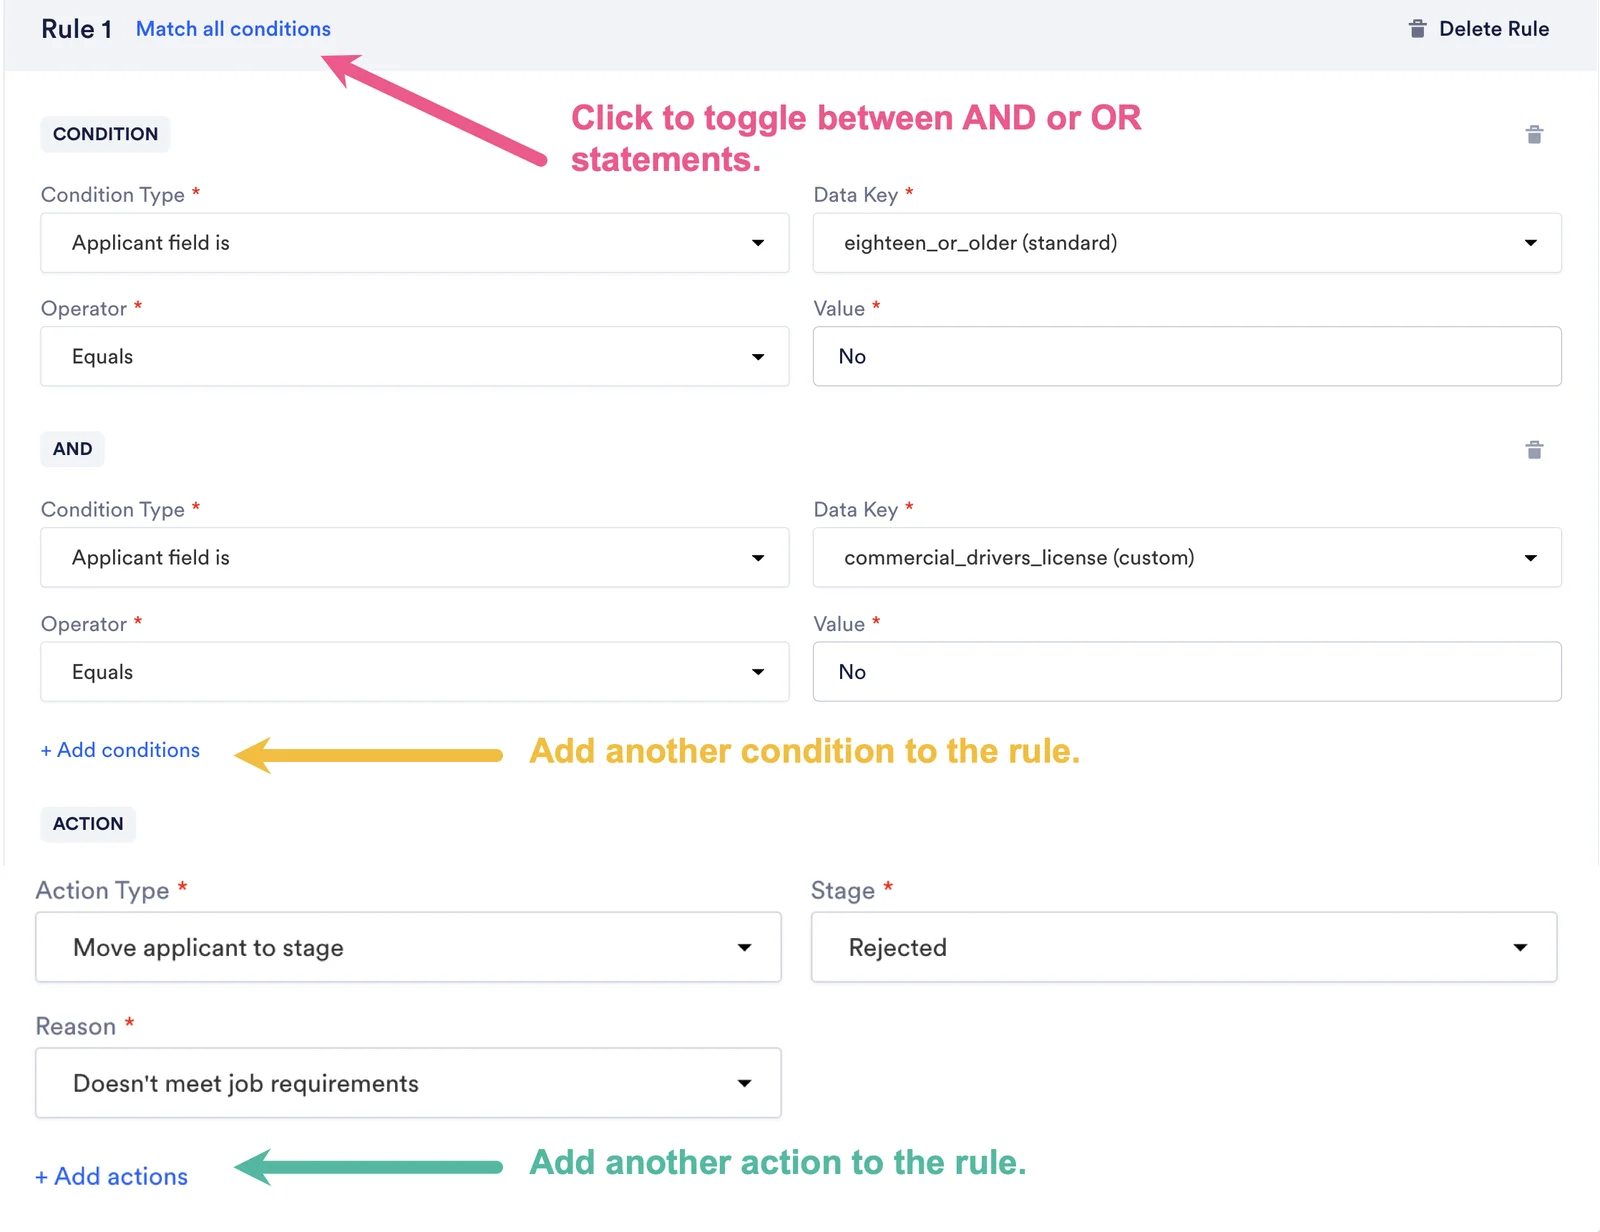
Select the Condition Type, Action Type, and any other required field selections. You can add additional conditions by clicking the +Add conditions button. You can also add additional actions by clicking the +Add actions button. Review the Complex Conditions section of this article to learn more about adding additional conditions and actions.
-
Click Save changes.
Complex Conditions
Section titled “Complex Conditions”You can also build more complex logic where you string together multiple conditions using “OR” or “AND”. The Match all conditions option will appear to the right of the Rule header if you add more conditions. Simply click on the link to change between “Match all conditions” to “Match any conditions”.
For example, if the applicant answers “No” to over 18 years old AND “No” to having a car AND “No” to having a Driver’s License THEN they will be moved to Rejected with a custom reason “Does not meet requirement”. Otherwise, the applicant will move forward to the next stage.
Additional Resources
Section titled “Additional Resources”Click the image below to try out building a Rule stage.